Connectors: Mapping & transforms
Working with REST APIs comes with its own set of challenges. We can end up with more data than we need, less data than we need, or even data that's just messy or difficult to parse. Though we strive to build clear and intuitive APIs that make sense to our consumers, the size and complexity of our endpoints' responses can slow us down.
This is where Apollo Connectors come in. With Connectors, we can connect to REST data sources and map the properties we want to the types and fields in our API—and all the work takes place in the GraphQL schema.
In this course, we'll take a deeper dive into the mapping syntax used within the @connect directive in Apollo Connectors. We'll use the Connectors Mapping Playground to explore REST endpoints' JSON responses and write the precise mapping to transform our data.
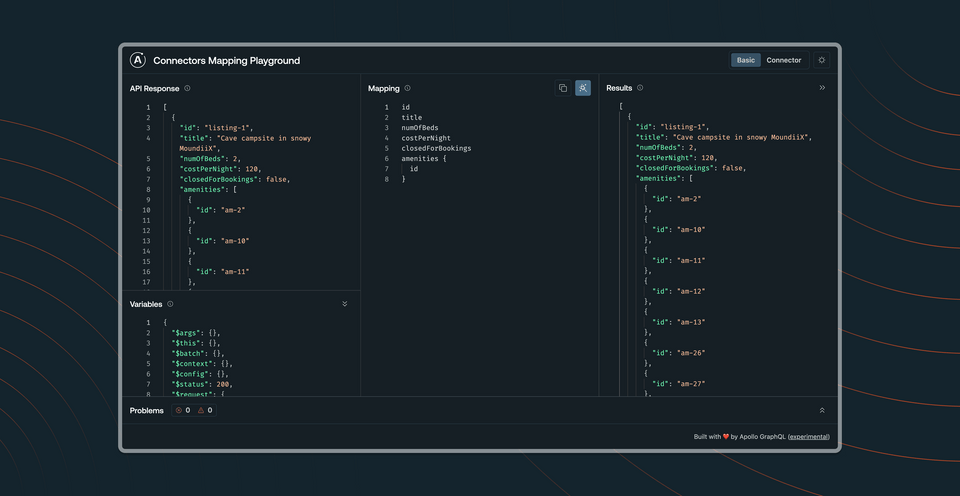
We'll start with the basics of the mapping syntax before diving into more advanced use cases, applying transform methods to automatically convert JSON properties into a shape that suits our schema.
Ready to jump in?
Prerequisites
Before taking this course, you will need:
- Basic familiarity with Apollo Connectors, such as implementing a Connector in a schema with simple mapping
- Basic knowledge of GraphQL and Schema Definition Language (SDL)
If you need a refresher on the prerequisite topics, we recommend the following:
Where we're going
Our goal for this course is to get you more familiar with the mapping syntax for writing Connectors, applying them in your schemas, and using your REST API endpoints to return exactly the response your clients need.
In the lessons ahead, we'll:
- Access nested values
- Use aliases to rename properties
- Apply transform methods such as
entries,first, andmatch - Cover the use cases for special symbols
$and@in your mapping
Let's get to know the playground where we'll be writing our mapping.
Introducing the Playground
To get familiar with the mapping syntax we'll explore throughout the course, let's jump into the Connectors Mapping Playground.
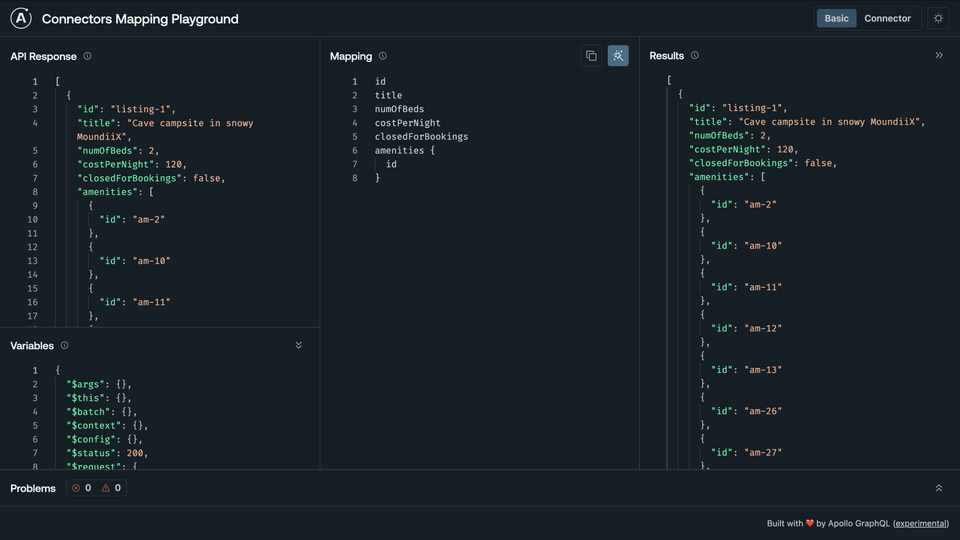
Let's break down what we're looking at.
API Response
The first panel, labeled API Response, is where we'll paste the JSON response data from a REST API endpoint. Here we see that a default array of data has already been provided: it contains several objects with additional nested properties.

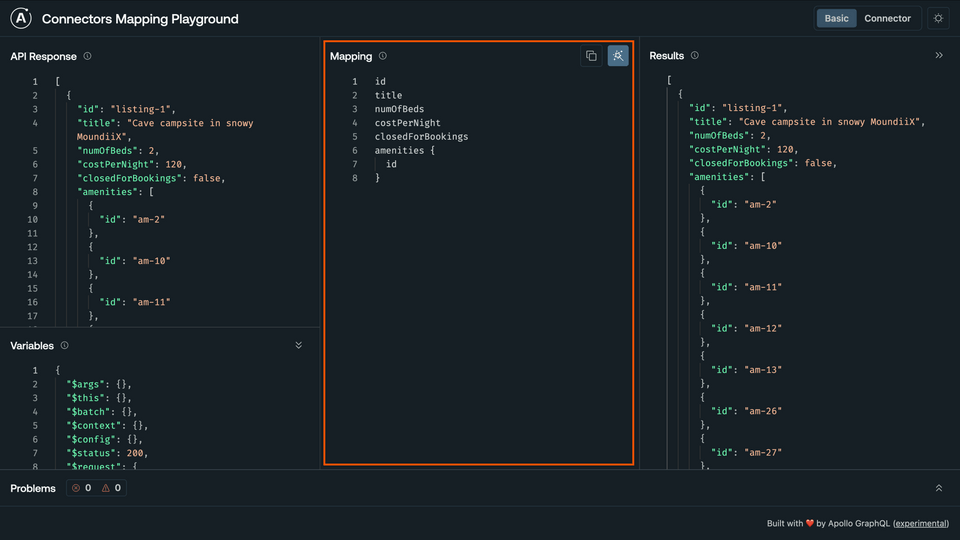
Mapping
In the center panel, we'll find the workspace where we can define our mapping. For the purposes of this course, we'll use this section to build out the mapping that corresponds to the selection argument in an @connect directive.
Problems
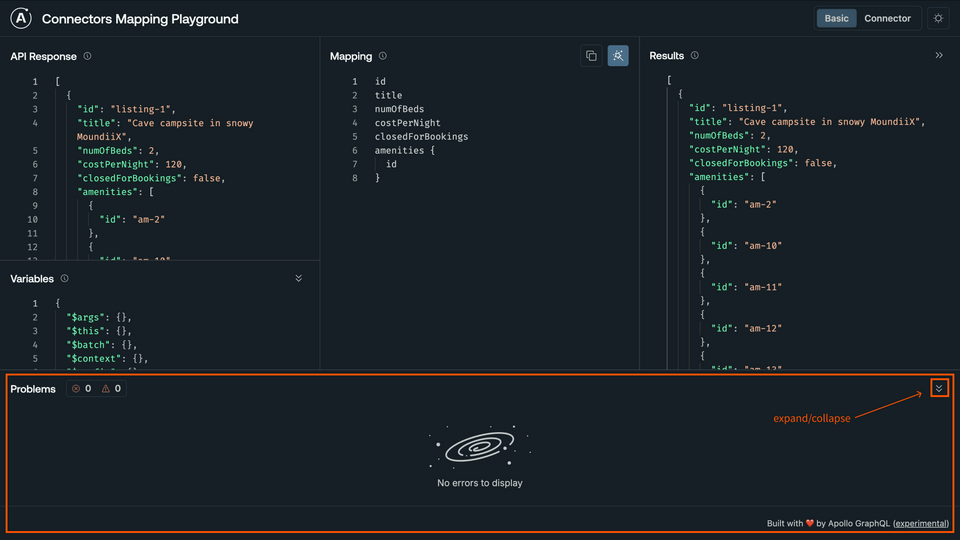
At the bottom of the screen, we'll find the Problems panel. This will reflect any errors that occur as we work on our mapping. We can collapse and expand this section as needed.
Results
The result of our mapping is reflected in the Results panel on the right. This is the panel we can use to validate that our mapping results in data that matches our GraphQL schema.
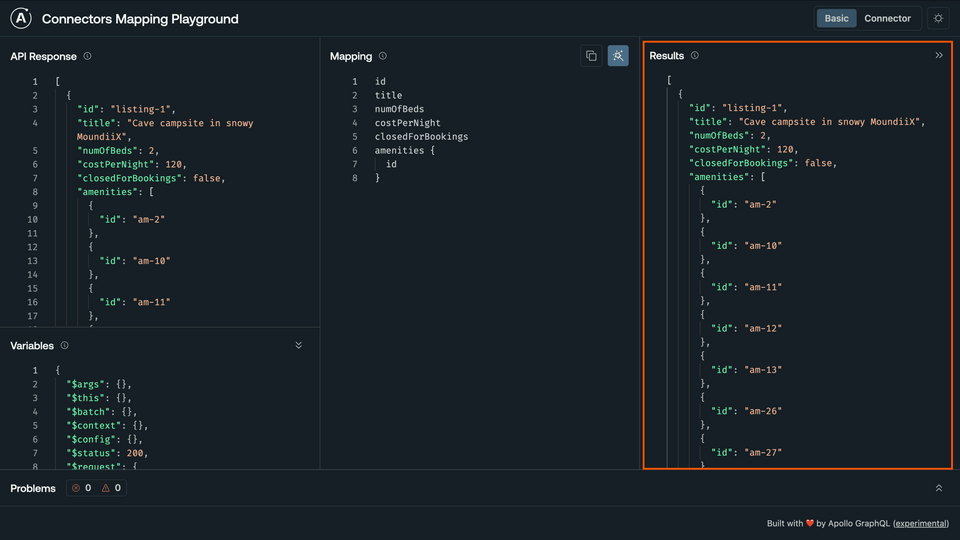
When we modify the contents of the Mapping panel, we'll see the Results update. Try removing a few of the fields in the mapping and watch the Results reflect the same change.
Generate
In the top-right corner of the Mapping panel, we'll find a couple buttons. The first lets us copy the mapping syntax that we've written. The second button is a bit more magical: it reads in the JSON API response and automatically generates a 1:1 mapping. Let's click that button now.
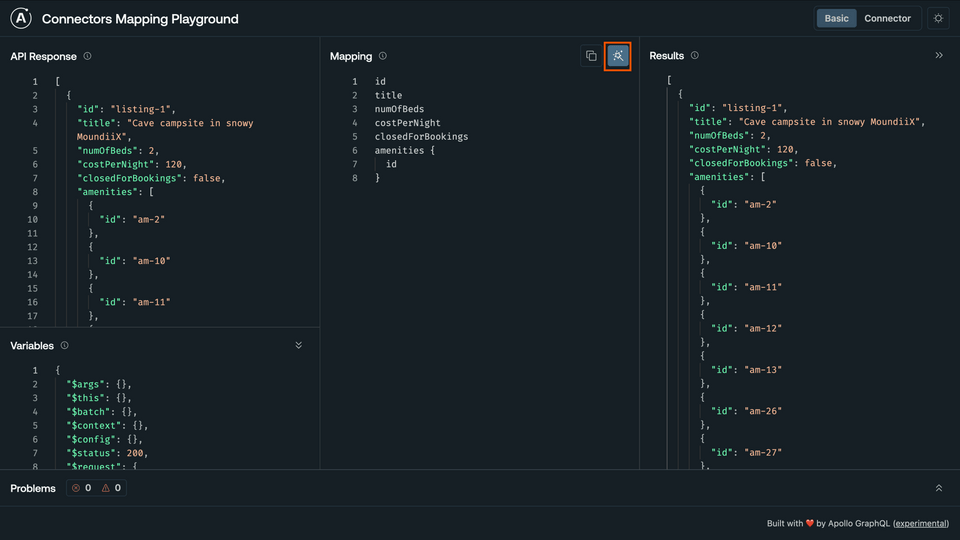
We'll see our Mapping panel update with the direct 1:1 mapping we could apply in our schema to return the JSON object exactly as is.
The results of this mapping are also reflected immediately in the Results panel; and what we'll see is that our JSON API Response object matches the Results exactly.

This is a handy option when we need to quickly generate the 1:1 mapping for a JSON response. It also gives us a great starting point when our schema mostly matches the shape of the JSON response, with just a few tweaks necessary.
Modes
We can set the playground to one of two modes: Basic or Connector.
Basic mode, the default mode we've explored so far, focuses on a particular mapping expression. This is what we would add to the selection property of a Connector.
Connector mode simulates a full Connector, including the request definition and schema information.
We'll focus on the Basic mode for this course.
Practice
selection parameter in the @connect directive?Key takeaways
- The Connectors Mapping Playground gives us a space to explore an endpoint's JSON response and write the mapping we can then apply in our schema.
- The API Response, Mapping, and Results panels work together to show how a particular mapping will transform a REST API's JSON response.
Up next
Let's get going on our mapping. We'll take a look at a JSON response and start accessing properties.
Share your questions and comments about this lesson
This course is currently in
You'll need a GitHub account to post below. Don't have one? Post in our Odyssey forum instead.