🙌 Hands-on time!
Time to upgrade our Catstronauts app with the supergraph.
Let's start with a freshly cloned project. First, create a new directory called supergraph, then run the following command:
git clone https://github.com/apollographql-education/lift-off-supergraph-demo-tracks.git
The project starts where we left it in Lift-off IV, with a few differences:
- The schema is now defined in a standalone
.graphqlfile, which also changes how it's loaded into our server. - The server itself is now running on Apollo Server 4!
- We're importing the
gqltag directly from thegraphql-tagpackage.
Let's navigate to the projects folder we've just cloned and install its dependencies.
cd lift-off-supergraph-demo-tracks && npm install
Then launch it with:
npm run dev
This should start our graph and make it available on port 4001. We can then navigate to Sandbox at http://localhost:4001, where we can query our locally running monograph.
Note: npm run dev uses nodemon to watch any changes to our app or schema and restart the subgraph automatically when needed.
In Sandbox, we see three available fields of the Query type: tracksForHome, track, and modules, as well as one Mutation field: incrementTrackViews. Let's try out a query to retrieve the title for each of our tracks.
query TracksForHome {tracksForHome {title}}
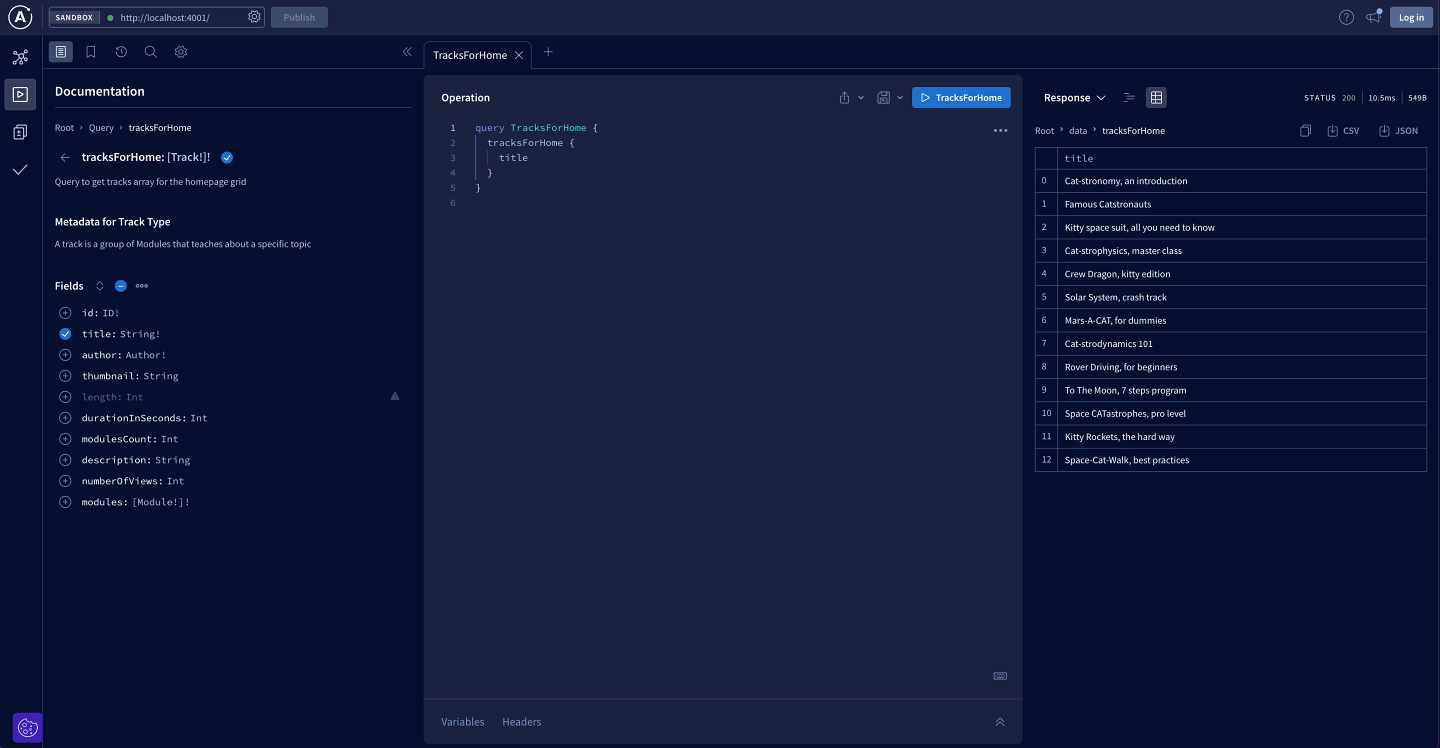
Great, it all works as expected 😎.
To convert this monograph into a subgraph, we'll first need to install a new package, @apollo/subgraph.
npm install @apollo/subgraph
Then we'll navigate to schema.graphql and add a line at the top of the file to make it ready for Federation 2. (This lets us use the latest and greatest features in our supergraph.)
extend schema @link(url: "https://specs.apollo.dev/federation/v2.0", import: ["@key"])
Finally, back in index.js, we'll import the buildSubgraphSchema function from the subgraph package we've just installed.
const { buildSubgraphSchema } = require("@apollo/subgraph");
The buildSubgraphSchema function does exactly what its name suggests: it creates a subgraph schema that can be composed as part of a larger supergraph. We'll use this function in the server constructor, passing it our type definitions and their corresponding resolver functions.
const server = new ApolloServer({schema: buildSubgraphSchema({ typeDefs, resolvers }),});
Our schema definition is now boosted with federation support! 🚀
Here's the diff between the Lift-off IV starting point and the current state of our project:
Locally, we have now effectively turned our monograph into a subgraph. 🥳
Let's check that everything still works the same as before. Our server automatically restarted as we made changes to it, so we can rerun the same query in Sandbox and confirm that we get back the same results. The only noticeable difference is that we can see a new _service field on the Query type in the Documentation sidebar. We won't need to use this field directly (it exists as part of our schema as a requirement for subgraphs to comply with the federation specs), but it lets us know we're now working with a subgraph.
The schema for this subgraph holds all of our tracks information, so we can call this our tracks subgraph.

Goal #1 complete, go on and check the task below 🎉!
With this first working subgraph, we're one step closer to our objectives. We now need to create a supergraph schema from this first subgraph and set up an endpoint where clients can query our supergraph. To do that, we'll need the Rover CLI.
Rover CLI
Rover is Apollo's command line interface (CLI) tool that helps developers work with graphs. It's a handy and versatile tool that can be used for both local development and CI/CD. We can use it to run checks, publish schemas to the Apollo registry, and much more (that we'll discover in the Voyage series).
For now, let's see how it can help us speed up local development for our subgraphs and supergraphs.
First, let's install the Rover binary on our machine. In a terminal window, paste the following command:
curl -sSL https://rover.apollo.dev/nix/latest | sh
Note: If you want to install Rover using a different method, see the official Rover installation docs.
When the installation is complete, we can run rover --help to see the many commands this tool provides.

We'll only need one for this course: rover dev.
The rover dev command enables us to run our supergraph locally with a router and one or more subgraphs.
Important note: The rover dev command is intended exclusively for local development, and we should never use it in production as it is not optimized for this use case.
Local development flow
The local development flow is straightforward:
- Start your subgraph server if it isn't already running.
- Open a new terminal window and navigate to the subgraph's directory.
- Run
rover dev
When we have multiple subgraphs, we'll repeat these steps for each new subgraph we want to add to our supergraph.
Under the hood, the first rover dev process we run will automatically start an instance of the Apollo Router. It then listens for any additional rover dev processes, which each indicate there's another subgraph to add to the supergraph. Each time a subgraph is added, the original rover dev process composes an updated supergraph schema.
Let's try out this rover dev workflow with our first subgraph, tracks, which is already running on port 4001.
rover dev
In another terminal window, run rover dev from the lift-off-supergraph-demo-tracks directory.
Rover prompts us to provide the subgraph's URL, which is http://localhost:4001. For the name, we'll add tracks.
Because this is the first rover dev process we've started, Rover composes the supergraph schema, spins up the router, and prints out a few lines indicating the URL where the supergraph can be queried: http://localhost:3000. Let's head over there and query for some tracks.
Open a new browser window and navigate to Sandbox at http://localhost:3000. Then run the following query:
query TracksForHome {tracksForHome {title}}
Excellent, we have a working supergraph! For now, though, it has only one subgraph. Time to add another one!
Share your questions and comments about this lesson
Your feedback helps us improve! If you're stuck or confused, let us know and we'll help you out. All comments are public and must follow the Apollo Code of Conduct. Note that comments that have been resolved or addressed may be removed.
You'll need a GitHub account to post below. Don't have one? Post in our Odyssey forum instead.