🚀 Deploying our server
Let's get our GraphQL server up and running in production using Railway!
Railway is a cloud service platform that enables us to deploy our app without having to worry about the infrastructure specifics. This course uses Railway because it can sync to a GitHub repository and it has a free tier that lets us run our app without a credit card!
We can get started with Railway by clicking Login on the homepage. You can choose to login with your email, or with your GitHub account directly. We'll authenticate with our GitHub account and save ourselves some additional steps.
You might also need to complete verification steps for Railway to get access to your account.
From the dashboard, let's click New Project.
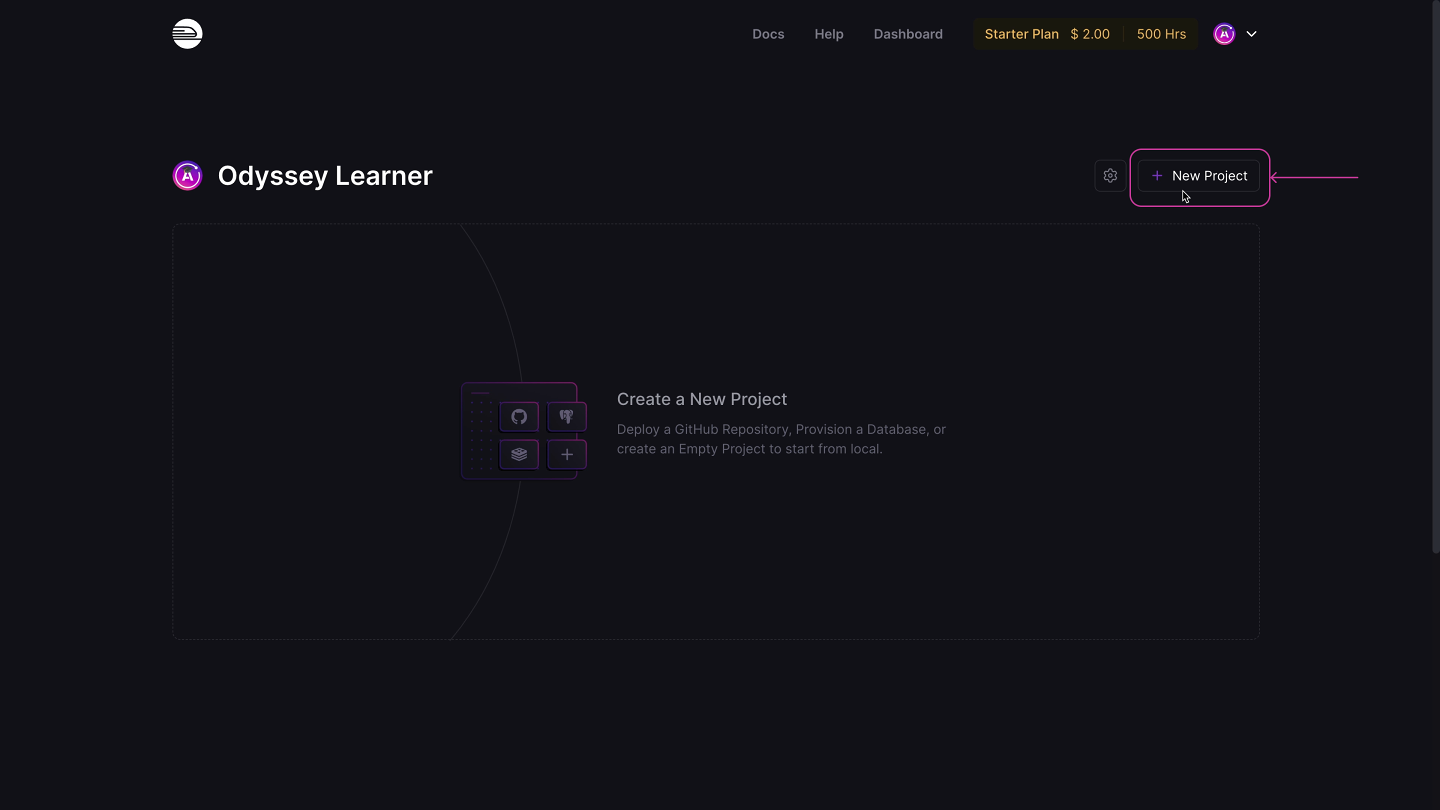
Then select Deploy from GitHub repo.
Next, we'll select Configure GitHub App, then step through the instructions on GitHub to authorize Railway. Now we can access our repositories!


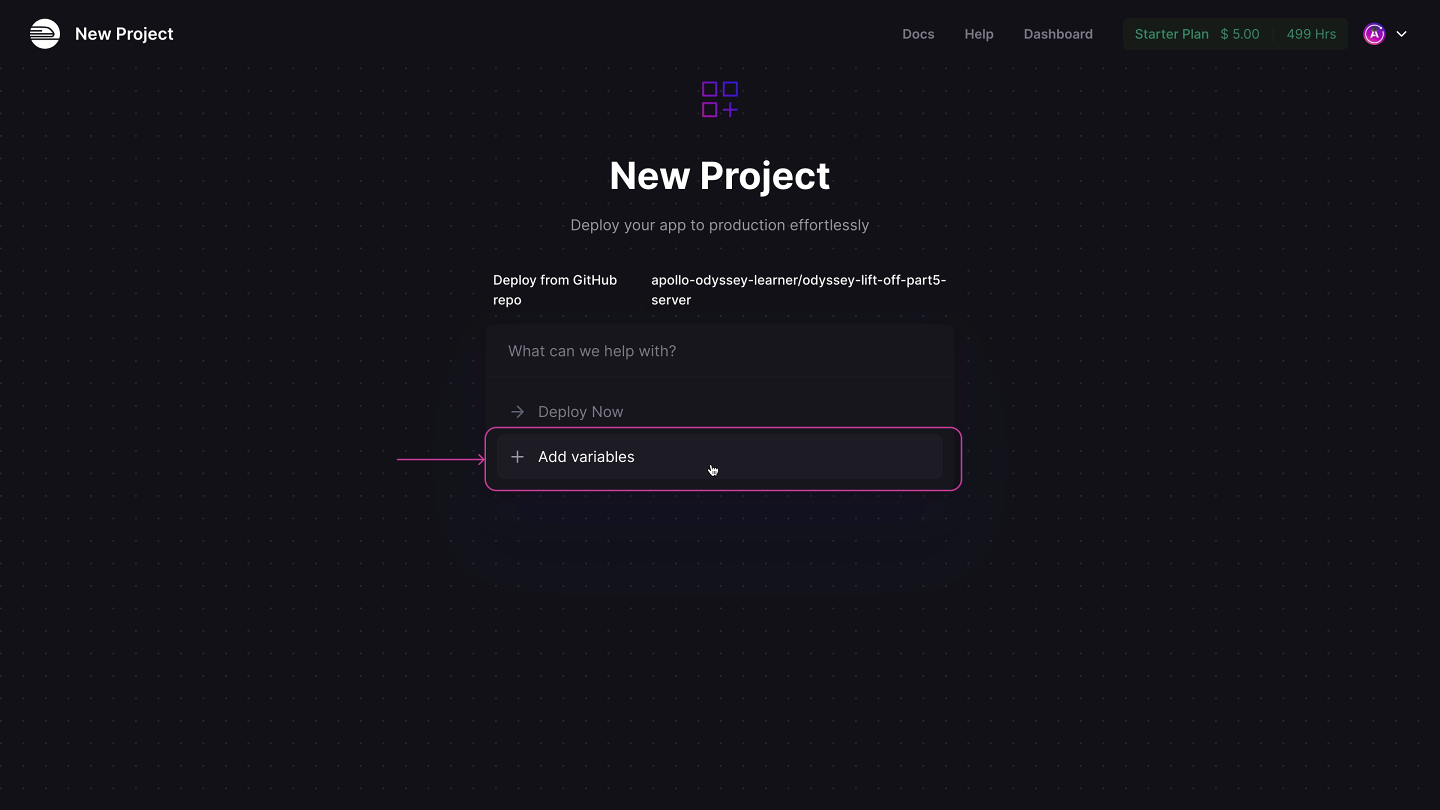
Let's select the repo that we forked. But before deploying, we need to set a few environment variables.
🌲 Adding the environment variables
Let's click Add variables.
We'll take care of these variables all at once by using the Raw Editor.

This opens a modal where we can paste in all of our handy variables.

Remember the environment variables Studio gave us when we created our graph? Let's put those to use!
Back in Studio, we'll copy all three of our graph's variables. Make sure you toggle the eye icon for the APOLLO_KEY variable before copying it - we want the real value, after all!
Let's hop back over to Railway and paste those variables in the ENV panel. Then, click Update Variables.
Now if we jump over to the Deployments tab, we'll see that Railway triggered a new deployment of our app. And after just a few moments, we should see it worked!
Next, we want to query our server at a public URL on the internet. To do this, we'll need to generate a domain. Go to your app's Settings tab, and click the Generate Domain button under the Domains header.
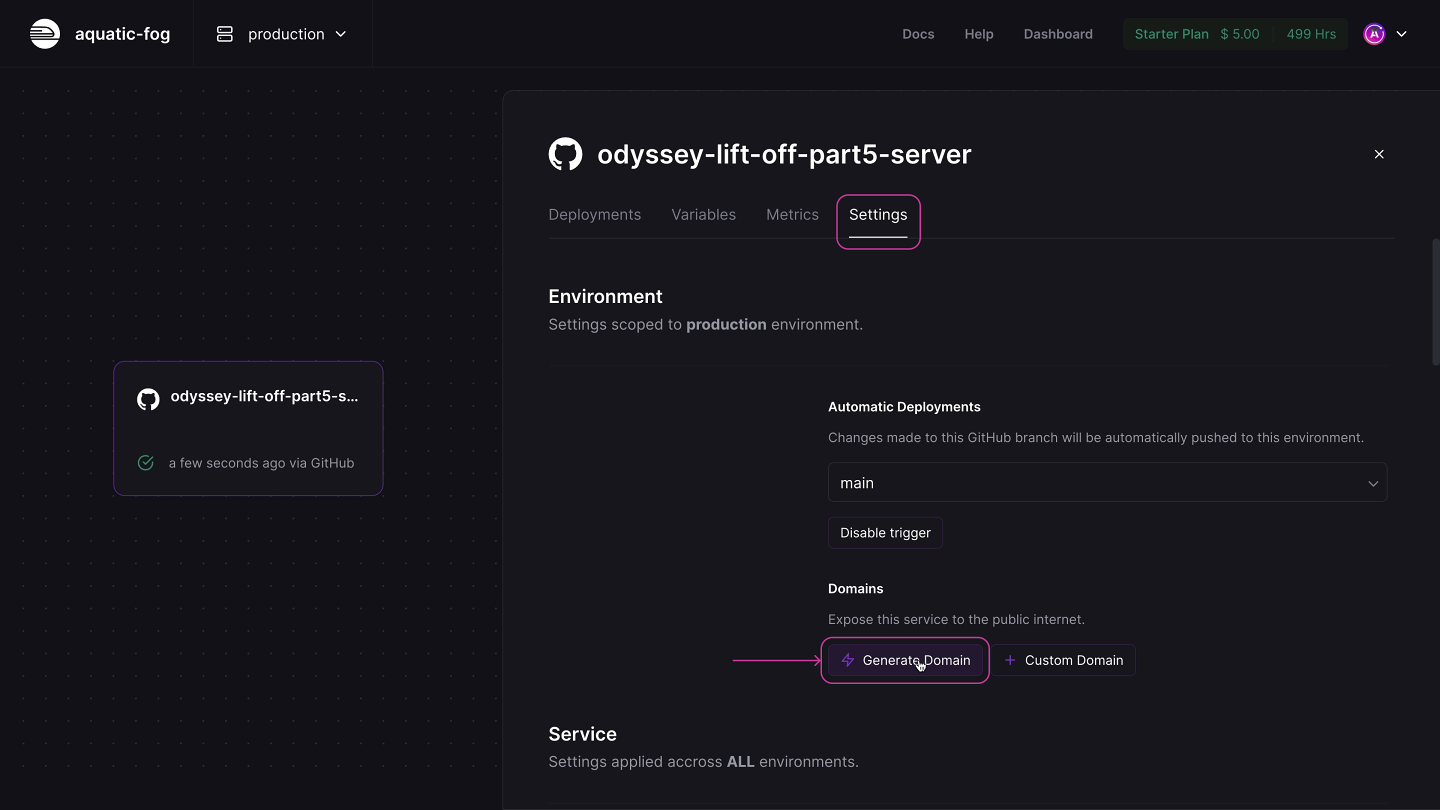
This will automatically create a production URL that we'll use in our client app later on.
Let's click on the generated URL and… uh-oh!
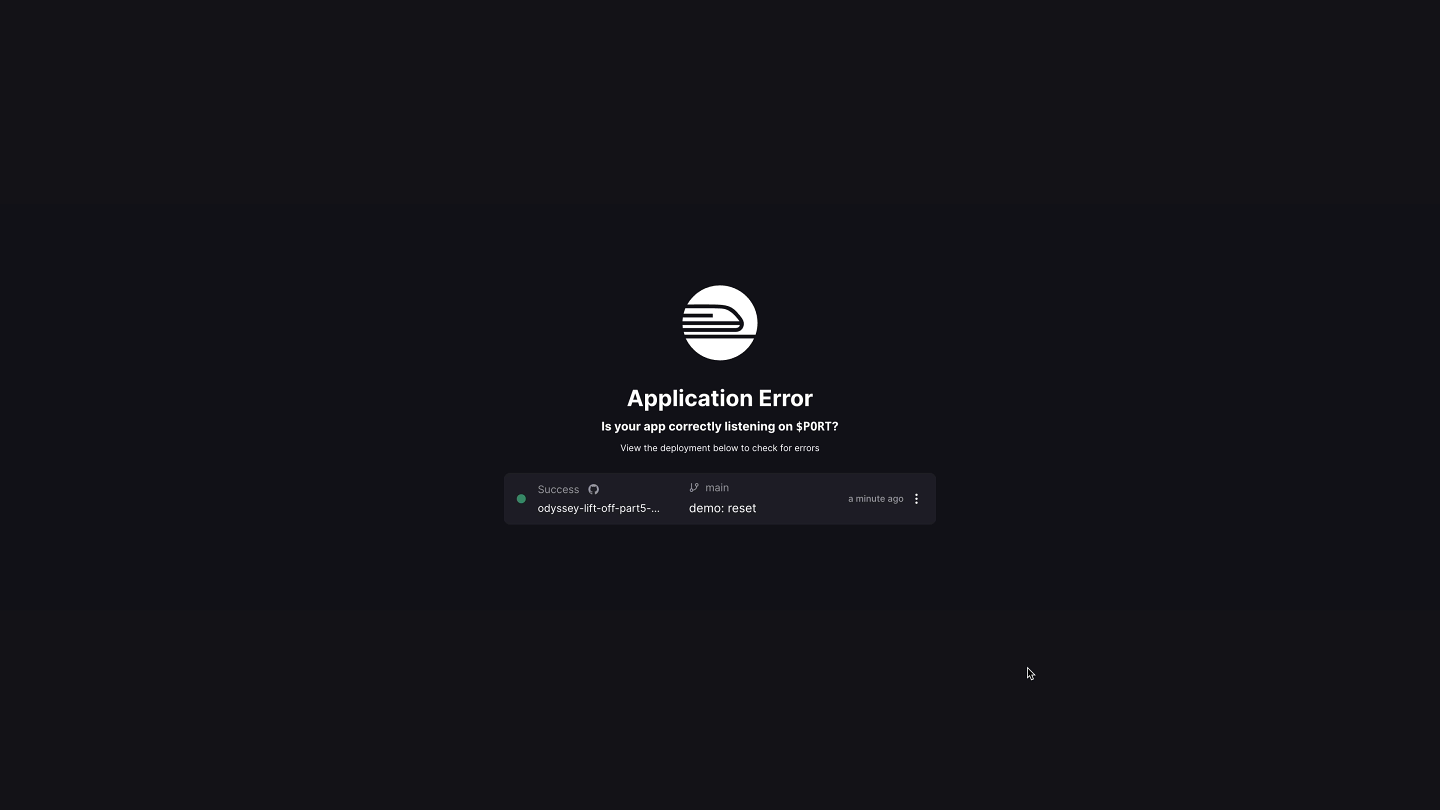
We need to make one change to our code. Railway needs our server to run on a port specified by the PORT environment variable, which is set behind the scenes.
🔌 Setting the PORT
Let's open up our server repo. In the src folder, open up the index.js file.
Right now, by default, Apollo Server is listening on port 4000. We need to update this by specifying an options object in the listen method.
await server.listen({ port: process.env.PORT || 4000 });
The port property should be set to process.env.PORT (with PORT in all-caps). To make sure our server still works locally on our own machines however, we'll add an "or" (||) and specify 4000 as our port number.
And that's it! Let's make sure to add and commit these changes, and push it up to our GitHub repo.
Edit the code below to configure Apollo Server to listen to a port specified by process.env.PORT, or if that doesn't exist, a hard-coded port number 4000.
Back in Railway, we should see the new commit trigger another deploy.
Let's try this again. Go back to that generated URL and... we see the landing page for Apollo Server in production! Yay! 🎉

But this page looks a bit different from what we would normally see if we had run our server locally.
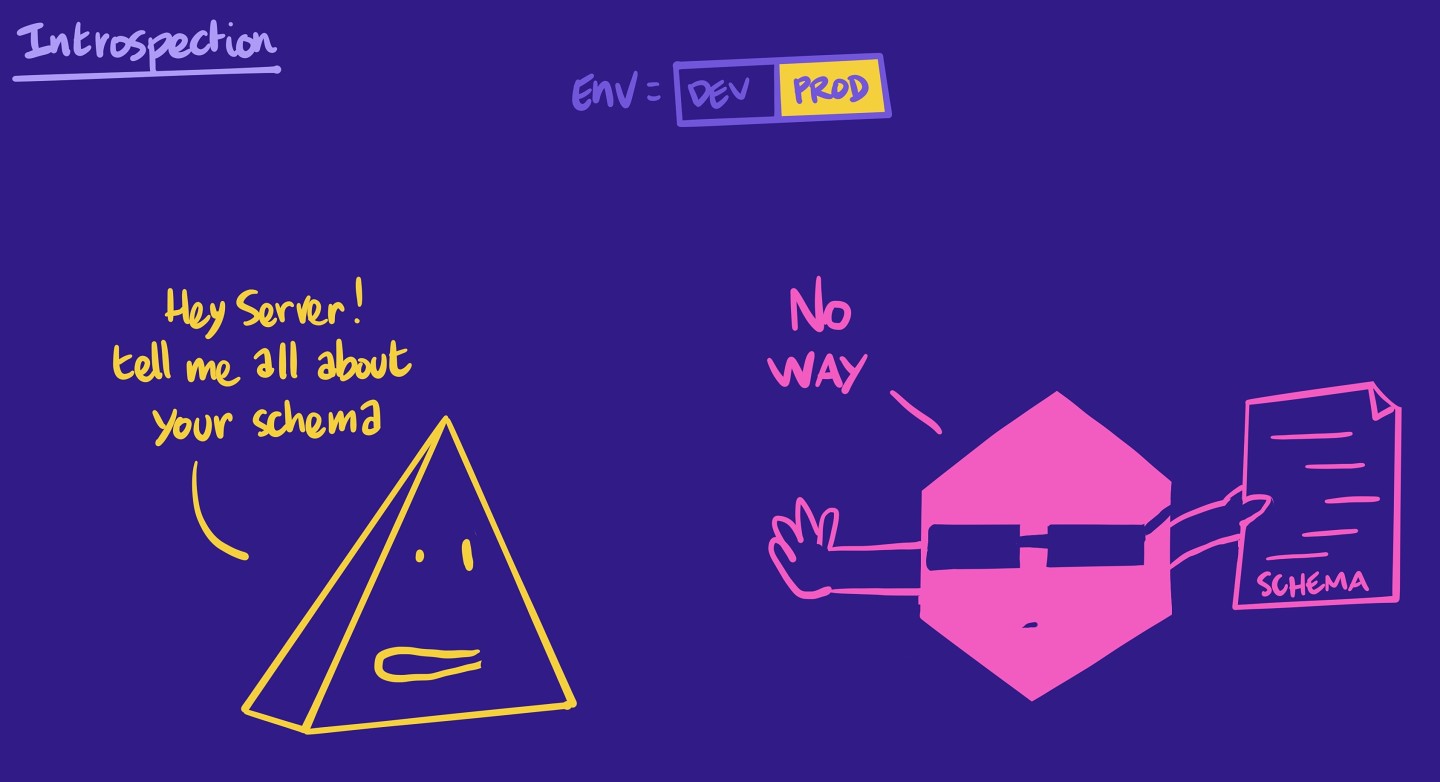
We don't have the option to query our server through Apollo Sandbox. This is because Railway automatically set the NODE_ENV environment variable to production, which alerts our Apollo Server to switch itself to production as well, automatically disabling introspection.
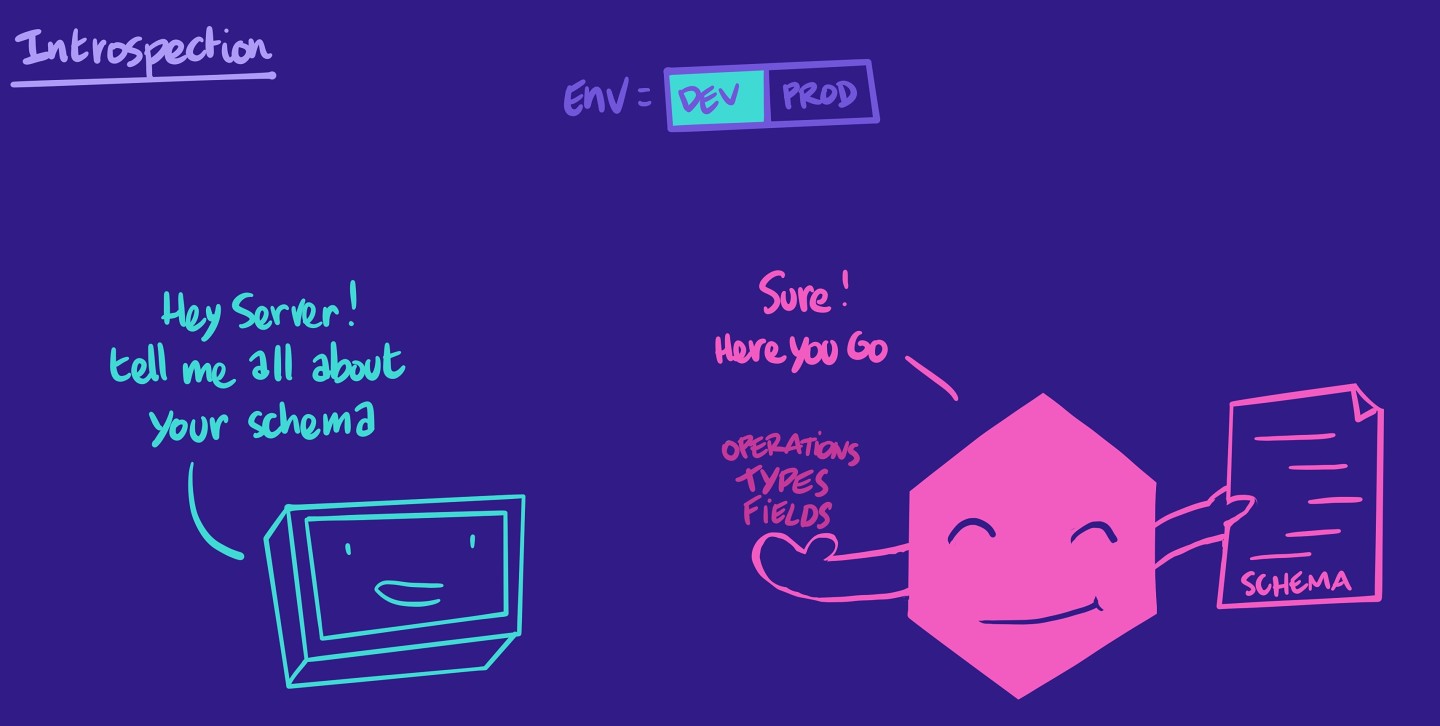
🤔 What is GraphQL introspection?
Introspection is a GraphQL feature that enables us to query a GraphQL server for information about the underlying schema. This includes data like types, fields, and field-level descriptions. Tools like Apollo Sandbox use introspection to build and run queries.
The problem is that having introspection in production can be a major security issue. It exposes all of our graph's structure and what we can do with it to the whole world. In most cases, that's not what we want! This is why Apollo Server disables introspection by default in a production environment.
How do we test our server if we can't query it with tools that rely on introspection? Well, thanks to the schema registry, we now have a secure way to access our graph and run queries on it using Apollo Explorer.
Querying with Explorer
Let's navigate to the Explorer and test out the tracksForHome query.
query GetTracks {tracksForHome {idtitlethumbnaillengthmodulesCountauthor {namephoto}}}
The first time you try to run the query, the Explorer will prompt you for the URL of your production server. This is the domain URL we generated in Railway.

See, our tracksForHome query still works!
Amazing, our server is live in production! 🎉 Next, let's tackle the client app.
Share your questions and comments about this lesson
Your feedback helps us improve! If you're stuck or confused, let us know and we'll help you out. All comments are public and must follow the Apollo Code of Conduct. Note that comments that have been resolved or addressed may be removed.
You'll need a GitHub account to post below. Don't have one? Post in our Odyssey forum instead.