Overview
We're familiar with queries, now let's bring them into our app!
In this lesson, we will:
- Configure Apollo iOS Codegen CLI and download the GraphQL schema
The Apollo iOS Codegen CLI
Before we bring our schema into our application, we need to configure the Apollo iOS Codegen CLI. This is because the schema plays an integral part in the code generation process: by seeing what types and fields are available in the remote service, codegen can reduce the amount of boilerplate that we as developers need to write.
So, what exactly does code generation do for us? Well, let's consider the pieces that we do have: we've downloaded the schema from our remote GraphQL server, and we have the query that we copied in from Sandbox. What's missing here?
The logic to connect to the server, of course! With Apollo iOS, we can generate operation objects for the GraphQL operations we use in our app. Each operation generated contains a set of strongly-typed models for the response we can expect from the server. This means that we don't have to concern ourselves with receiving, decoding, and mapping the response to our own models—code generation takes care of all of this for us, leaving us more time to focus on the queries we want to write and the views we can build with more and more data!
To learn more about how the Apollo iOS Codegen process works, please visit the official documentation.
Set up the Codegen CLI
The Apollo iOS SPM package includes the Codegen CLI as an executable target. This ensures you always have a valid CLI version for your Apollo iOS version.
To simplify accessing the Codegen CLI, you can run the included InstallCLI SPM plugin. This plugin builds the CLI and creates a symbolic link to the executable in your project root.
If you use Swift packages through Xcode, you can right-click on your project in the Xcode file explorer, revealing an Install CLI plugin command.
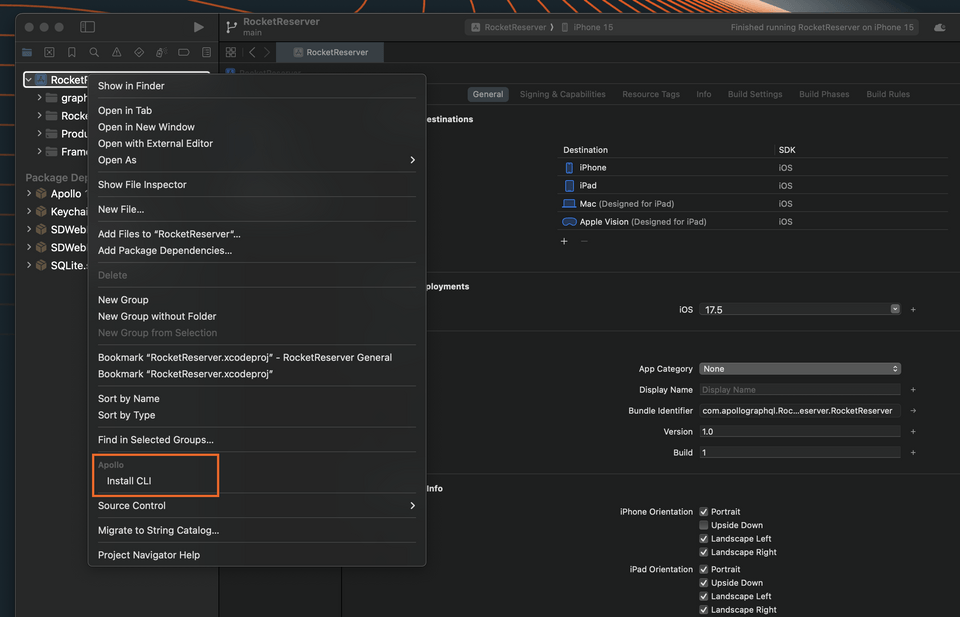
Selecting this command presents dialogs allowing you to select the target, grant the plugin "write" access to your project directory, and access the network.
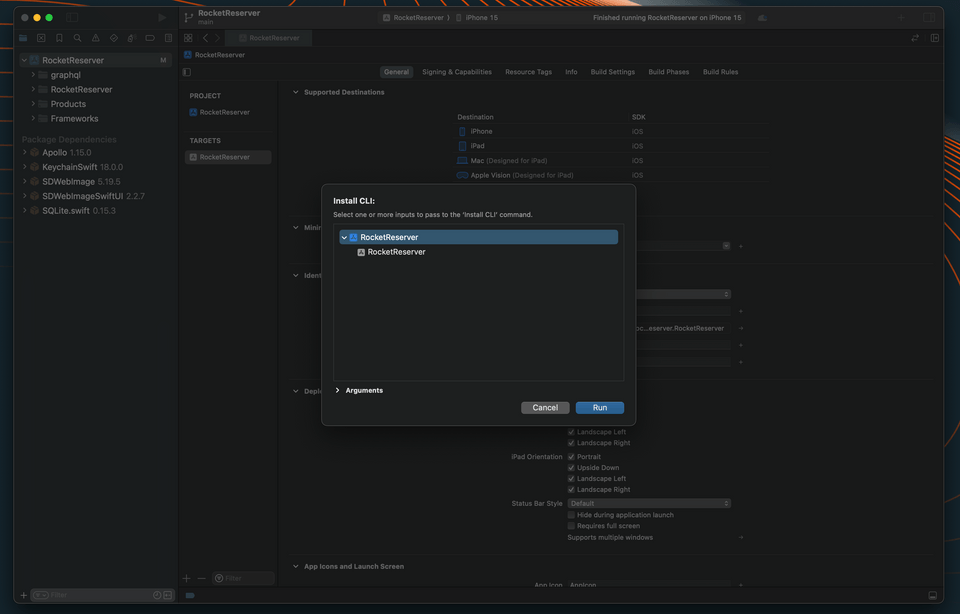
After the plugin installs, it creates a symbolic link to the Codegen CLI (named apollo-ios-cli) in your project root folder. You can now run the CLI from the command line with ./apollo-ios-cli.
Note: Because the apollo-ios-cli in your project root is only a symbolic link, it only works if the compiled CLI executable exists. This is generally located in your Xcode Derived Data or the .build folder. If these are cleared, you can rerun the Install CLI plugin to rebuild the CLI executable.
Note: Xcode 14.3 has a bug where the Install CLI plugin command does not show up in the menu when right-clicking on your project which is being tracked here. If you experience this issue an alternative is to use another version of Xcode, or follow the instructions to get a pre-built binary of the CLI on the Codegen CLI page.
Create your Codegen Configuration
Next we need to set up our codegen configuration file. To do this run the following command in a terminal opened to the root of your project directory:
./apollo-ios-cli init --schema-namespace RocketReserverAPI --module-type swiftPackageManager
This generates a basic apollo-codegen-config.json file for our project.
Download your server's schema
Next we need to download the schema for our project to use. To do so, first we need to update our apollo-codegen-config.json to include a schemaDownloadConfiguration.
The apollo-codegen-config.json file likely won't appear in your Xcode file system, so open it up separately in a different text editor. Add the following JSON to the end of the config file after the output object:
"output": {// ... contents of output object},"schemaDownloadConfiguration": {"downloadMethod": {"introspection": {"endpointURL": "https://apollo-fullstack-tutorial.herokuapp.com/graphql","httpMethod": {"POST": {}},"includeDeprecatedInputValues": false,"outputFormat": "SDL"}},"downloadTimeout": 60,"headers": [],"outputPath": "./graphql/schema.graphqls"}
For more information about downloading schemas, see the Downloading a schema documentation.
You'll notice that this code specifies that the schema that we download should be outputted into a path that already exists in our project: ./graphql/schema.graphqls. Up until now, that file has been empty—just waiting for exactly this schema to arrive!
Now that we've updated our config, we can download the schema by running the following command in the terminal:
./apollo-ios-cli fetch-schema
After running this command, we'll see that the schema.graphqls file has been populated with our server's schema!
Add the query to Xcode
Now let's add the query we ran in Sandbox to our project. Jump back to Sandbox. On the upper right-hand side of the Operation panel, we'll find a menu with three dots. Clicking this, we'll see a dropdown with an option to Copy operation.
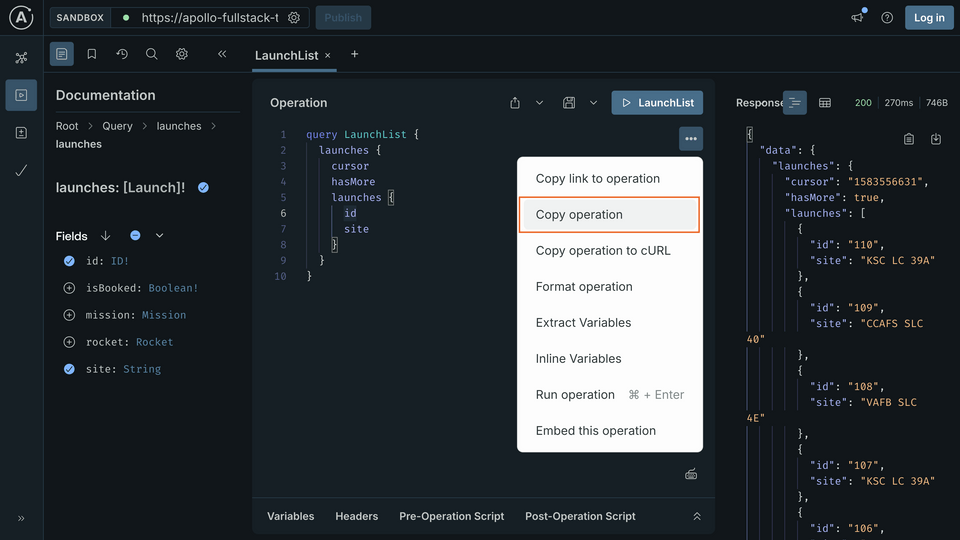
Let's copy the operation, then return to Xcode. We'll start by creating a new file for this query to live in.
Right-click on the
graphqlfolder in the project hierarchy and select New File....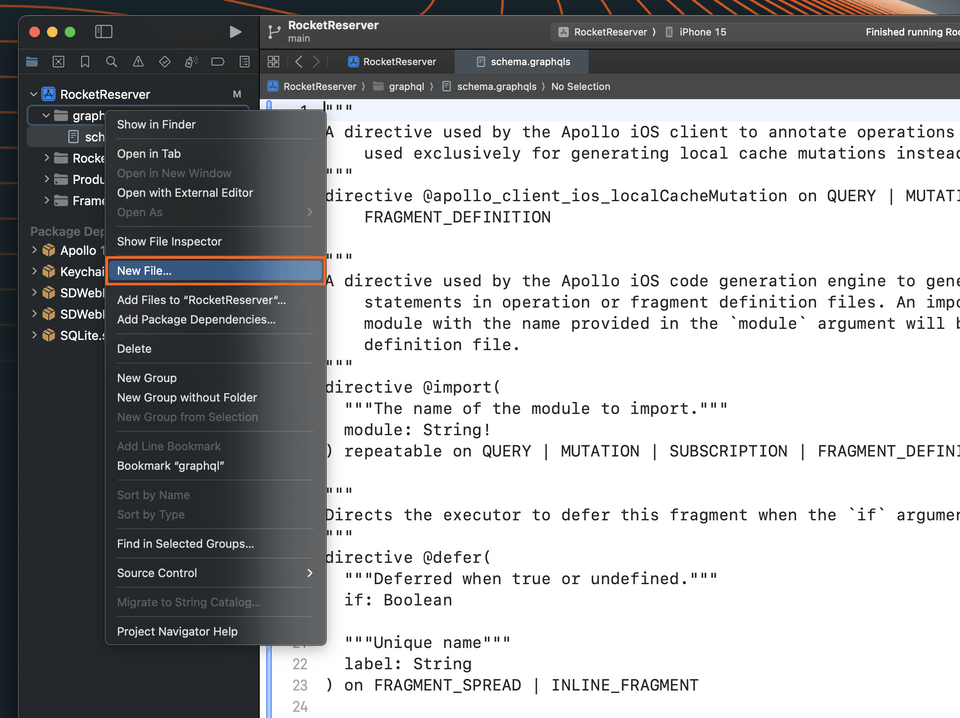
Scroll down in the Template menu until you locate the Other section. Select the Empty file template, and click Next.
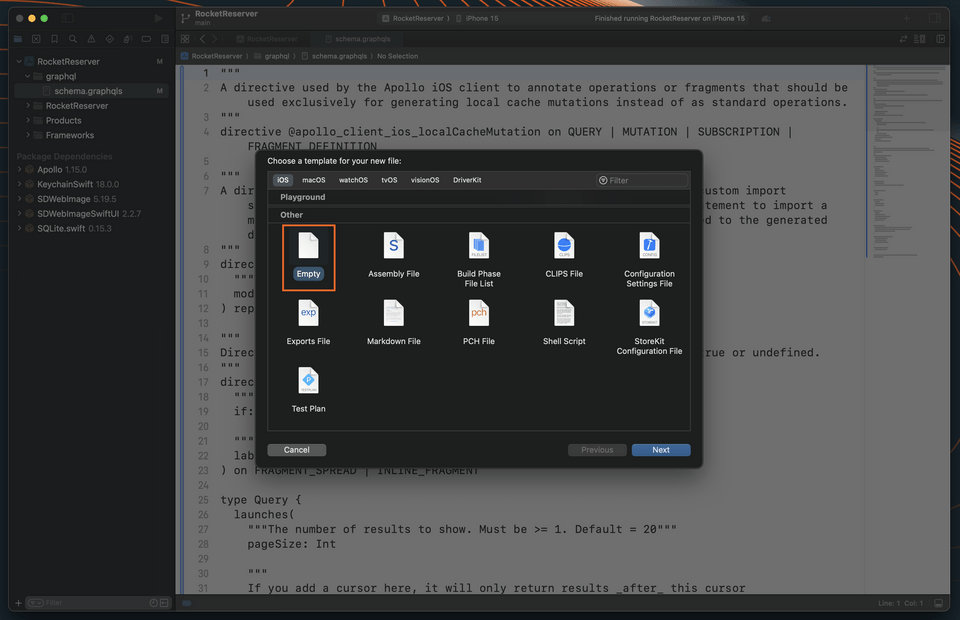
Name the file
LaunchList.graphql, ensure the file is being added to thegraphqlfolder where yourschema.graphqlsfile is. Finally, make sure the file is NOT being added to the app target, then click Create.
Paste the operation copied from Sandbox into the
LaunchList.graphqlfile. Your query file should now look like this:
query LaunchList {launches {cursorhasMorelaunches {idsite}}}
Practice
Drag items from this box to the blanks above
manifest
config.yml.graphqls.graphqlschema
apollo.gql./apollo-ios-cli fetch-schemaapollo-codegen-config.json./apollo-ios-cli init
Up next
Our query's in the app, ready to use! In the next lesson we'll talk through how to generate Swift code from this GraphQL query and schema data by running code generation.
Share your questions and comments about this lesson
This course is currently in
You'll need a GitHub account to post below. Don't have one? Post in our Odyssey forum instead.