Essential GraphQL developer tooling
Great work! We have a running GraphQL server that interacts with data from multiple sources. Now before we jump over to the client side, let's turn on some powerful tooling.
Apollo Studio is a cloud platform that helps you with every phase of GraphQL development, from prototyping to deploying to monitoring.
Studio's core features are free for everyone. All of the features in this tutorial are free features.
Create your first graph
In Apollo Studio, each graph has a corresponding GraphQL schema. For your first graph, we'll use the schema of the server you just finished building.
Note: Depending on when you created your account and what plan you're on, your Studio account might look a bit different than what we're showing in the video or lesson instructions.
Before continuing with the lesson, expand the section below to find your specific steps on how to create a graph.


- Provide a name for your graph.
- We are working with a single GraphQL server for this tutorial, so set the Graph Architecture to Monolith.
The default graph architecture is a Supergraph composed of underlying subgraphs (i.e., GraphQL APIs). Check out our hands-on ✨Voyage series✨ to learn more.
- Click Next. A dialog appears instructing you to register your schema. We'll do that in the next step.
Connect your server
Apollo Server can communicate directly with Apollo Studio to register its schema and push useful performance metrics. This communication requires a graph API key. Let's obtain one for our graph.
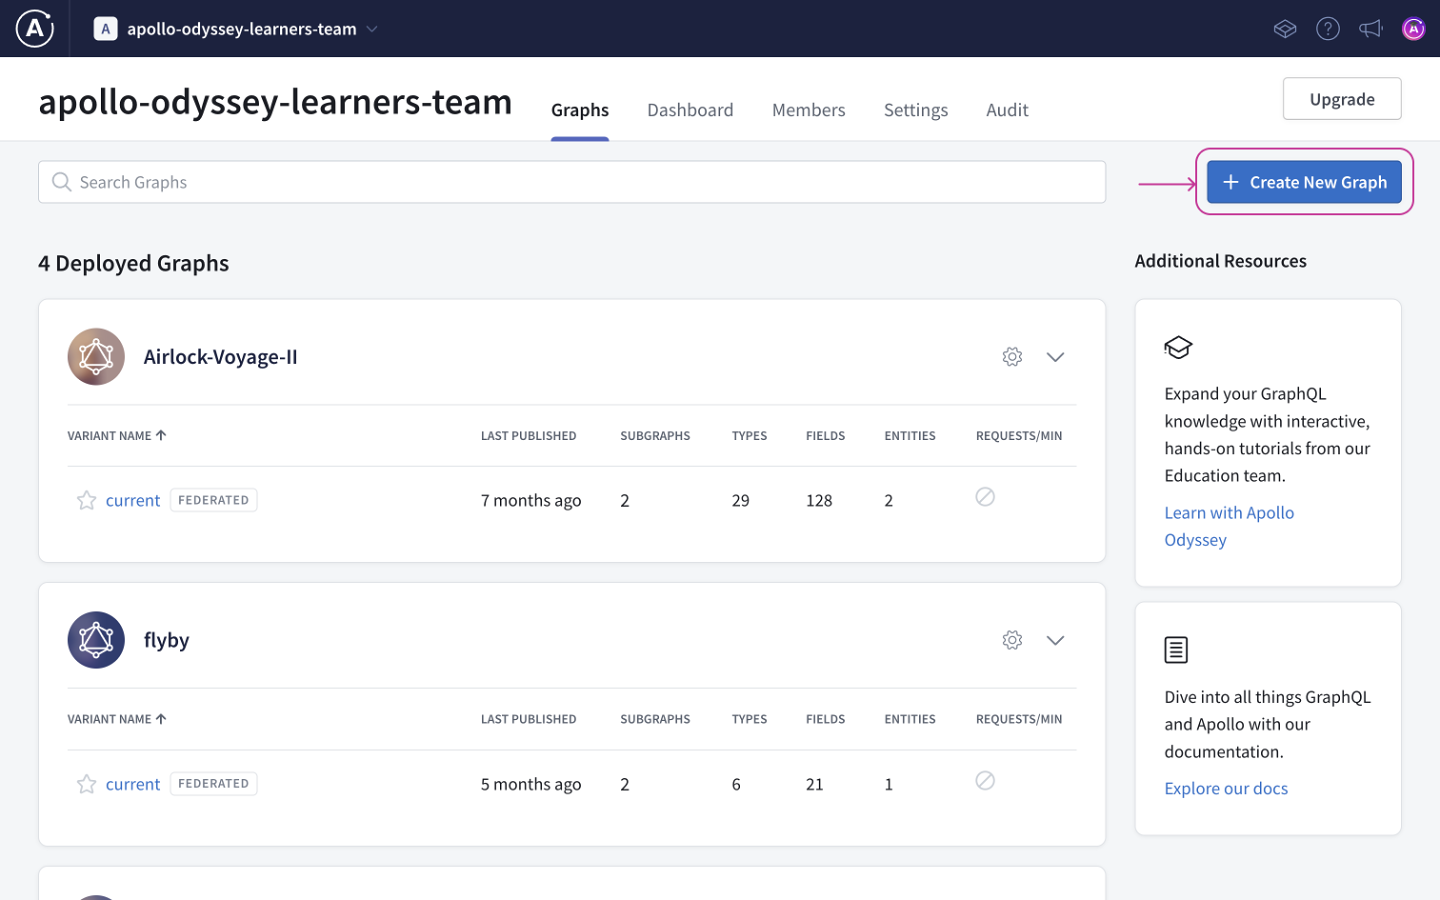
From your Studio homepage, click your newly created graph. This displays the same dialog that appeared after you created it:
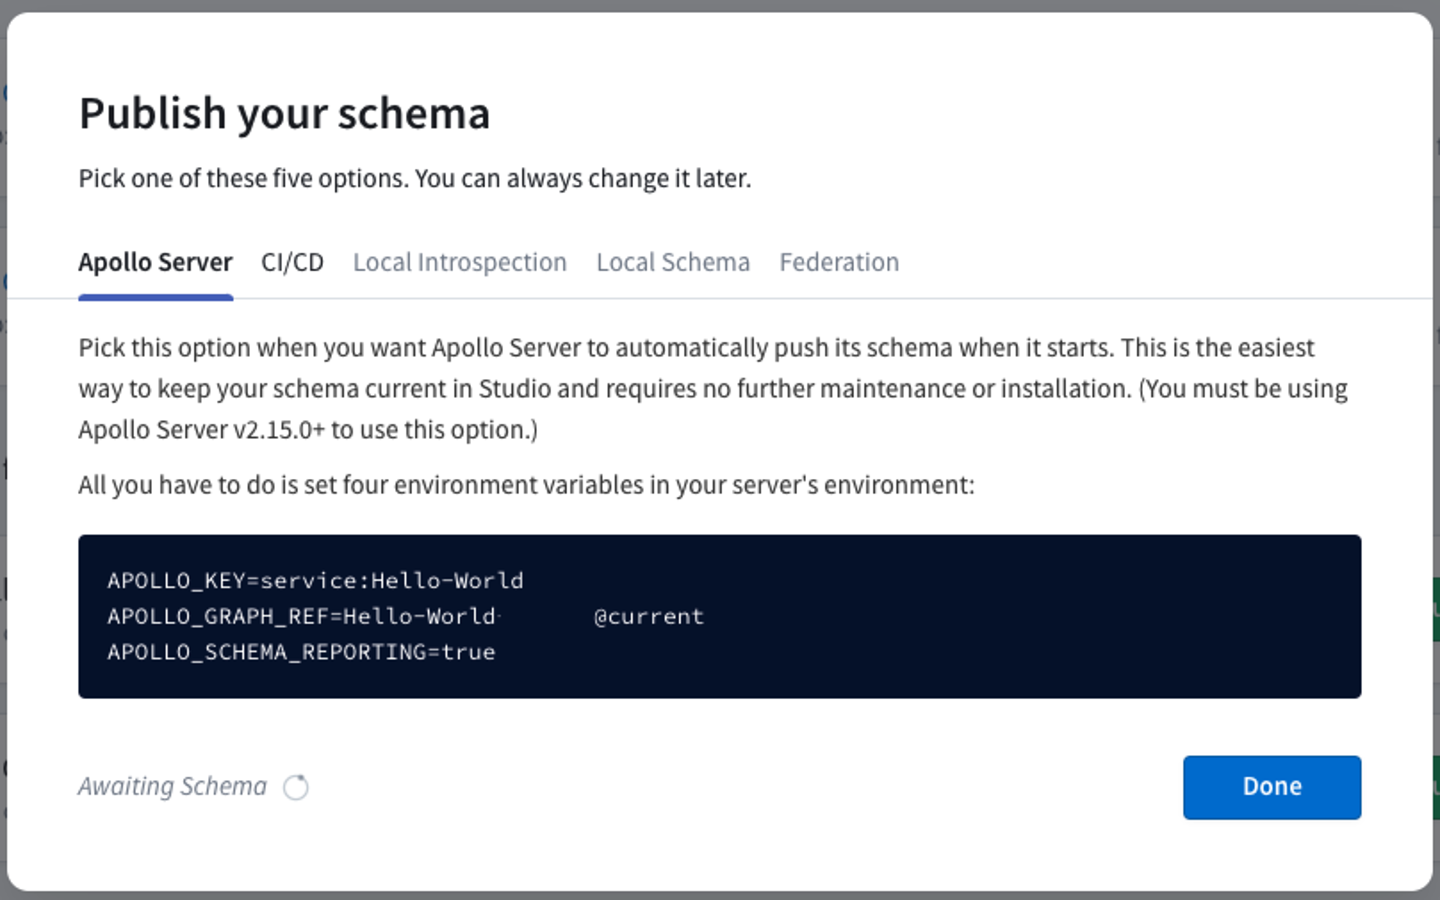
Copy all of the environment variable definitions in the block at the bottom of the dialog (the value of APOLLO_KEY is your graph API key).
Set environment variables
You provide your graph API key to Apollo Server by setting it as the value of the APOLLO_KEY environment variable.
Create a .env file in start/server by making a copy of start/server/.env.example. Then paste the environment variables from the dialog in studio:
APOLLO_KEY= YOUR_API_KEYAPOLLO_GRAPH_REF= YOUR_GRAPH_ID@GRAPH_VARIANTAPOLLO_SCHEMA_REPORTING=true
Graph API keys are secret credentials. Never share them outside your organization or commit them to version control. Delete and replace API keys that might be compromised.
Load environment variables
The dotenv package provides support for reading environment variables from the .env file.
Navigate to start/server/src/index.js and you'll see we've already a line configuring dotenv for you:
require("dotenv").config();
Restart your server
After you restart your server with npm start, return to your Studio homepage. After fifteen seconds or so, Studio will receive your server's schema and you can view its full details. (If you don't see any update, try refreshing the page!)
Try out free Studio features
Connecting your server to Apollo Studio activates a variety of powerful features:
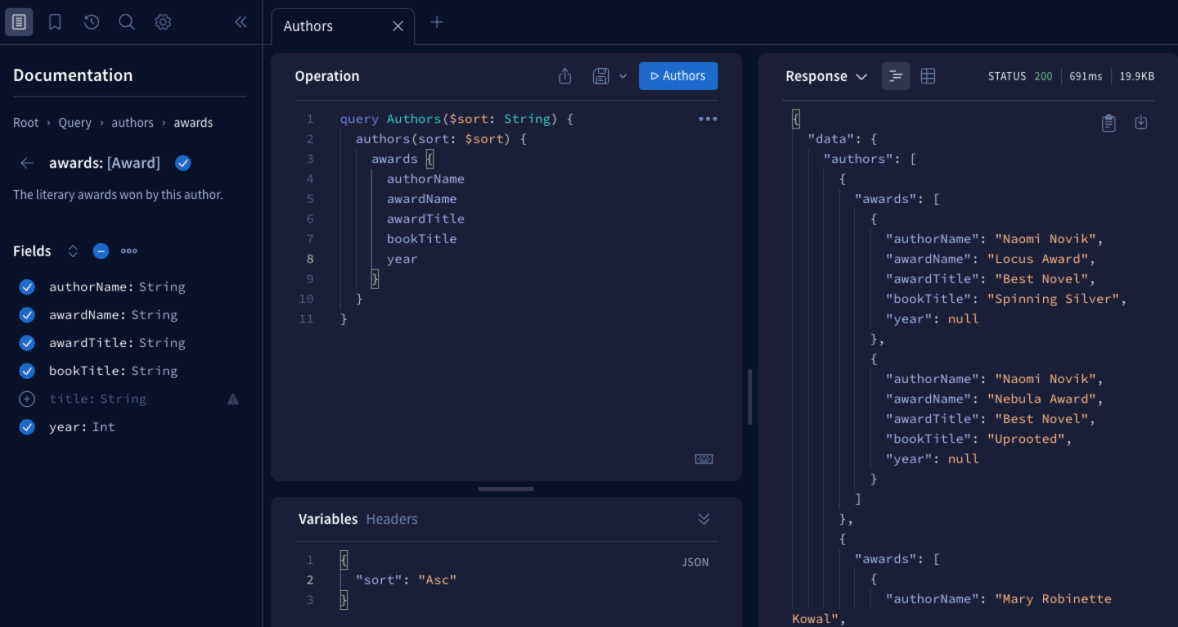
The Explorer
As shown earlier in the tutorial with Sandbox, the Apollo Studio Explorer provides a comprehensive view into your schema, including all documentation strings you include in it. Use it to build queries and execute them on your server.
Schema changelog
Open the Changelog tab to view a full revision history of the schema versions your server pushes over time:
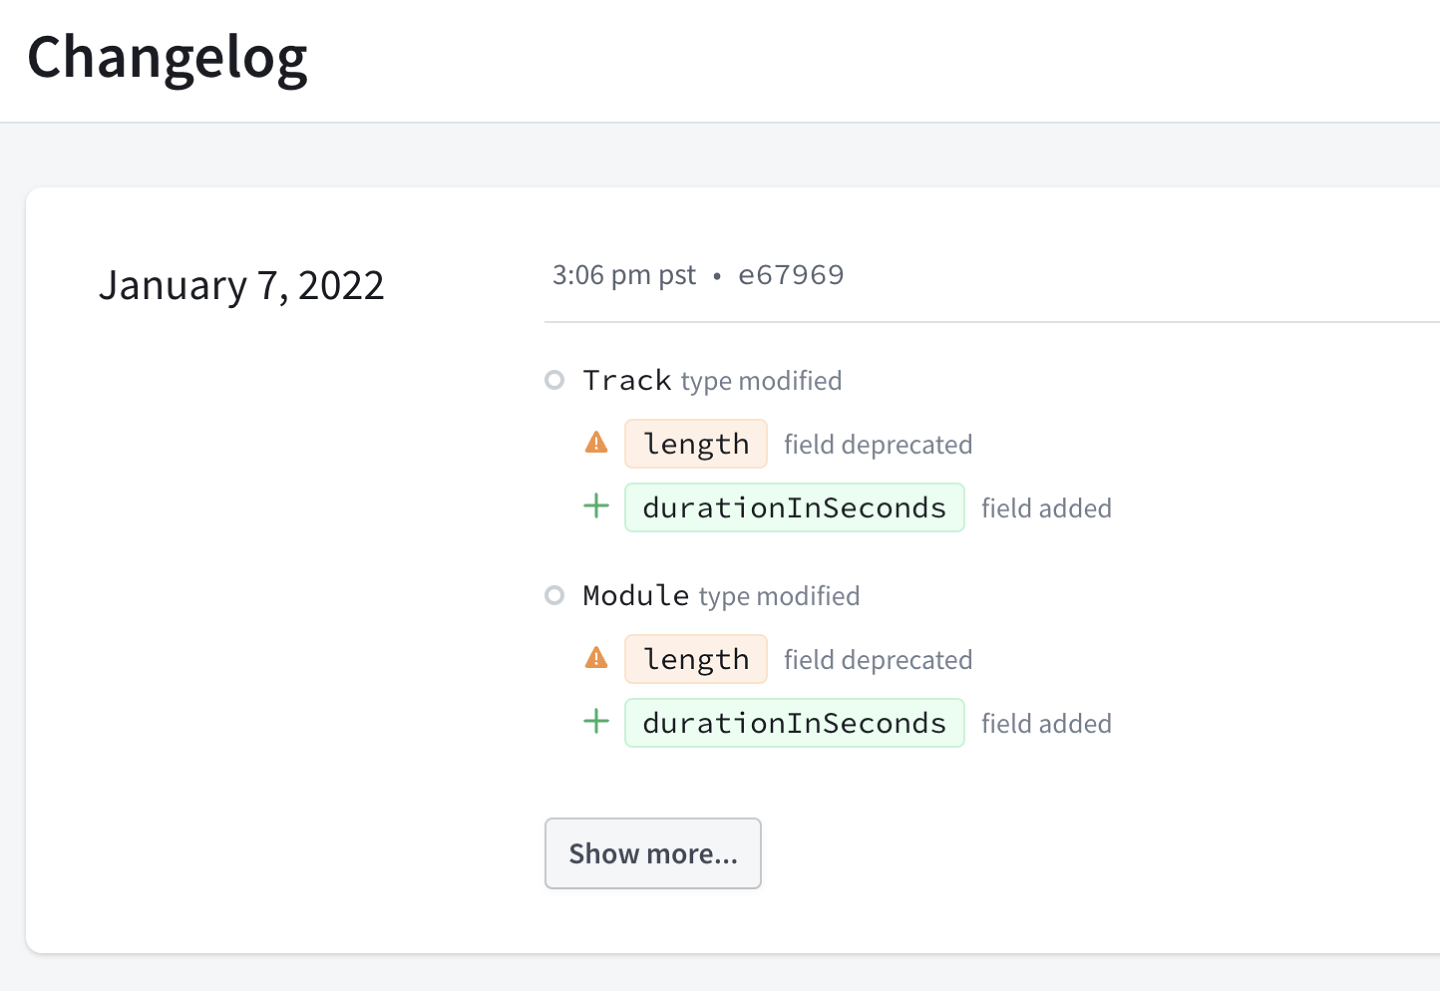
This changelog helps you identify exactly when a particular type or field was added or removed, which is crucial when diagnosing an issue.
Operation metrics
Apollo Server pushes metrics data to Studio for each GraphQL operation it executes. This data includes a breakdown of the timing and error information for each field that's resolved as part of the operation.
Apollo Server does not push GraphQL operation results to Studio. For more information, see Data privacy and compliance.
Open the Operations tab to view performance data based on the last 24 hours of your server's operation traces:

Organizations with a paid Studio plan can view metrics for the last 90 days or more, depending on the plan. For more information on paid Studio features, see the Studio documentation.
Now that our server is connected to Studio, let's start building a client to execute some queries!