Overview
We're logged into our app, but we haven't put our authorization token to work yet!
In this lesson, we will:
- Introduce Apollo iOS Interceptors
- Implement an
ApolloInterceptorclass - Finalize the logic to include our authorization token with all requests
Introducing Apollo iOS Interceptors
In order to actually book a trip, we need to pass our authentication token along to the server. To understand how we can do that, let's first dig a little deeper into how Apollo iOS's ApolloClient works.
To send operation to a GraphQL server, ApolloClient uses a class called RequestChainNetworkTransport. This class (the default implementation of the NetworkTransport protocol) handles HTTP communication with the server by generating a RequestChain object for each request.
A RequestChain consists of a sequence of interceptors—special objects that can operate upon the request that passes through them. They can mutate the request, check the cache before the request hits the network, and even do additional work after a response is received from the server.
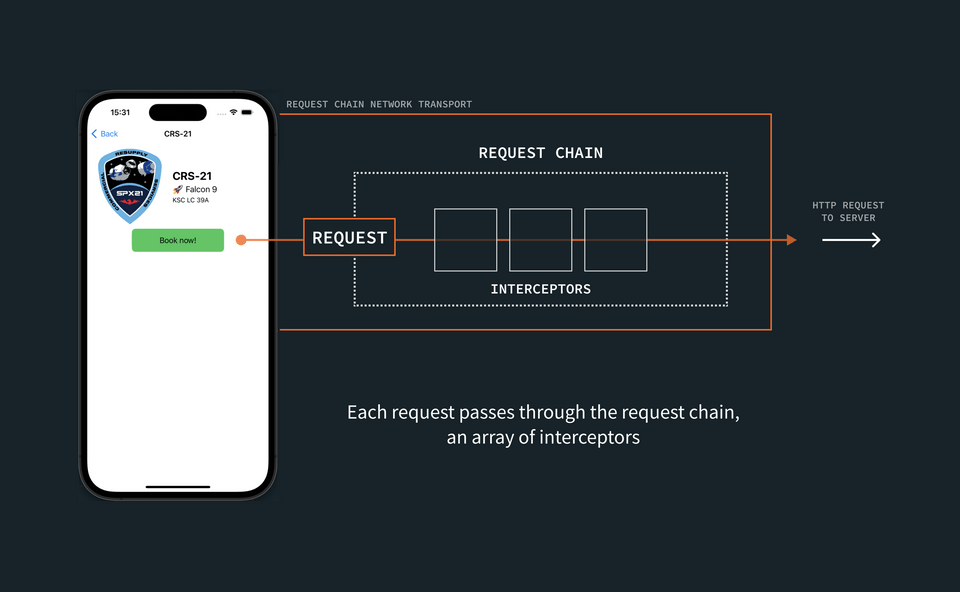
Actually creating the RequestChain, the array of interceptors, is a job for an InterceptorProvider. We get a few providers out of the box by default; one, the DefaultInterceptorProvider, returns a fairly standard array of interceptors.
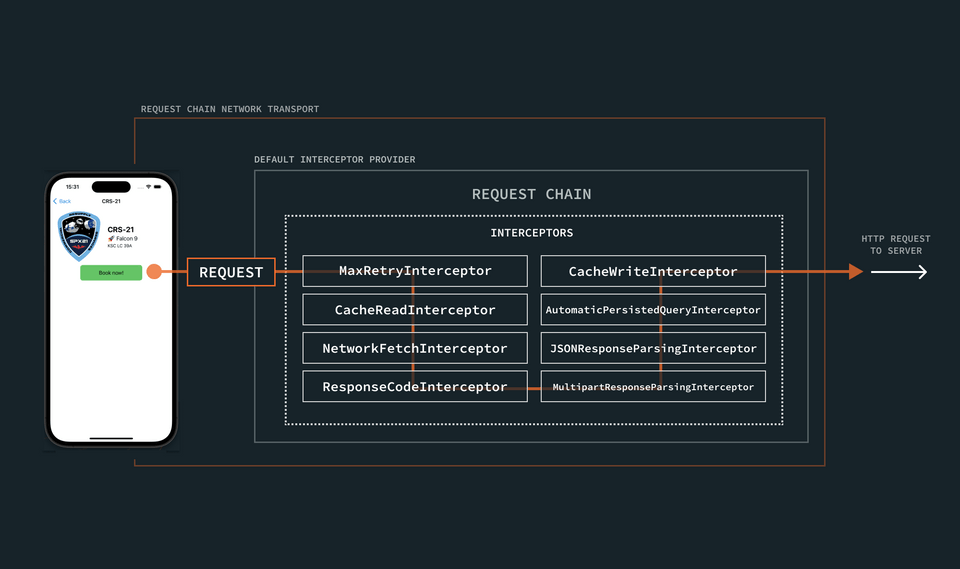
This default sequence of interceptors represents the "chain" that each request passes through on its way to the GraphQL server. But we can also take matters into our own hands: adding our own interceptors to the chain anywhere we need to perform custom actions. In this case, we want to include an interceptor that adds our token to operations.
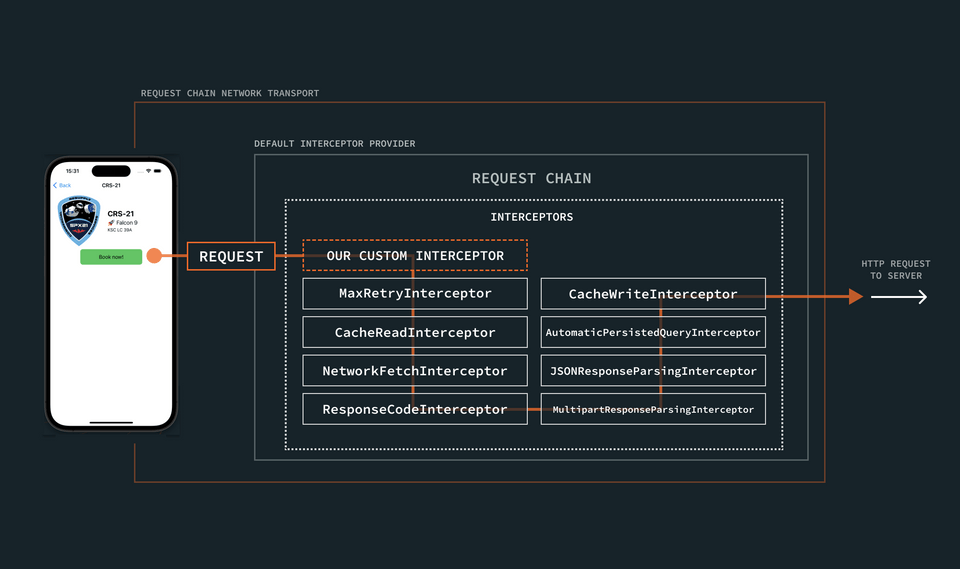
Note: To read more about this pattern, see Request Chain Customization in the Apollo docs.
We'll bring this custom logic into our application in a few steps.
- First, we'll create our
AuthorizationInterceptor. This job of this class will be to add our authorization token (if one is available) to the headers of every request that passes through it. - Next, we'll create a a new
InterceptorProviderfor our app to use. This provider will make sure that our new interceptor is included as part of the request chain that every request passes through. - Then we'll hook up our new
InterceptorProviderto our app!
1. Create AuthorizationInterceptor
First up: creating the interceptor that will add our authorization token to a request's headers.
Go to File > New > File... and create a new Swift file called AuthorizationInterceptor.swift. (Make sure it's added to the RocketReserver target.)
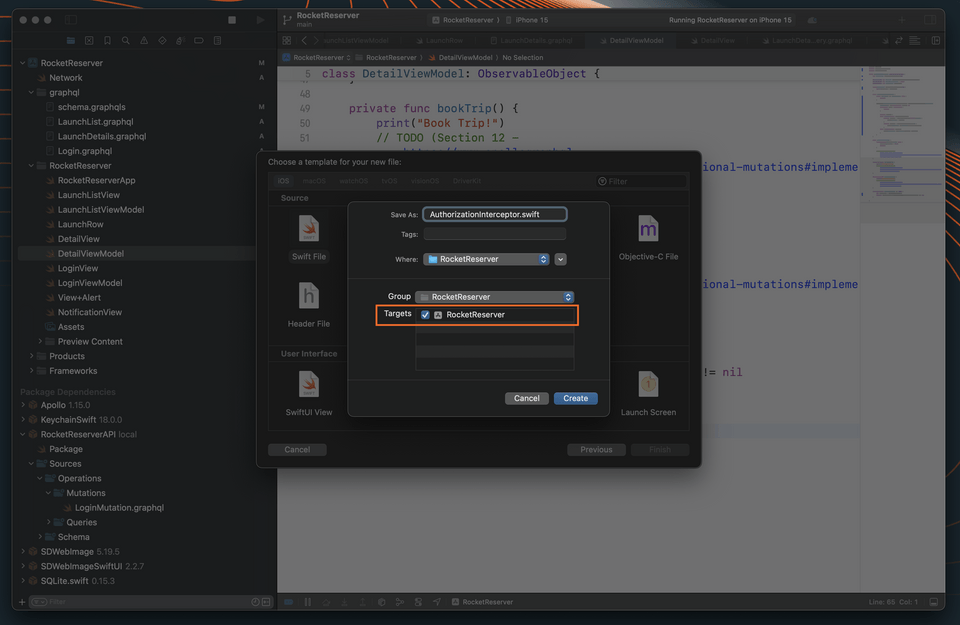
Open that file, and add the following code:
import Foundationimport Apolloimport ApolloAPIclass AuthorizationInterceptor: ApolloInterceptor {public var id: String = UUID().uuidStringfunc interceptAsync<Operation>(chain: RequestChain,request: HTTPRequest<Operation>,response: HTTPResponse<Operation>?,completion: @escaping (Result<GraphQLResult<Operation.Data>, Error>) -> Void) where Operation : GraphQLOperation {// TODO}}
Next, we'll import KeychainSwift at the top of the file so we can access the key we stored in the keychain in the last step of the tutorial:
import Foundationimport Apolloimport ApolloAPI+ import KeychainSwift
Then, we'll replace the TODO within the interceptAsync method with code to get the token from the keychain, and add it to our headers if it exists:
let keychain = KeychainSwift()if let token = keychain.get(LoginView.loginKeychainKey) {request.addHeader(name: "Authorization", value: token)}chain.proceedAsync(request: request,response: response,interceptor: self,completion: completion)
Our app is already configured to use the DefaultInterceptorProvider: it's the class that creates the RequestChain consisting of the array of interceptors each request should flow through.
We still want to use the DefaultInterceptorProvider's request chain (it provides a lot of helpful interceptors, after all!), but we also want to make sure that our new AuthorizationInterceptor runs before all the other interceptors in the chain. We can achieve this by subclassing the DefaultInterceptorProvider class, and inserting our new interceptor at the start of the chain.
Create NetworkInterceptorProvider
Go to File > New > File... and create a new Swift file called NetworkInterceptorProvider.swift. (Make sure it's added to the RocketReserver target.)
Add the following code to insert the AuthorizationInterceptor before the other interceptors provided by the DefaultInterceptorProvider:
import Foundationimport Apolloimport ApolloAPIclass NetworkInterceptorProvider: DefaultInterceptorProvider {override func interceptors<Operation>(for operation: Operation) -> [ApolloInterceptor] where Operation : GraphQLOperation {var interceptors = super.interceptors(for: operation)interceptors.insert(AuthorizationInterceptor(), at: 0)return interceptors}}
Note: Another way to do this would be to copy and paste the list interceptors provided by the DefaultInterceptorProvider (which are all public), and then place our custom interceptors in the points in the array where we want them. But because we just want to place our custom interceptor at the front of the list, it's simpler to subclass.
Use the interceptor
Next, return to the Network class. Replace the ApolloClient with an updated lazy var which creates the RequestChainNetworkTransport manually, using your custom interceptor provider:
class Network {static let shared = Network()- private(set) lazy var apollo = ApolloClient(url: URL(string: "https://apollo-fullstack-tutorial.herokuapp.com/graphql")!)+ private(set) lazy var apollo: ApolloClient = {+ let client = URLSessionClient()+ let cache = InMemoryNormalizedCache()+ let store = ApolloStore(cache: cache)+ let provider = NetworkInterceptorProvider(client: client, store: store)+ let url = URL(string: "https://apollo-fullstack-tutorial.herokuapp.com/graphql")!+ let transport = RequestChainNetworkTransport(interceptorProvider: provider, endpointURL: url)++ return ApolloClient(networkTransport: transport, store: store)+ }()}
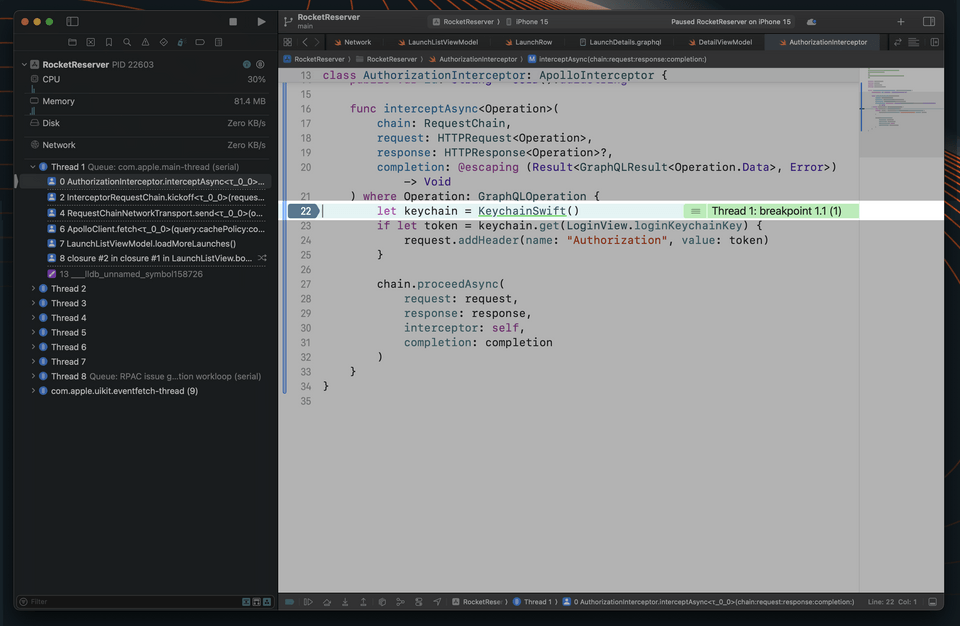
Great! Now, let's return to AuthorizationInterceptor.swift. Click on the line numbers to add a breakpoint at the line where we've instantiated the Keychain:
let keychain = KeychainSwift()
Build and run the application. Whenever a network request goes out, that breakpoint should now get hit. If we're logged in, our token will be sent to the server whenever we make a request!
Now let's make sure that we remove the breakpoint going forward.
Up next
Now that our operations are being authenticated, it's time to define additional mutations to book and cancel trips.
Share your questions and comments about this lesson
This course is currently in
You'll need a GitHub account to post below. Don't have one? Post in our Odyssey forum instead.