Overview
In this lesson, we will:
- Learn about the project we're working on
- Set up our graph
- Set up our AI assistant, Claude
Introducing Airlock
Want to book a trip to new, exciting, sometimes-fictional places in the vast universe? Enter Airlock!
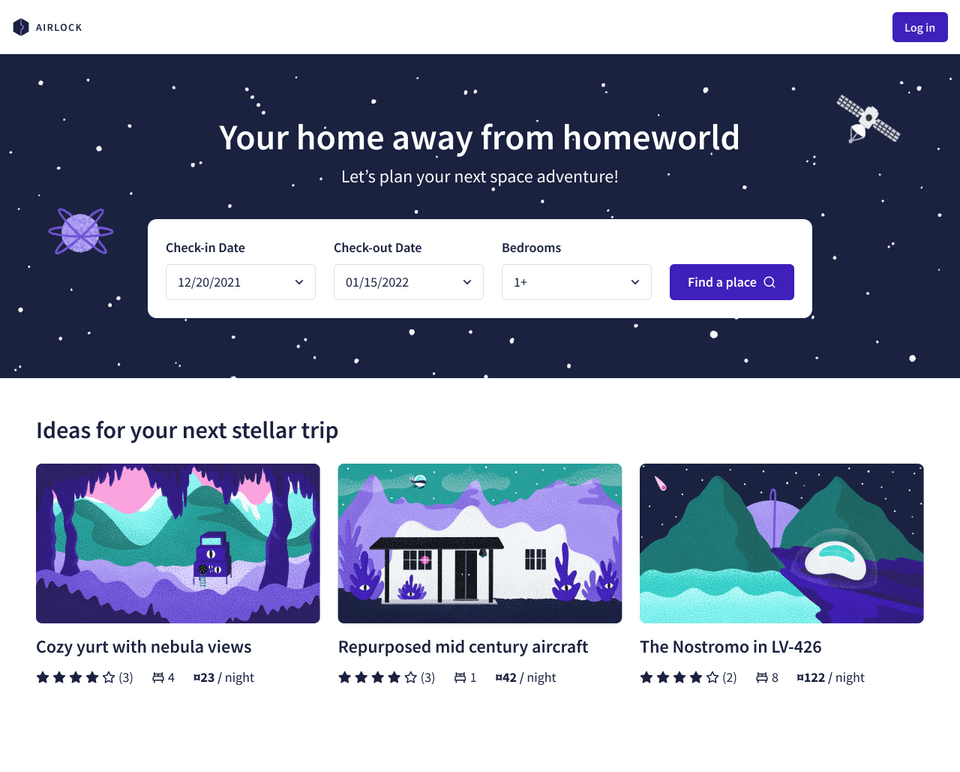
With Airlock, you can find listings that meet your dates of choice and the number of beds you'll need. Learn what each place is all about and what amenities it offers, and if you're interested, you can book your stay in one click (provided you have enough space credits in your wallet of course)!
Setting up our project
Our Airlock graph is composed of multiple smaller graphs called subgraphs. We'll start with two subgraphs: listings and accounts.
We'll walk through how to set up our project, step by step:
- Clone the repository that contains our subgraph server for listings.
- Create a graph in GraphOS. This is where our supergraph and all the details about its subgraph schemas will live.
- Publish each subgraph schema.
- Set up our AI assistant, Claude. Like many other contemporary LLMs, it excels in text generation, answering questions, and assisting with a variety of tasks.
Let's get to it!
Step 1) Clone the repository
In your terminal, run the following command to clone the repository.
git clone https://github.com/apollographql-education/odyssey-mcp-listings.git
This is a basic subgraph server all about listings. We'll add more subgraphs to our graph as we go along, but we've cloned this one locally so that we can make specific schema changes later on.
In your terminal, navigate into the odyssey-mcp-listings directory and run the following commands.
First, to install the dependencies.
npm install
And then to boot up the server.
npm run dev
We should see some output that the server is running on port 4001. And we're good to move on!
Step 2) Create a graph in GraphOS
You'll need an Apollo GraphOS account and at least Rover v0.35.0 installed.
Sign up for an Apollo GraphOS account
Check your plan: This course includes features that are only available on the following GraphOS plans: Developer, Standard, or Enterprise.
Don't have an account yet? Create one now.
You must have Graph Admin or Org Admin role to create graphs and follow along with the course.
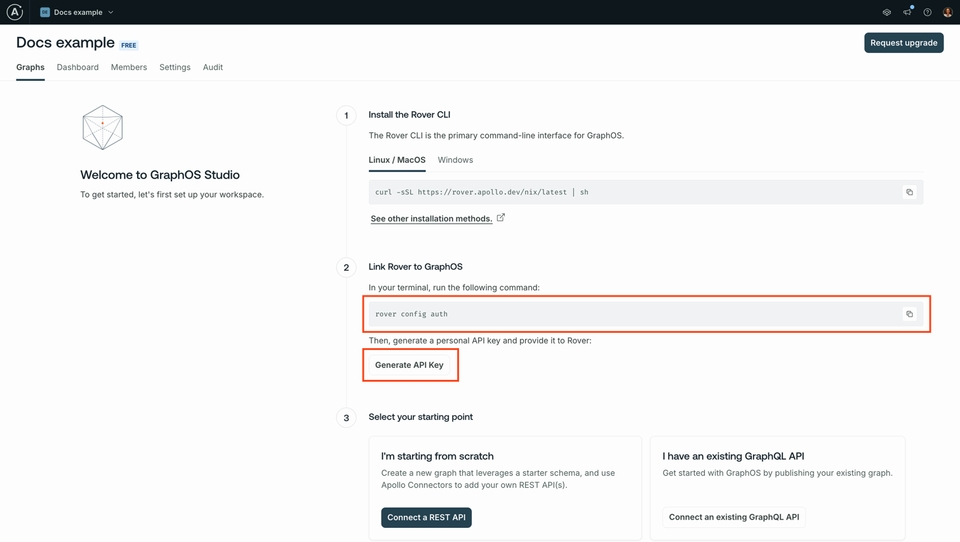
Install and authenticate Rover
Create your graph
Let's go to Studio in the browser. On our organization homepage, click on Add new graph and select Connect an existing graph from the dropdown.
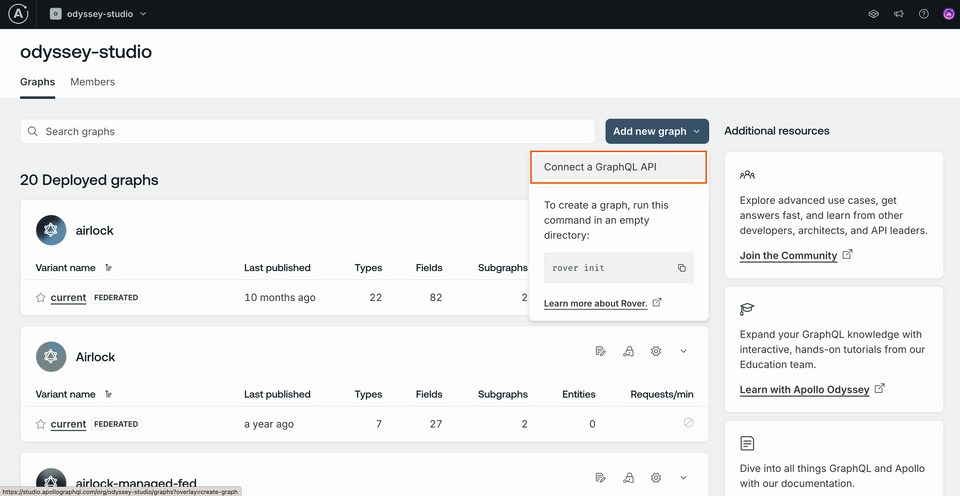
This opens up a modal where we can give our graph a title.

Leave the other defaults as they are, and click Next. We'll see some different options for publishing our subgraph schemas: Schema Document if we have access to the local schema, and Introspection if we have a running service we can introspect. Let's click on the Introspection tab.
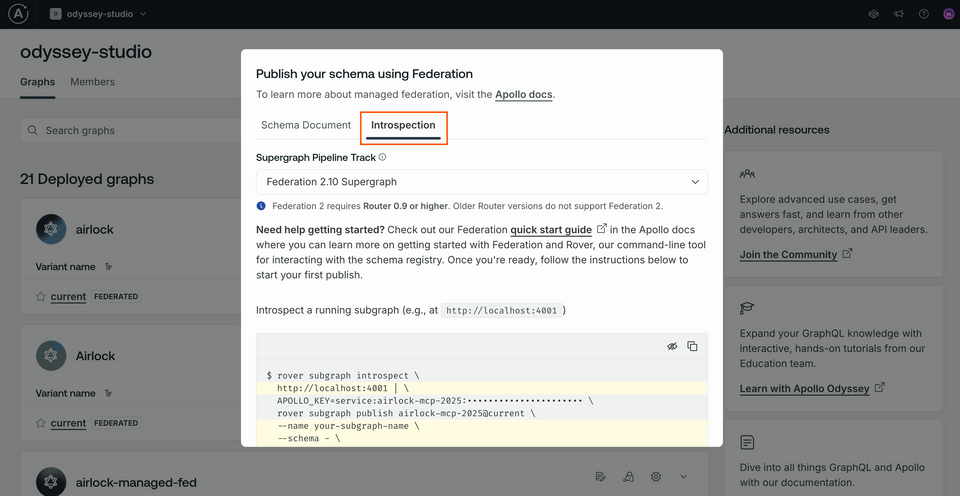
Scrolling down, we'll find all the details we need to run the rover subgraph introspect and rover subgraph publish commands in tandem; we just need to need to swap in the details.
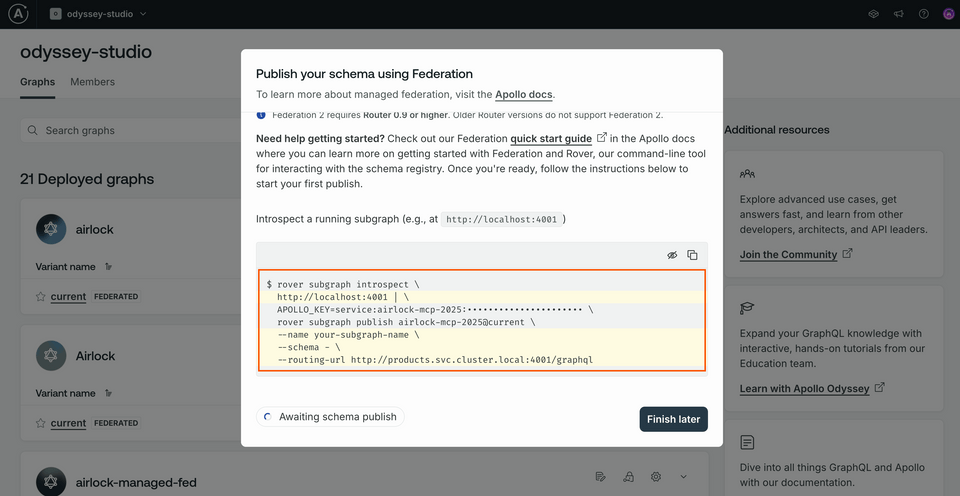
Copy the command somewhere safe, you'll need the APOLLO_KEY and the APOLLO_GRAPH_REF (what comes right after rover subgraph publish) values again.
Let's start publishing our subgraphs.
Step 3) Publish subgraph schemas
We'll initialize our graph with two subgraph schemas: accounts and listings.
Publishing accounts
Let's start with accounts. This service is running remotely at (https://rt-airlock-subgraphs-accounts.herokuapp.com/).
We'll first introspect, or read in, the contents of the running service, and then pipe the schema into our publish command. Be sure to swap in your own unique <YOUR_APOLLO_GRAPH_REF>, which you can find in the Studio modal from the previous step; it should look something like my-graph-id@current.
rover subgraph introspect https://rt-airlock-subgraphs-accounts.herokuapp.com/ \| rover subgraph publish <YOUR_APOLLO_GRAPH_REF> \--name accounts \--schema - \--routing-url https://rt-airlock-subgraphs-accounts.herokuapp.com/
Publishing listings
Make sure the listings service is still running at localhost:4001.
In the terminal, run the rover subgraph publish command in the root of the project directory. (We've omitted the introspect step here, since we already have the schema in our local files.)
rover subgraph publish <YOUR_APOLLO_GRAPH_REF> \--name listings --schema ./src/schema.graphql \--routing-url http://host.docker.internal:4001
Again, make sure you're using your own unique <YOUR_APOLLO_GRAPH_REF> value.
Everything working? Let's take care of our last step: setting up our AI assistant, Claude.
Step 4) Installing and running Claude
Head to Claude's Download page and select the option for your operating system. When the download completes, launch the application. You'll need to sign up for an account with Anthropic, but we won't do anything in this course that requires a paid subscription.
Once you've completed the onboarding process, you should see a chat interface where you can write your first messages to Claude.
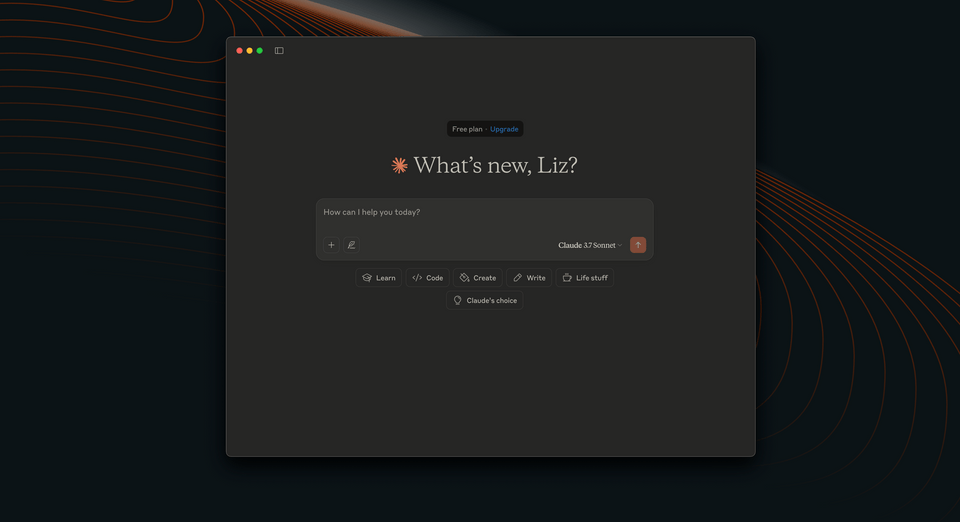
That's it for now!
Up next
In the next lesson, we'll set up the Apollo Runtime Container: a container that spins up a local GraphOS Router (to communicate with the subgraphs) and the MCP server (to expose the various tools our AI assistants can access).
Share your questions and comments about this lesson
This course is currently in
You'll need a GitHub account to post below. Don't have one? Post in our Odyssey forum instead.
