Overview
In this lesson, we will:
- Recap MCP operations and how they become tools
- Introduce persisted queries
- Use a manifest file to create a list of persisted queries for our graph
MCP operations: a recap
Let's quickly recap how our GraphQL queries can be equipped in an AI assistant's arsenal as handy tools.
It all starts with the MCP server, sitting between our APIs and our assistants. Within the MCP server, we can define the various GraphQL operations we want to get packaged up as invokable tools. In the process, each of these tools gets a name, a description, and a run-down of any of the inputs it. The MCP server presents these tools to any AI assistants that connect with it!
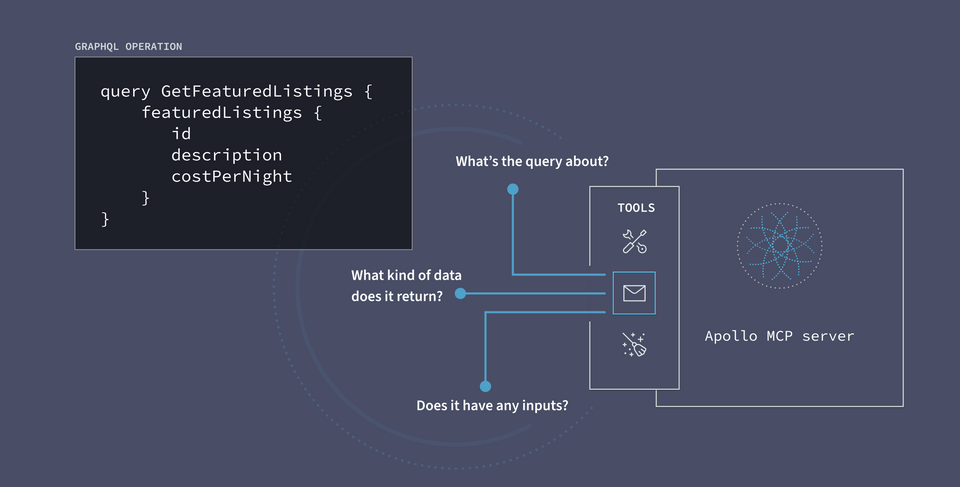
This means that an assistant helping out a customer can review its list of tools (the names, descriptions, and required inputs) and use its built-in language processing strength to decide which tool is most appropriate to call at a particular moment.
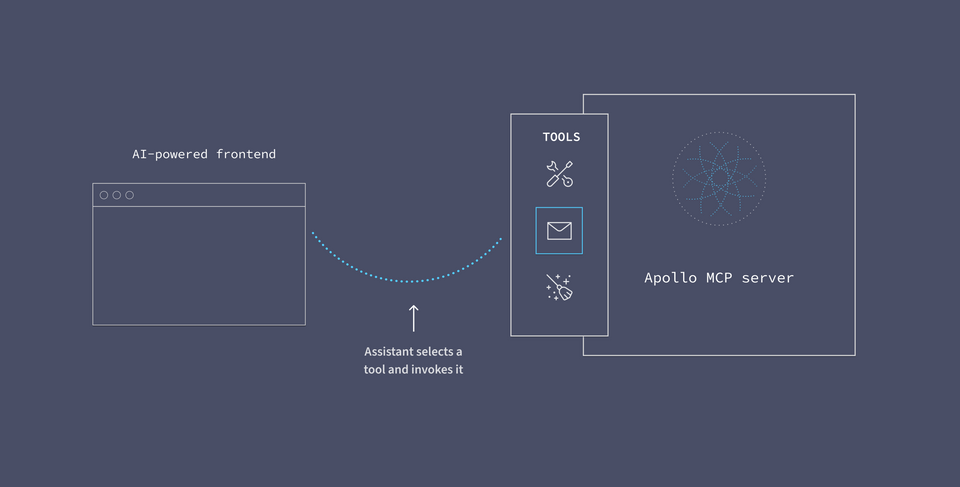
The assistant makes its selection, tells the server which tool it would like to use, and the MCP server runs the actual logic behind the scenes—in this case, executing the GraphQL query we defined ahead of time.
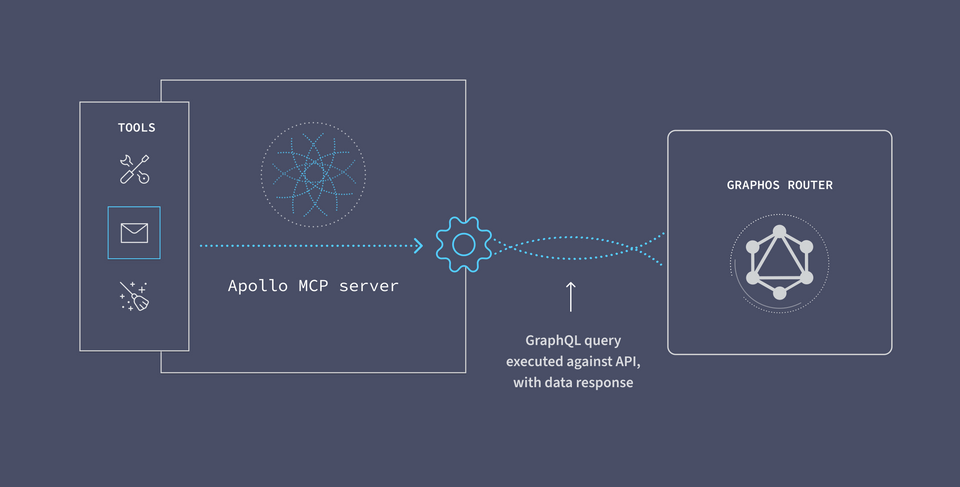
This keeps the amount of detail an assistant needs about our backend system to a minimum. The MCP server houses these operations, which then get passed to the assistant as its tools.
So, what's the issue?
What we've just recapped is a great way to handle defining operations ahead of time and exposing them to an assistant as tools. The problem is that most production graphs already have a set of permitted operations that can be executed against their schema, called persisted queries. And equipping our MCP server with this same list of operations means duplicating it across different domains—domains that can easily get out of sync and inconsistent.
The Apollo MCP server gives us another option beyond housing all of our permitted operations within the server itself. When we connect to our GraphOS account, the server can access the list of permitted operations we've already defined. No need for manual work keeping our MCP operations in sync with our graph's—with persisted queries in GraphOS, we can have a single source of truth.
Persisted queries as tools
Check your plan: This course includes features that are only available on the following GraphOS plans: Developer, Standard, or Enterprise.
To see persisted queries in action, let's return to our graph's page in Studio. We can navigate to our graph's Persisted Queries by clicking the option from the left-hand menu.
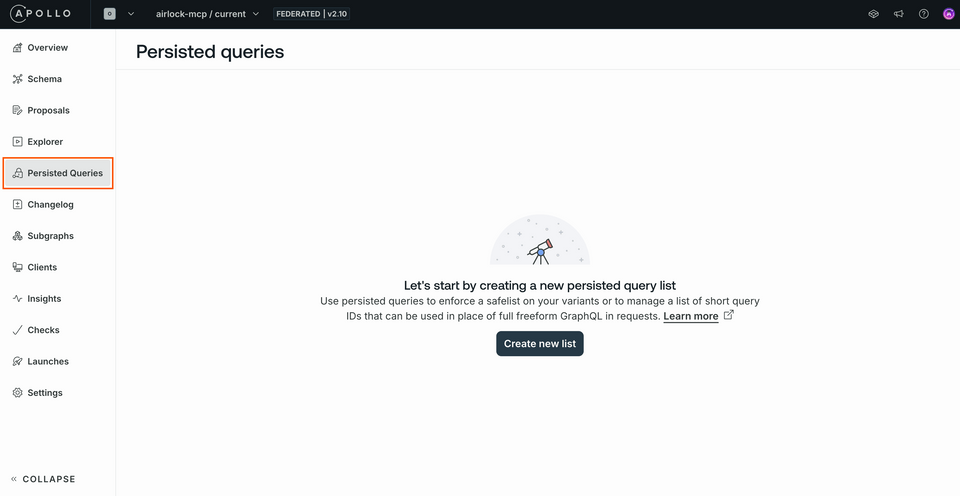
For our newborn graph, we should see that we haven't actually defined any operations yet. Let's click the Create new list button to start defining our first queries.
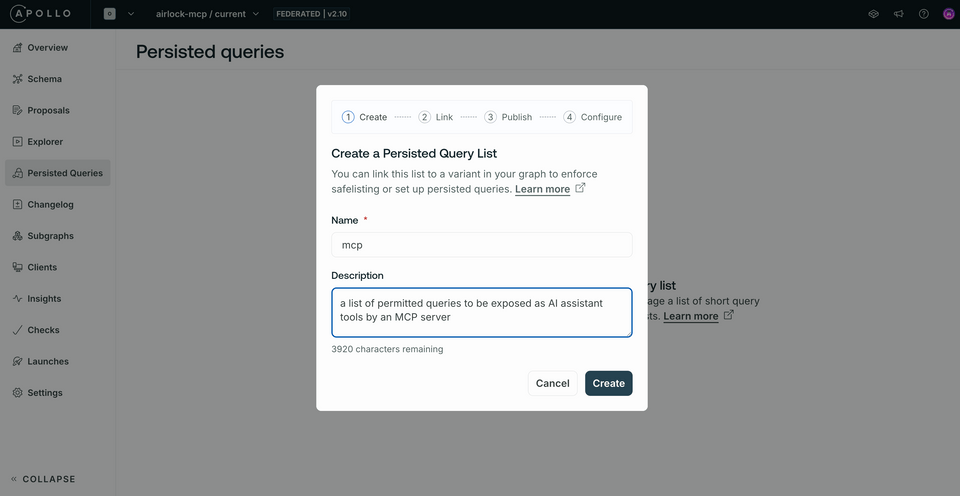
This triggers a modal where we can provide our list a specific name and description. We'll call ours mcp then hit Create.
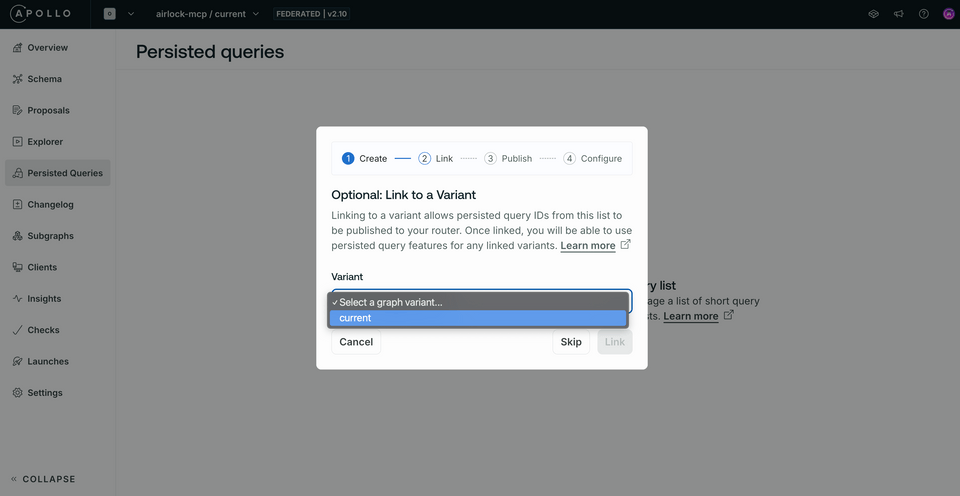
Next, we'll have the option to select a specific graph variant that our list should apply to. We've only got one variant of our graph for now, so click the dropdown and select current. Then click Link.
The next screen provides us with an ID for our persisted query list. Additionally, we'll see a Rover command we can use to publish a json file of operations to this list. We've already provided a file to start with in our repository; let's explore that next.
The persisted queries manifest
In the root of your repo, you'll find a file called persisted-query-manifest.json. It contains a JSON object with an array of operations. Each object in this array represents a particular GraphQL operation that we're going to include as a persisted query. You'll notice that each operation has three properties: a unique id, a name, type and the body of the operation itself.
{"format": "apollo-persisted-query-manifest","version": 1,"operations": [{"id": "4654ad9c7fed44b407e23605307fec2b6787ba42859ca57c53545a90618c4dfd","name": "GetFeaturedListings","type": "query","body": "query GetFeaturedListings {\n featuredListings {\n id\n description\n costPerNight\n locationType\n numOfBeds\n __typename\n }\n}"}// ... other objects]}
The manifest of operations you publish needs to follow a specific format—indicated by the "apollo-persisted-query-manifest" value at the top of the object—and we've generated ours using the @apollo/generate-persisted-query-manifest package as described in the Apollo Client documentation.
Note: The Apollo Client libraries for Web, Kotlin, and iOS each provide a mechanism for generating a manifest file. Check out the official documentation on generation methods for more detail.
Publishing the manifest
We can use another Rover command, rover persisted-queries publish, to publish the operations in this manifest file to our new persisted queries list in Studio.
Let's set up that command. In a new terminal window, navigate to the root of your project directory so we can pass a relative path to our JSON file. Here's what the command looks like—be sure to pass in your own unique graph ref before running it!
rover persisted-queries publish \<YOUR GRAPH REF> \--manifest ./persisted-query-manifest.json
We should see some successful output.
Publishing operations to list mcp for <GRAPH REF> using credentials from the default profile.Successfully added 3 operations, creating revision 1 of mcp, which contains 3 operations.
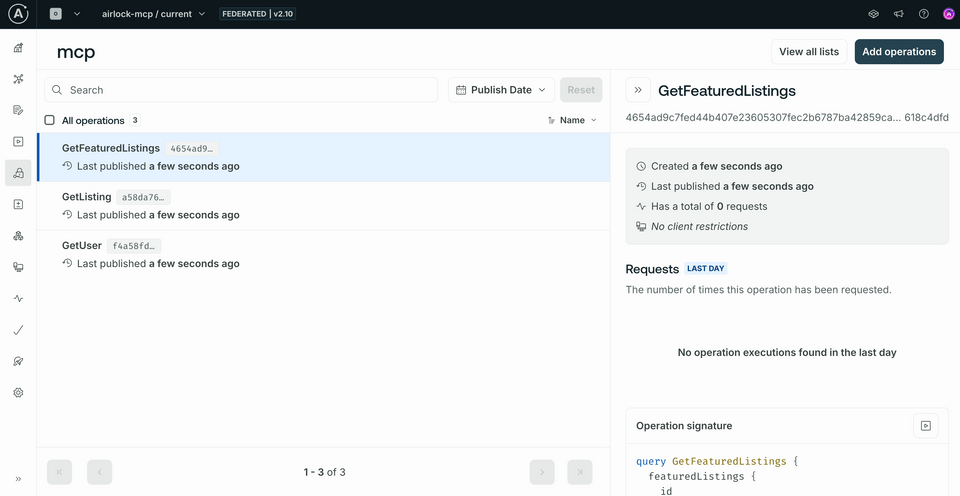
Back in Studio, let's refresh the page. We should see three of our operations successfully registered in our mcp list!
Connecting persisted queries to an MCP server
Let's return to our Docker process running the "all-in-one" container. We need to update how we're running the router: specifically, we need to tell it to permit persisted queries as part of its process.
Open up Docker Desktop, and find your running container. Click the three little dots on the right of the container row, then select View files.
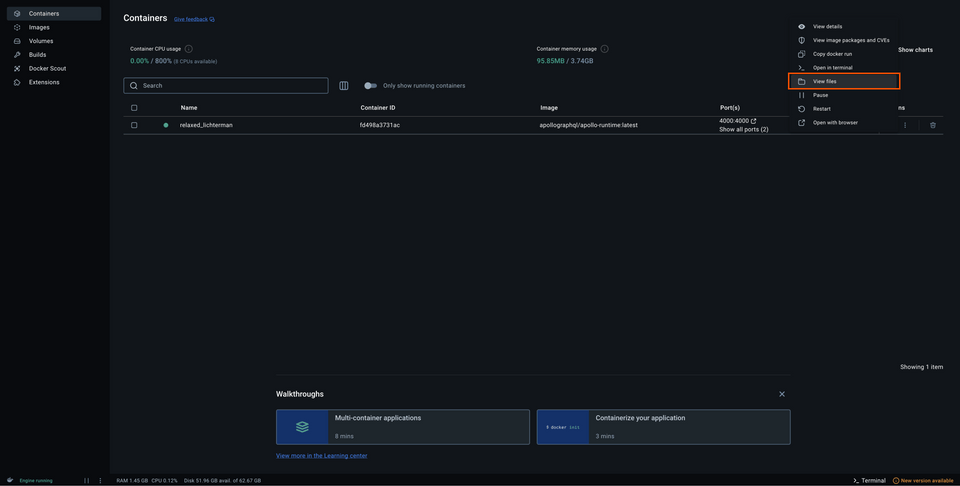
This takes you to the file structure inside the container. Next, we'll jump into the config file, and right-click on router_config.yaml. Select Edit file.
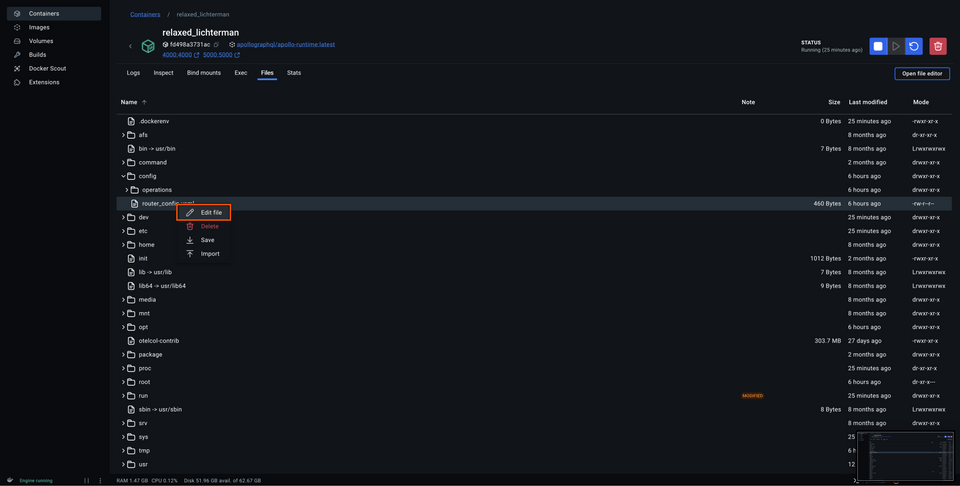
Inside, paste the following contents. We want persisted_queries to be at the top root level (the same level as supergraph).
supergraph:listen: 0.0.0.0:4000introspection: trueinclude_subgraph_errors:all: true# ... other config propertiespersisted_queries:enabled: true
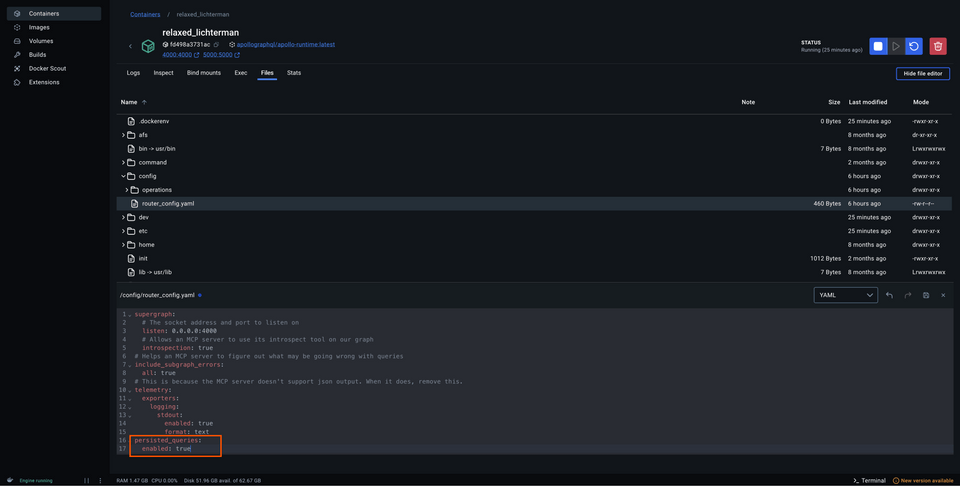
With our changes saved, we'll restart the container.
Now in addition to the messages saying that our GraphQL API and MCP servers are running, we should see some relevant output about the tools that we registered: the three that we included in our manifest!
Tool GetFeaturedListings loaded with a character count of 482. Estimated tokens: 120Tool GetUser loaded with a character count of 333. Estimated tokens: 83Tool GetListing loaded with a character count of 1301. Estimated token: 385
Cool, now let's get Claude all hooked up.
Connecting Claude
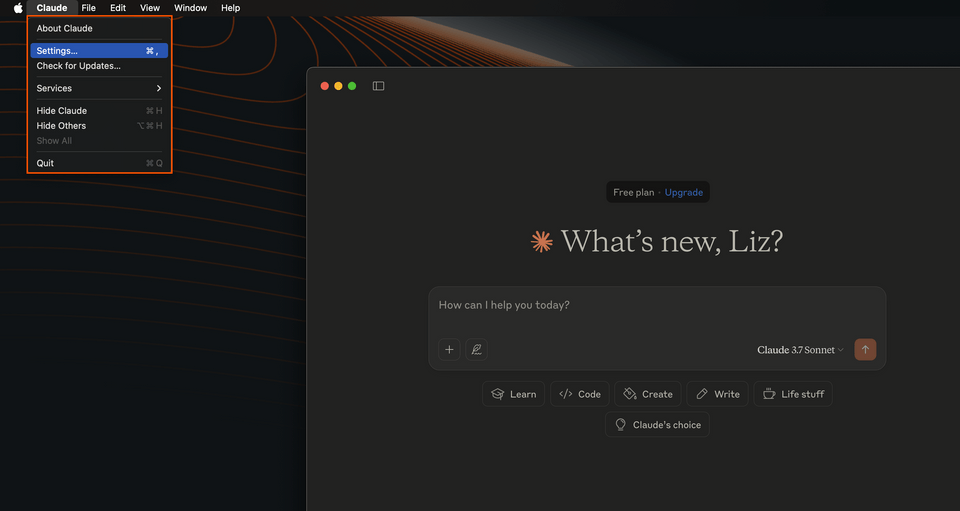
Let's return to our Claude application. In the Application tool bar, open up Settings. (On MacOS, this is accessible through the main Claude menu dropdown.)
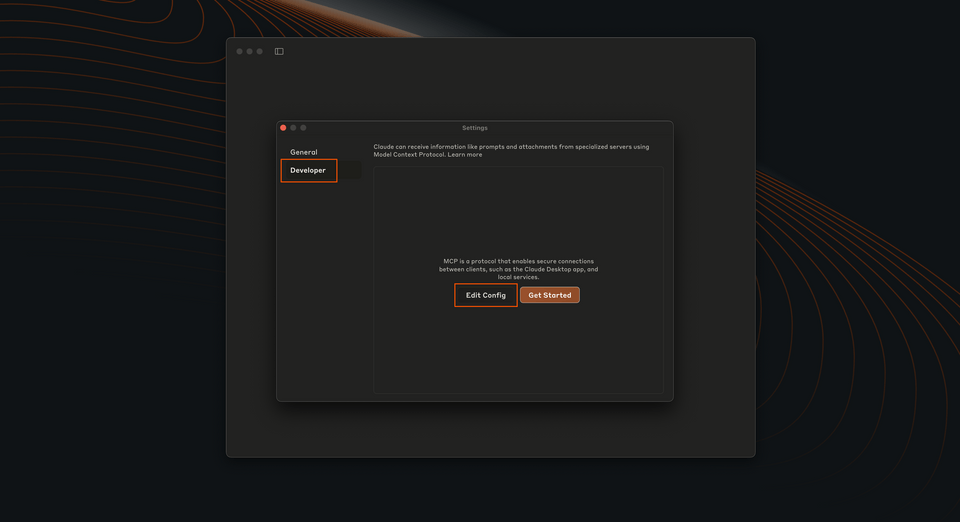
Next, we'll select the Developer option from the left-hand menu. In this window we'll see a short overview about Claude's compatibility with servers that use MCP.
To equip Claude with a connection to our MCP server, we'll click the button that says Edit Config.
This will open a new file system window, opened to a particular file in the Claude application folder called claude_desktop_config.json. Right-click on this file, and let's open it up in our code editor.
What we'll see is a pretty simple setup to start! If you're running a fresh installation of Claude, you'll probably see an empty mcpServers config:
{"mcpServers": {}}
Paste in the following configuration:
{"mcpServers": {"airlock": {"command": "npx","args": ["mcp-remote","http://127.0.0.1:8000/mcp","--transport","http-first"]}}}
Save the file, and return to Claude. We won't see anything right away, so let's restart the application.
Chatting with Claude
We shouldn't see anything right away in Claude, but if we look closer there's a little button under the chat box where we can see the available tools we've equipped Claude with. We should see all three of our persisted queries listed here.
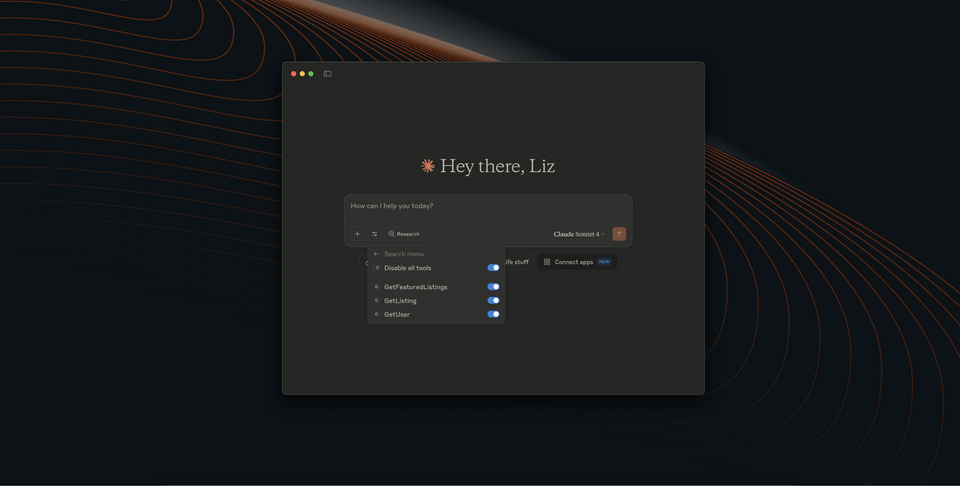
We also recommend turning off the Web search toggle to better isolate how Claude is using our MCP server to answer questions.
Let's ask Claude a basic question about featured listings.
What are the featured listings today?
And as we expect, Claude tries to invoke one of our tools.
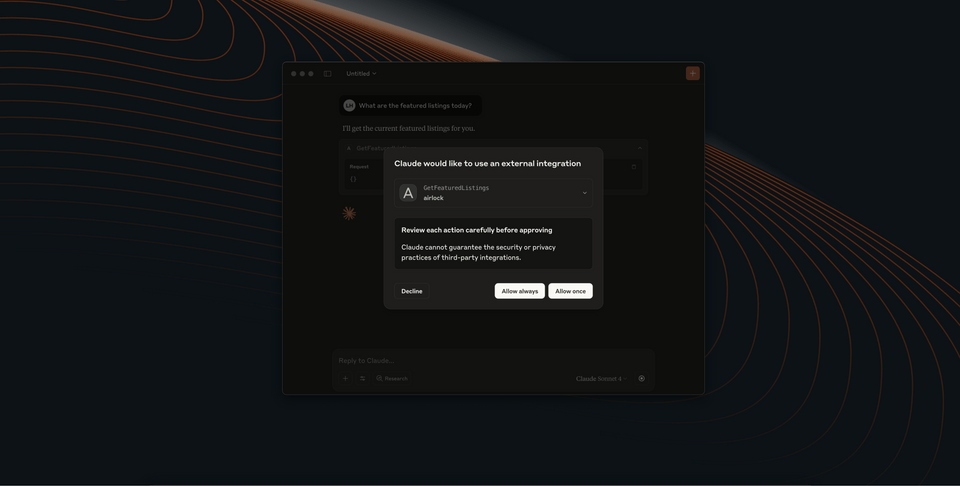
When we approve this, we can confirm that our persisted query GetFeaturedListings is working! We can see that a tool has been called, and pretty quickly we'll get that data back. Great, let's try another question: pick one of the featured listings, and ask Claude for some more information about it.
Can you tell me more about the Cozy Yurt in Mraza?
In response, Claude might make two requests: it would be reasonable for our assistant to invoke the GetListing tool for more information about the listing and, upon receiving that data, decide to call GetUserDetails for host information as well. Our tools are working!
We were able to define our persisted queries in a list directly in Studio. When we pass our graph credentials to give the MCP server access to this list of operations, it's able to make tools out of them that assistants can access and call.
Practice
Key takeaways
- With persisted queries, we can define a set of operations we want AI assistants to have access to in the form of tools. This allows us to predefine the operations we permit assistants to run, without worrying about overreach or access to sensitive information.
- We create a new list of persisted queries directly in GraphOS Studio. We can link this list to a particular graph variant, and then publish a manifest file which contains all the details about each operation we add.
- We can publish the persisted query manifest using the Rover CLI's
rover persisted-queries publishcommand. - To use persisted queries, our local router needs the
persisted_queriesproperty enabled in itsrouter-config.yamlconfiguration file.
Up next
Let's take things a step further by enabling Claude to introspect our schema, giving it access to all of our graph's types and fields.
Share your questions and comments about this lesson
This course is currently in
You'll need a GitHub account to post below. Don't have one? Post in our Odyssey forum instead.