Overview
Sometimes predefined tools won't suffice when our AI assistant is faced with new user requests. Let's give the assistant another option!
In this lesson, we will:
- Enable introspection in the MCP server
- Set up a contract in GraphOS
GraphQL introspection
We can use the process of introspection to learn more about a graph's schema and the types of queries that can be executed. An introspection query is a special kind of query that we send for exactly this information.
Introspection is powerful because it permits users or assistants to create their own queries, which can address their needs or questions more precisely than predefined queries.
When faced with a user request, an AI assistant can take a look at the graph's schema and create the most relevant and precise query needed to resolve the request. But introspection comes with a downside: by providing all the details about a schema, we might inadvertently introduce security concerns. Bad actors can end up seeing more than they should, which can result in unauthorized queries being executed against the graph.
We want to be able to control how much of the schema an assistant can access. This lets us fine-tune how much of the graph we're exposing, while still giving the assistant the flexibility to create queries in the moment they're needed!
We'll start by exploring how we enable introspection in our MCP server, then look into how we can govern and secure it.
Enabling introspection
Using the Apollo Runtime Container, we can enable introspection by passing another environment variable: MCP_INTROSPECTION.
Let's stop our container, and add the new flag to our command before restarting it.
docker run \--env APOLLO_GRAPH_REF=<YOUR GRAPH REF> \--env APOLLO_KEY=<YOUR APOLLO KEY> \--env MCP_ENABLE=1 \--env MCP_INTROSPECTION=1 \--rm -p 4000:4000 -p 5000:5000 \ghcr.io/apollographql/apollo-runtime:latest
Next, we'll restart Claude to refresh its connection to our server.
Back in our chat interface, we should see that our airlock tools have increased in number to include execute as well as introspect: this is because we've given Claude to both introspect from our schema (in the process, devising its own queries) as well as execute them.
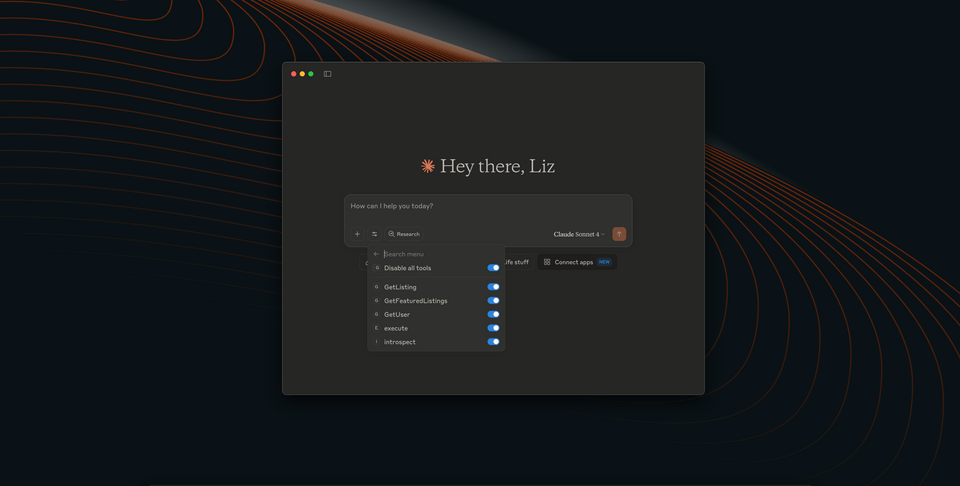
Let's ask a broader question that prompts Claude to reason about the data it might need to request.
What can you tell me about Airlock's hosts?
Though this process is not deterministic (we can't say for sure what Claude will do), we might see a dialog box asking for permission to use an external integration.
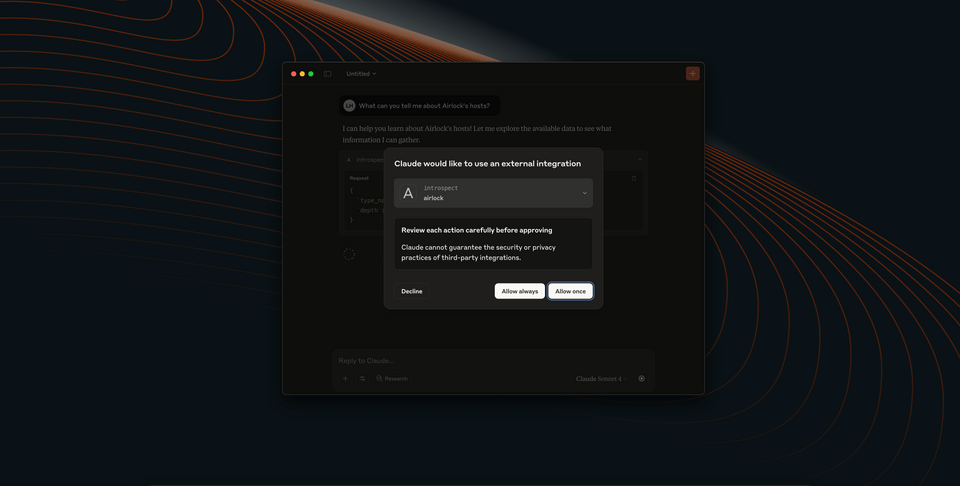
And because we've enabled introspection, we might very well see that Claude's requesting an introspect action; in other words, Claude is asking if it can learn more about our schema to determine exactly what it needs to request next. If we approve this request, pretty soon we're likely to see another. Claude has used the information it compiled about our schema to put together a new query, one that requests precisely the information we're after. (Of course, you might see Claude choose to use one of its available tools instead!)
Try out some other questions: see if you can challenge Claude to introspect more information from the schema to create its next queries to answer your questions!
Introducing contracts
Our setup currently includes our three persisted queries, as well as the ability for Claude to introspect any other information it might need from the schema. And as we mentioned earlier in this lesson, opening up your entire graph so that anyone can introspect it is not a great idea. To mitigate this security risk, we can define a specific subset of our schema to open up for introspection. We do this in GraphOS using contracts.
A contract defines the exact pieces of a schema that are accessible by a certain graph variant. We can create different graph variants, consisting of different types and fields from our schema, for different clients. This allows us to expose certain functionality only to those with the authorization to perform particular tasks. So while we won't give our AI assistants admin-level access to our graph and all its possible operations, we can define a reliable and safe section of the schema that Claude can access and use to come up with its own queries.
Creating a contract
Check your plan: This course includes features that are only available on the following GraphOS plans: Developer, Standard, or Enterprise.
Let's return to our graph in Studio. We can access the Contracts menu by navigating to our graph's Settings.
On the main tab (labelled This Variant (current)), we should see an option in the side menu called Contracts.
Clicking this, we'll find that we have... 0 contracts! Let's click the button there labeled Create contract.
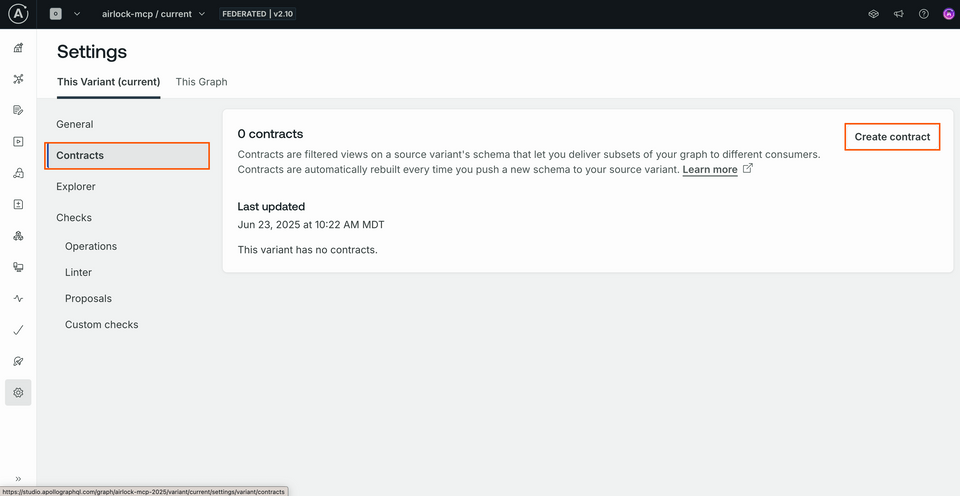
Note: We're creating this contract based on our graph's only variant, which we refer to as "current". You can alternatively create a new variant of the graph (such as "mobile" or "partner", depending on who the contract will serve) by clicking to the This graph tab and selecting the Variants menu item. See the official documentation for step-by-step guidance on this process.
We'll see a modal open up where we can provide all our contract details. Let's give this contract the name "assistant", to make it clear that it's intended for AI assistant consumers of the graph. We'll keep the Source Variant set to our graph's only variant, "current".
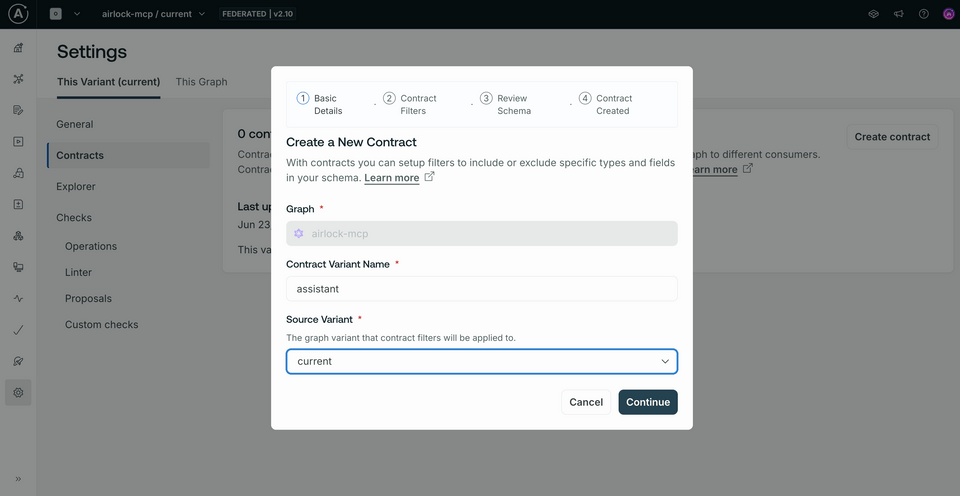
The next step takes us to Contract Filters. These are the rules that we apply to decide what is included and excluded from our resulting contract schema. We do this by specifying particular tags.
Tags are little extra bits of text we can append to the types and fields in our schema, kind of like annotations. On their own, they don't have any effect; but when we filter based on tags, GraphOS can include or exclude particular portions of the final schema.
Our schema doesn't actually contain any tags yet; we'll add those after. For now, let's say that we want our contract to filter out any of those fields we end up marking with a tag called "internal".
In the "Excluded tags" section, add a tag called internal.
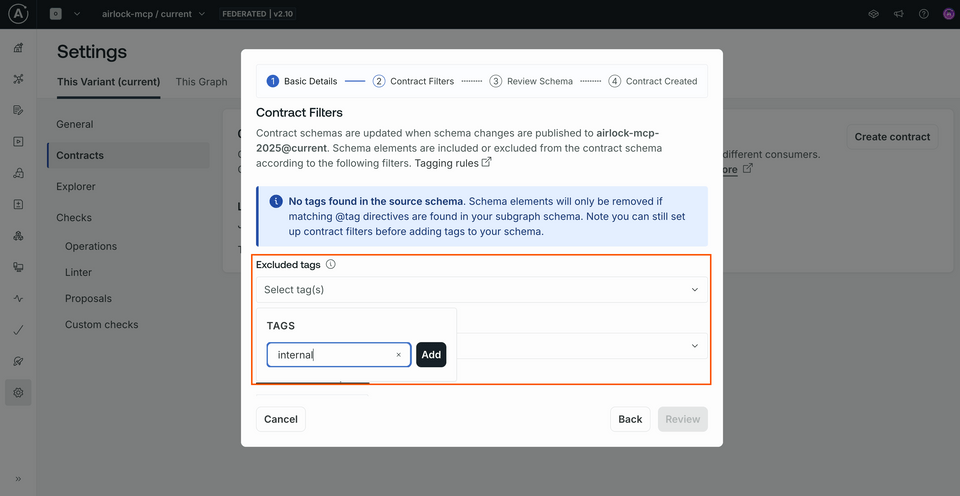
Down at the bottom of the modal, we'll click the Generate Preview button.
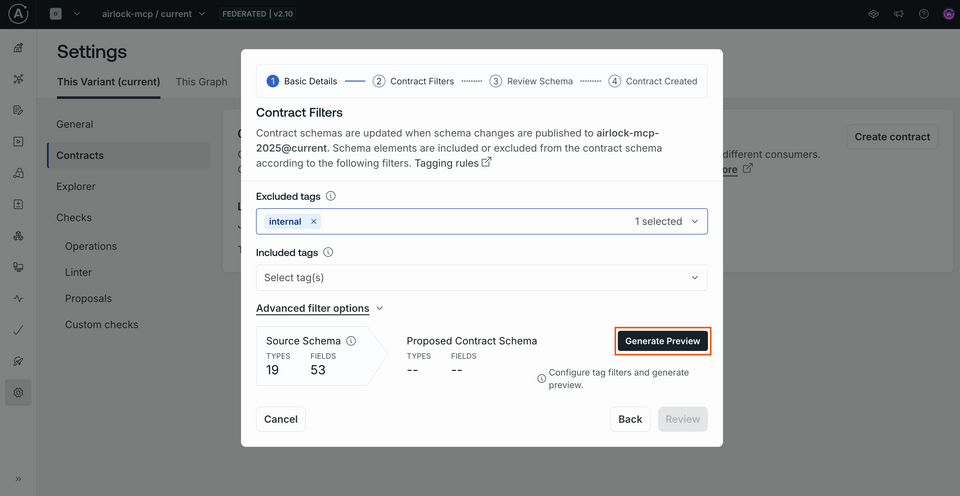
This takes into account the tags that we filtered on, and generates a preview of the schema that will be included in our contract. And... we shouldn't see any difference at all! Our Source Schema and Proposed Contract Schema should be exactly the same. Nothing in the schema has been tagged with "internal" yet, so nothing has been filtered out.
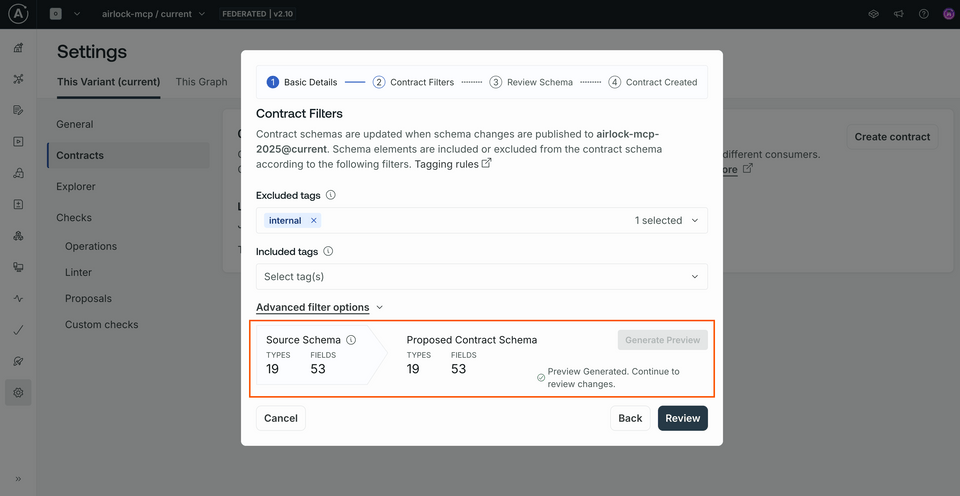
Let's click Review to jump to the next step.
On this next screen we'll have a chance to preview the resulting schema line-by-line. We won't see anything different here yet, so let's click the Create button. We'll see a final summary of our contract details. Hit View launch details.
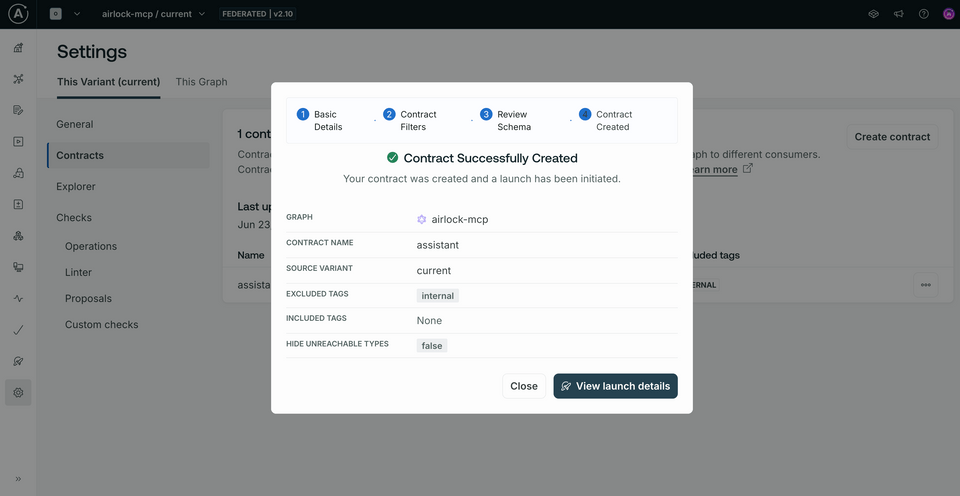
When Studio reloads, we'll find in our graph dropdown that we're now looking at the new contract variant that we created. We can always switch back to our current variant by selecting it from the dropdown, but for now we'll stay here so we can see our changes reflected when we update the schema.
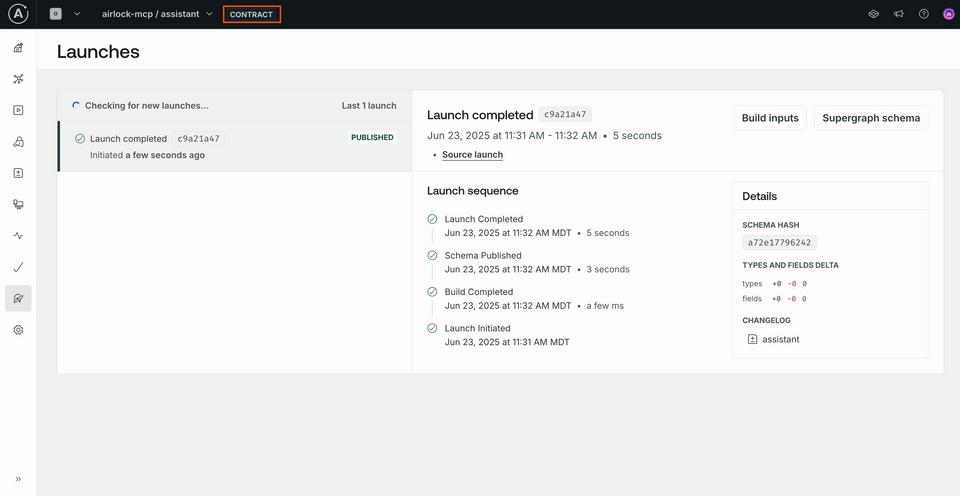
Now let's jump into our schema file locally, and apply that "internal" tag to a few fields so we can see our contract actually at work.
Applying tags
Returning to your code editor, open up the src/schema.graphql file. The first thing we need to do is find our Federation imports at the top of the file and add "@tag" to the array.
extend schema@link(url: "https://specs.apollo.dev/federation/v2.9"import: ["@key", "@shareable", "@external", "@tag"])
In addition to our querying functionality, this schema also includes the types needed to create new listings. These look like good candidates for "internal"-only functionality, so let's take some time to attach our "internal" tag.
Jump down first to the Mutation type. It has two fields, createListing and updateListing, so we can apply our tag to the type as a whole. We do this by first specifying @tag, then passing a pair of parentheses that hold the tag's name value.
type Mutation @tag(name: "internal") {"Creates a new listing"createListing(listing: CreateListingInput!): CreateListingResponse!updateListing(listingId: ID!listing: UpdateListingInput!): UpdateListingResponse!}
When we filter out those types and fields marked with "internal", this entire type will be removed from the resulting schema for our assistant contract variant. This means that our AI assistant won't be able to create or update listings, which is exactly what we want!
Let's do the same for both input types, CreateListingInput and UpdateListingInput.
input CreateListingInput @tag(name: "internal") {"The listing's title"title: String!# ... other fields}"Updates the properties included. If none are given, don't update anything"input UpdateListingInput @tag(name: "internal") {"The listing's title"title: String# ... other fields}
As well as both response types, CreateListingResponse and UpdateListingResponse.
type CreateListingResponse implements MutationResponse @tag(name: "internal") {"Similar to HTTP status code, represents the status of the mutation"code: Int!# ... other fields}type UpdateListingResponse implements MutationResponse @tag(name: "internal") {"Similar to HTTP status code, represents the status of the mutation"code: Int!# ... other fields}
We could also apply these tags field-by-field: for instance, we could make any individual field on the Listing or Amenity types "internal"-only with our tag. But these types look good for now, so let's push up our schema changes.
Publishing schema changes
We'll use the rover subgraph publish command to push our changes to our supergraph in GraphOS. Open up a new terminal window and run the command.
rover subgraph publish <YOUR GRAPH REF> \--name listings --schema ./src/schema.graphql
Be sure to swap in your own unique graph ref before running the command. (And note that we're still publishing our changes to the current variant of our graph!)
We don't need to include the --routing-url argument in this command because we've already set that value, and we're not changing it to a new value.
Checking our changes
Now we can return to Studio to check out how our contract schema has changed. Make sure you've selected the "assistant" variant from the graph dropdown at the top of the screen. Select Schema from the side menu to see the types and fields this contract has access to.
No Mutation type here! Additionally, we won't find the Create and Update types we applied our tag to.
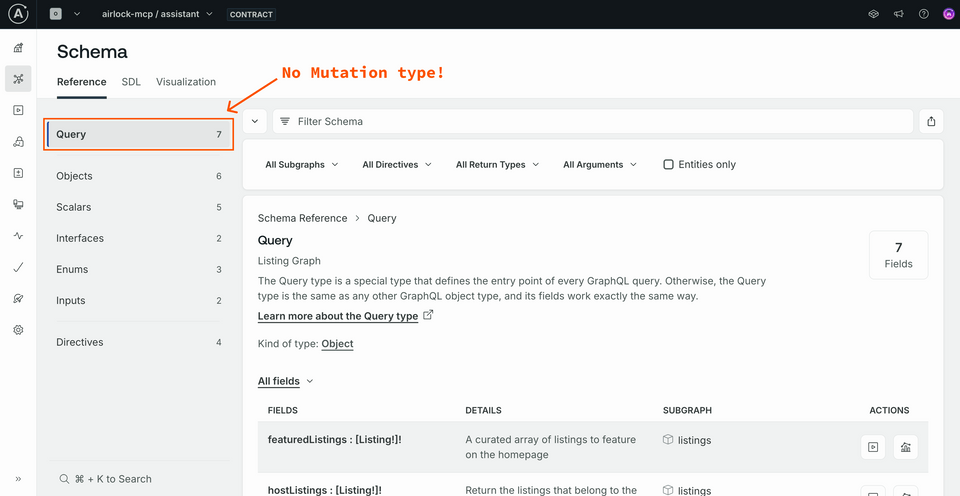
Now let's put this to the test in our assistant.
Testing in Claude
We've set up our contract, but our running Docker process is still based on our graph's current variant: which doesn't have any restrictions on what can be introspected.
Before changing our configuration, let's test the limits of what Claude can see and do in our system. Returning to the chat interface, let's see what it comes up with when we ask whether it's possible to create listings.
Can you check if you're able to create listings on Airlock?
Note: Asking Claude to explicitly check what capabilities it can perform is often the best way to trigger the "introspect" operation.
We'll likely see Claude request to use an external integration, specifically its introspect tool.
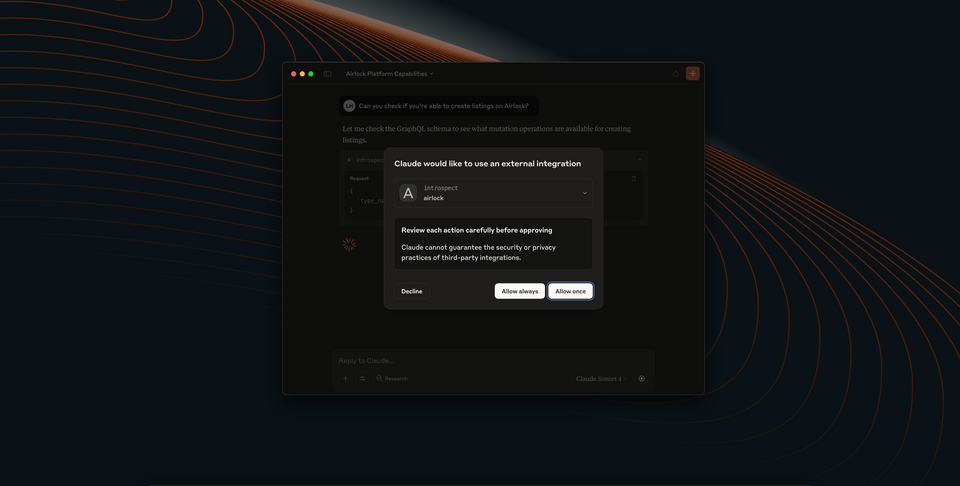
And in response, we might see something like the following.
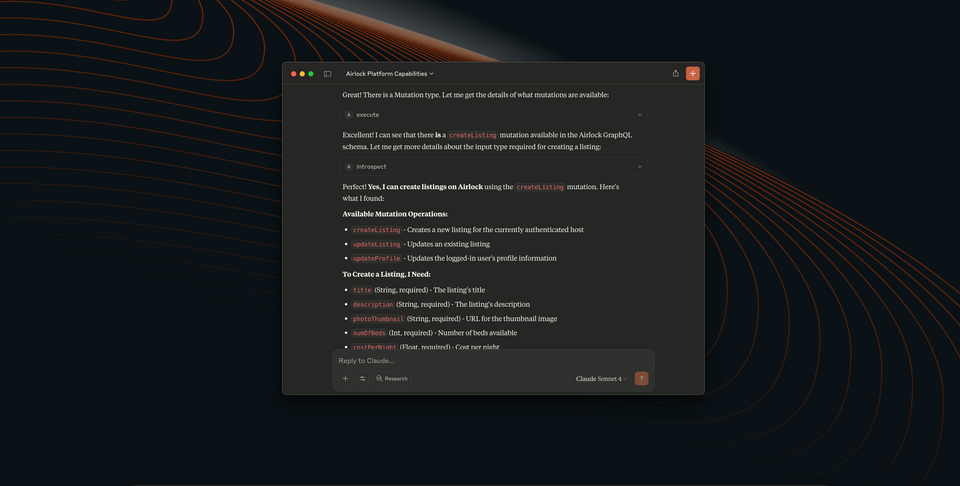
Now let's tell Claude to create a listing.
Can you create a new arctic-themed listing?
As we've already seen several times, Claude will likely prompt us to approve its use of one (or more) external integrations to resolve our request. And with that, we should see new listings created on the fly!
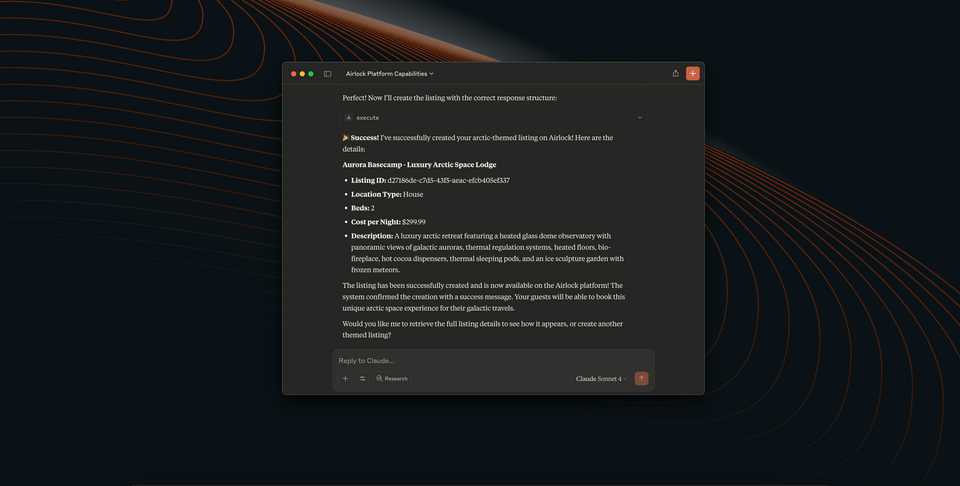
Great, so we can see that creating listings works—that's great in development mode, but we probably need some better safeguards when we're in production, otherwise anyone—including their AI assistants—could bombard us with false listings. Now's the time to return to our contract!
Running the contract router
To connect Claude to our limited contract schema, rather than our full graph, we can update our Docker process. Right now we're running our router with the full schema; we passed in our current variant when we launched the process, which doesn't have any restrictions on included fields at all. We need to stop the process and then tweak the variant we're running to point to our assistant contract variant instead.
Return to the terminal where your Docker process is running, and stop it. We'll replace the @current variant name with @assistant.
docker run \--env APOLLO_GRAPH_REF=<YOUR GRAPH NAME>@assistant \--env APOLLO_KEY=<YOUR APOLLO KEY> \--env MCP_ENABLE=1 \--env MCP_INTROSPECTION=1 \--rm -p 4000:4000 -p 5000:5000 \ghcr.io/apollographql/apollo-runtime:latest
Your resulting APOLLO_GRAPH_REF value should look something like airlock-mcp@assistant.
Boot up the process, then let's restart Claude.
Back in the chat interface, we won't see anything different. But let's try that same path of inquiry we used before.
Can you check if you're able to create listings on Airlock?
We've still enabled introspection for our MCP server, so it's likely we'll see Claude ask for permission to use its introspect integration. But now, with our assistant contract variant filtering our mutation fields, Claude shouldn't be able to find anything about mutations or creating new listings!
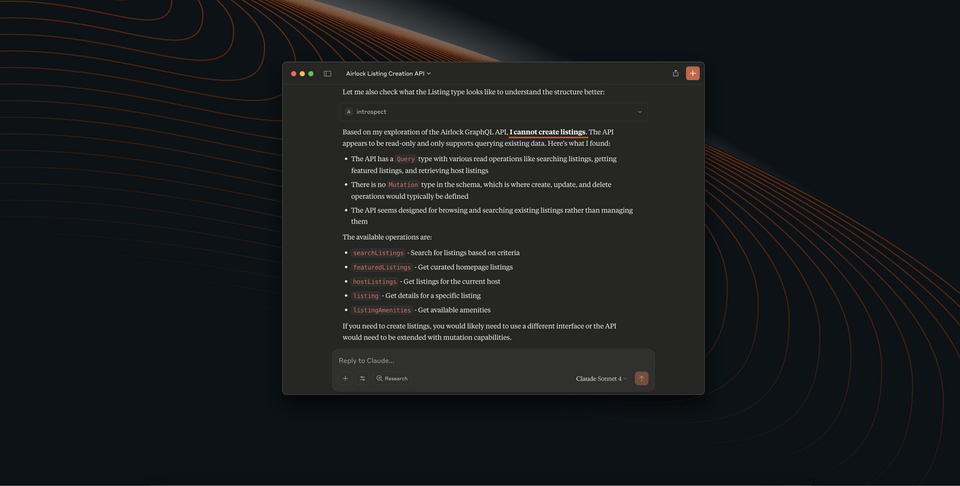
We've locked off functionality—with just a few tags in our schema!
Practice
Key takeaways
- Introspection allows AI assistants to generate queries based on the schema, but can introduce security risks.
- Contracts let you define subsets of the schema that are accessible to specific clients or tools.
- By applying
@tagto schema types and fields, you can control what is included or excluded in a contract. - Enabling introspection and contracts together allows for flexible yet secure interactions with the graph.
Conclusion
Congratulations! You've leveled up your AI assistant interactions with the graph—without compromising security or governance. With persisted queries, we defined queries that could be exposed over MCP to our AI assistants as tools; and with introspection and contracts working in tandem, we could isolate particular pieces of the schema to give AI assistants access to. This granted them greater flexibility in creating new queries, without compromising our sensitive backend details.
Where else can you take your MCP & GraphQL interactions? What would you like to see next? Keep us posted in the comments, or reach out to the broader Apollo Community. Thanks for joining us here on Odyssey, and we hope to see you in the next one!
Share your questions and comments about this lesson
This course is currently in
You'll need a GitHub account to post below. Don't have one? Post in our Odyssey forum instead.