Overview
In this section, we'll cover:
- how to leverage Contracts to securely extend a subset of the supergraph to additional parties
Prerequisites
- Our supergraph running in the cloud
Contracts
Now that we have a working supergraph built for KBT Threads, there is a desire to extend a subset of this functionality to additional external groups.
While this sounds straightforward, there are data privacy and security concerns that need to be addressed. We need to ensure that we are only sharing the proper information with these third parties. To do that, we will leverage contracts from Apollo to restrict access to sensitive information in our graph.
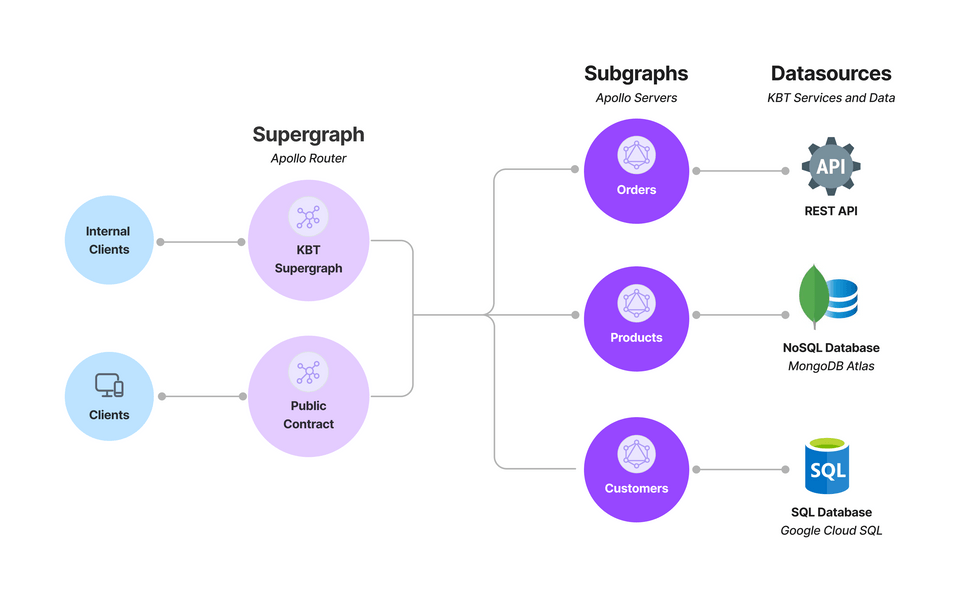
Contracts provide a way for us to segment access to our graph so that we only expose the data to the teams that need it. It does this by creating a separate Router with a subset of our original schema. In this way, we provide physical separation between our clients and their endpoints.
To get started in creating a contract, we need to tag fields in our schema.
The schema for our Customers subgraph has already been tagged. Go to the Schema page in GraphOS Studio to view our Customer subgraph schema:
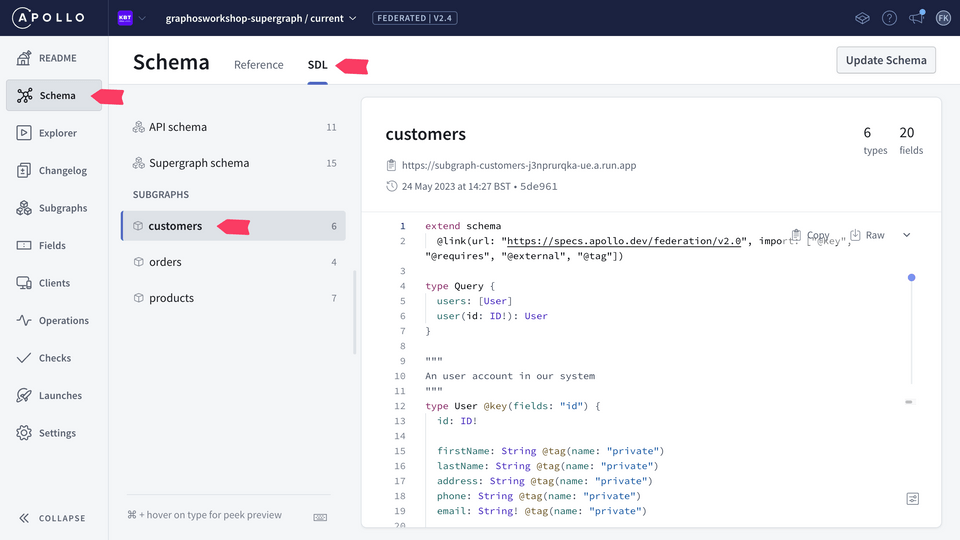
- Go to Settings on the left side of the page > This Variant (Current) > Contracts
- Click Create Contract. From there you will see the following dialog:
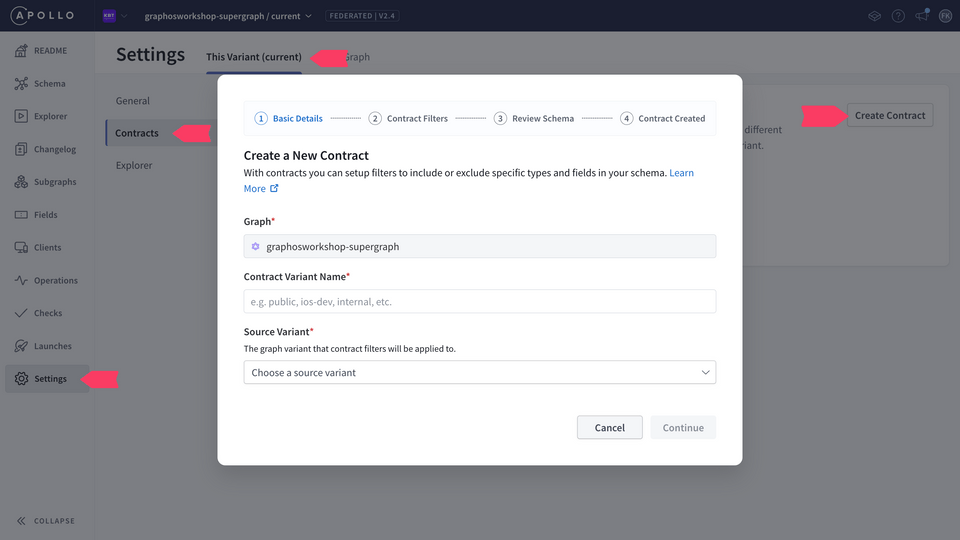
- In the dialog, set the Contract Variant Name to public.
This is the first step toward creating our new contract. It will be named public and we will use as a baseline the current variant we created earlier. Once this is done, click Continue.
- Now that we have named our variant, it is time to leverage the tags we saw earlier to create our contract schema.
Here we can decide which tags we want to leverage, and if those tags should be included or excluded. In our case, we want to exclude the private tags for our public variant.
Select private as an excluded tag and click Generate Preview.
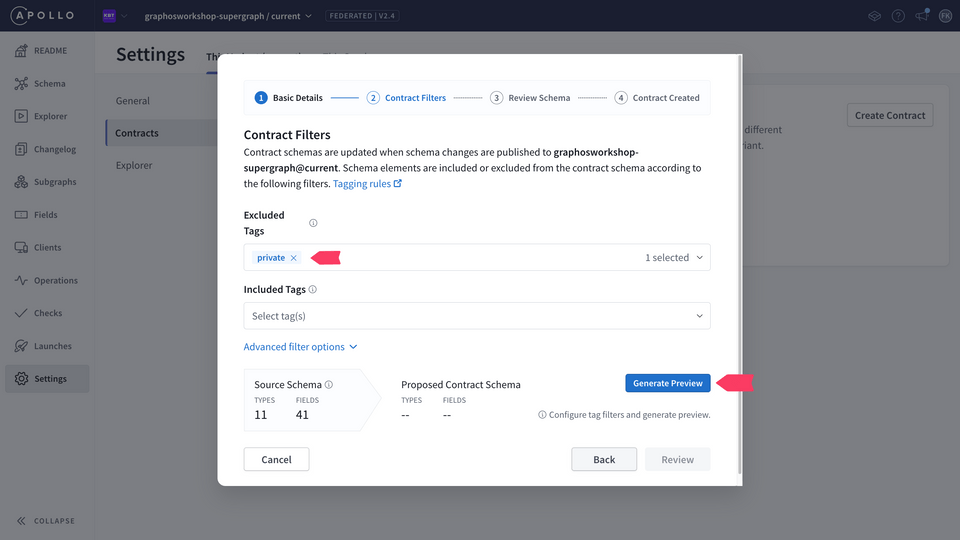
GraphOS Studio now shows that this new schema will have five less fields. Let's click Review and take a look at the diff file. At this stage, we can see that the five tagged fields and the ones removed from the schema.
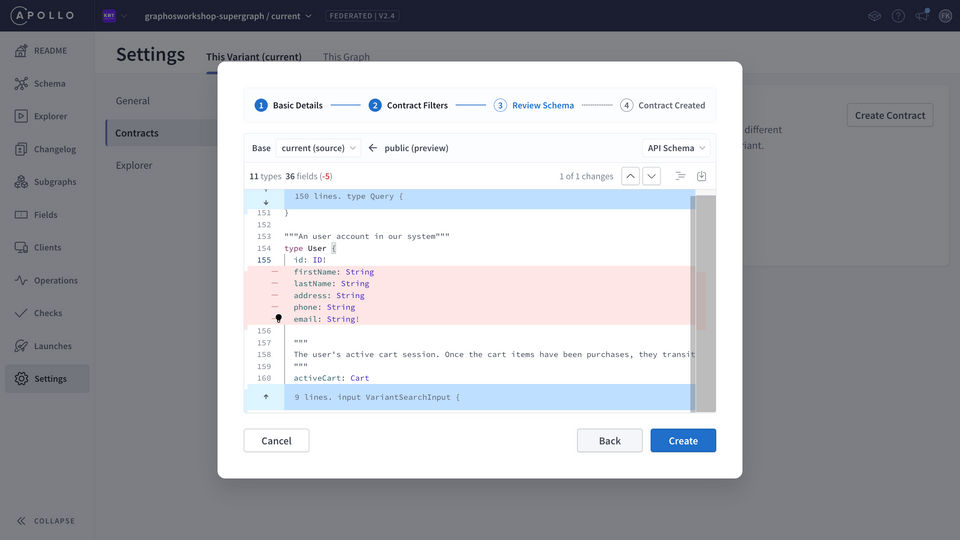
Now that we can see this is the contract we want, lets click Create. This will create the contact variant. At this point, you can close out that window once the creation is successful or view the Lunch details, which will show the whole creation process details.
Now let's go to the contact variant - at the top of the page - and prep for deploying the GraphOS Router for this endpoint. On the top of the page, click where it shows your graph name, something in the form of <graph_name>@current, and select the contract, something like <graph_name>@public. Once there, select the Readme tab.

Copy your graph ref, as seen in the example above. We will now use that to deploy the contract Router to the cloud.

Deploy the Contract Router
Now that we have the graph ref, let's update it in our environment to prepare to deploy the contract Router. Go to the root directory of your workshop repository.
Open up the
.envfile and change the graph ref to the new version for your contract variant (from@currentto@variant).Now we need to edit the
contract.yamlfile to reflect the proper project id. Go to./router/. From here, we need to modifycontract.yamlto reflect the proper project name and unique service name. We need to find and replace two values in the contract.yaml file. We will replace two values.
| Default Value | New Value |
|---|---|
| federation-workshop | <your-workshop-name> (This will be provided by Apollo) |
| contract-api | <yourName-contract> |
There are many ways to find and replace text in this file, one command-line option is sed. Here are the commands to modify the file using sed in Unix.
sed -i '' 's/federation-workshop/<workshop-name>/g' contract.yamlsed -i '' 's/contract-api/<yourname>-contract/g' contract.yaml
- With the proper variables in place, it's time to deploy the Router. To deploy the Router, go to the root folder of your workshop and run
make deploy-contract
- Once that command is finished, we once again need to get the URL for this endpoint we have just deployed. To do that run the following command:
gcloud run services describe <yourname>-contract --region us-east1 --format 'value(status.url)'
- We need to paste this domain into GraphOS Studio so Explorer can query this contract variant. In GraphOS Studio at the Readme page, your graph should say, This graph doesn't have an endpoint yet - add one in Connection Settings Click on Connection Settings. In here, past the domain that you received from the previous command.
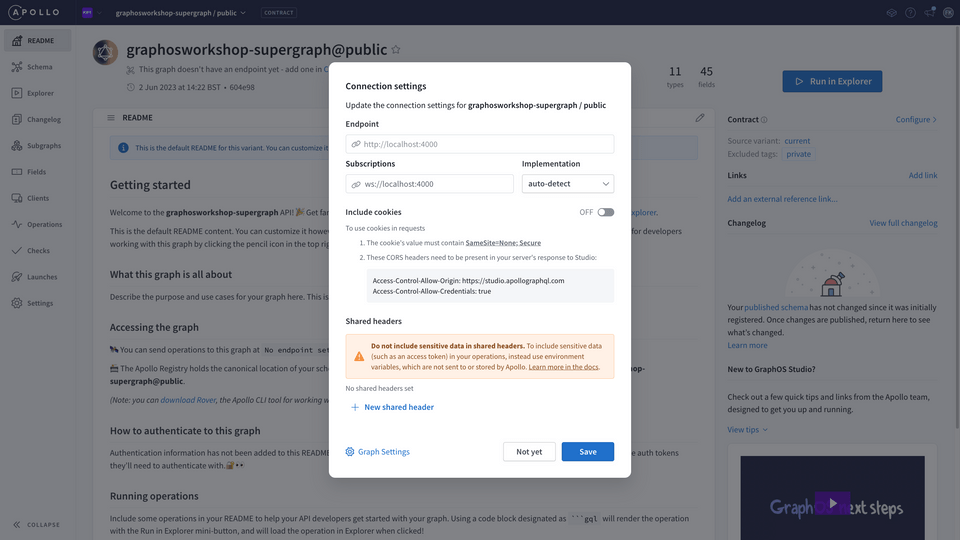
Then click Save. Once you have saved your URL, you are ready to test out this contract in Explorer. Go to the Explorer tab and let's build a query:
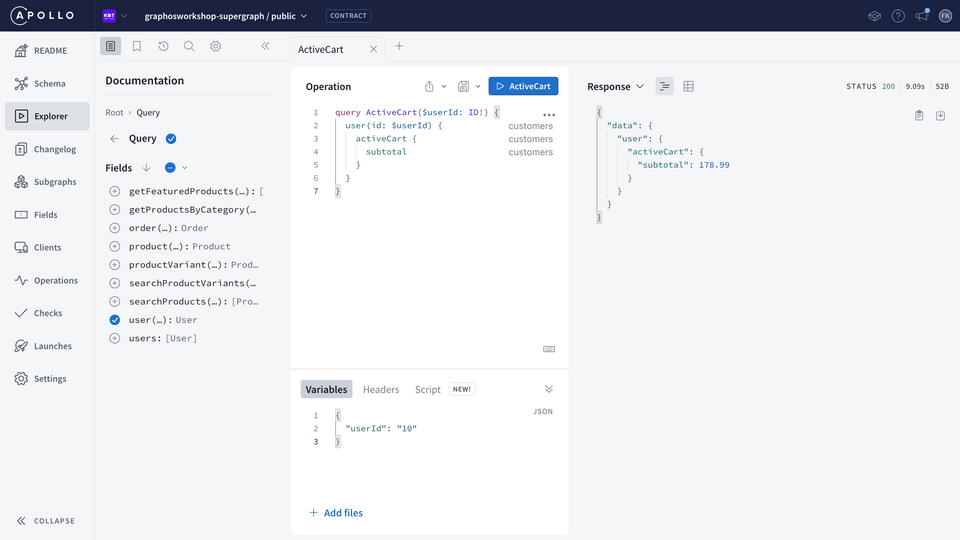
Hint: use the Query builder to easily build a simple query for a User's active cart
- In addition, we need to add a
userIdwithin the variable panel. Set the id to10.
{"userId": "10"}
- Execute the query by pressing Run operation button and check the result:
{"data": {"user": {"activeCart": {"subtotal": 178.99}}}}
Now, what if we want to access this user's PII data? We know that our underlying subgraphs can serve up name, address, email, and phone number. Even though those fields do not show up in Explorer, let's try to access them. Manually type in firstName to the query above, as shown below:
query ActiveCart($userId: ID!) {user(id: $userId) {activeCart {subtotal}firstName}}
We immediately see that the query is indicating an error. Hovering our mouseover firstName tells us that we cannot query firstName:
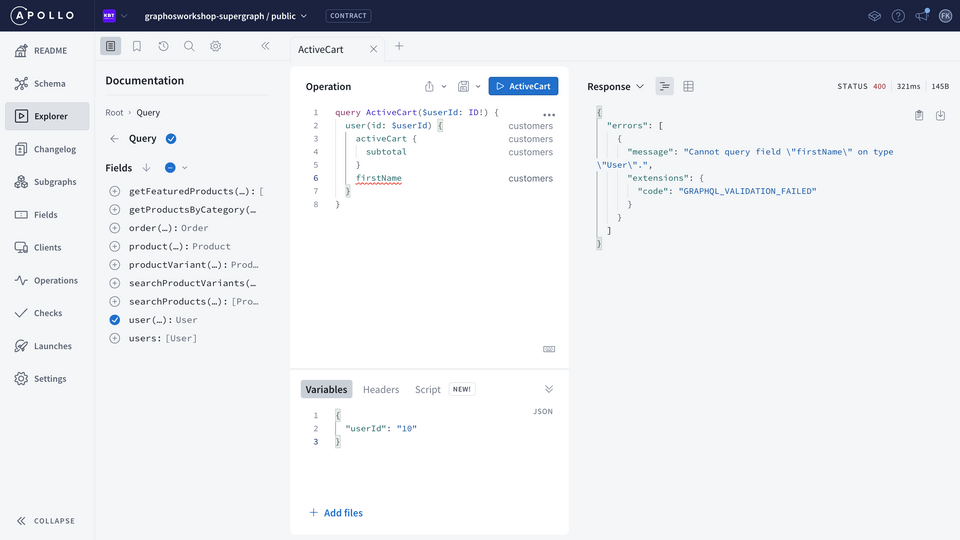
What happens if we try to run it anyways?
You should receive an error message. This verifies that the contract Router we created cannot access those redacted fields, making it safe to share with third parties.
🎉 Congratulations! Your Contract is now ready to securely share data with third parties! 🎉
Up next
Now that we have used our supergraph both with our contract and the front-end, it's now time to explore some of the metrics that we can get in GraphOS Studio. Therefore, in the next section, we'll see how to we can use observability and metrics to understand, shape and grow our supergraph.