🪝 Setting up the useQuery hook
To make a call from our client to the GraphQL server, as you'll remember from Lift-off I, we need to make use of Apollo Client's useQuery hook.
We'll be using this hook inside the Track component. Open up the track.js file in the client/src/pages folder.
Before the return line, we can declare our usual loading, error and data object that we'll receive from our useQuery hook.
const { loading, error, data } = useQuery();
We pass the GET_TRACK query as the hook's first argument, and now the big difference from our previous query is the addition of a second argument: an options object.
This object will hold a variables key, note variables, with an "S" because it can have multiple variables. This variables key takes an object as a value, and here is where we'll pass our trackId.
const { loading, error, data } = useQuery(GET_TRACK, {variables: { trackId },});
Use the useQuery hook to send the GET_SPACECAT query to the server. It takes a spaceCatId as a variable. Destructure the loading, error and data properties from the return object of the hook.
useQuery hookuseQuery hook, inside an options object.Drag items from this box to the blanks above
isCompletedataloadingresultsvariables
argumentserrorsecond
first
📑 Filling up the track page
We can now start to add more to our blank Track page by adding more components inside the Layout. Similar to the homepage, we'll use the pre-built QueryResult component to handle any errors and display the loading state properly.
Add the following in the return line of the Layout component:
<QueryResult error={error} loading={loading} data={data}>{/* this is where our component displaying the data will go */}</QueryResult>
When the query is finished loading and there are no errors, the QueryResult component will render its children, passing them the data they need.
We have conveniently provided a TrackDetail component, ready to use to display that data. It's located in the client/src/components folder, so feel free to take a minute to look at it and see how the UI elements are organized if you're curious.
Let's import the TrackDetail component at the top of our track.js file.
import TrackDetail from "../components/track-detail";
Now inside QueryResult, we can render the TrackDetail component and set the track prop to data?.track, using optional chaining here since the data won't be available until the query is finished loading.
<TrackDetail track={data?.track} />
And we're good for the track page! Here's what the track.js file should look like after all our changes:
import React from "react";import { useQuery, gql } from "@apollo/client";import { useParams } from "react-router-dom";import { Layout, QueryResult } from "../components";import TrackDetail from "../components/track-detail";/** GET_TRACK gql query to retrieve a specific track by its ID */const GET_TRACK = gql`query GetTrack($trackId: ID!) {track(id: $trackId) {idtitleauthor {idnamephoto}thumbnaillengthmodulesCountnumberOfViewsmodules {idtitlelength}description}}`;/*** Track Page fetches a track's data from the gql query GET_TRACK* and provides it to the TrackDetail component to display*/const Track = () => {const { trackId } = useParams();const { loading, error, data } = useQuery(GET_TRACK, {variables: { trackId },});return (<Layout><QueryResult error={error} loading={loading} data={data}><TrackDetail track={data?.track} /></QueryResult></Layout>);};export default Track;
💻 Browser check!
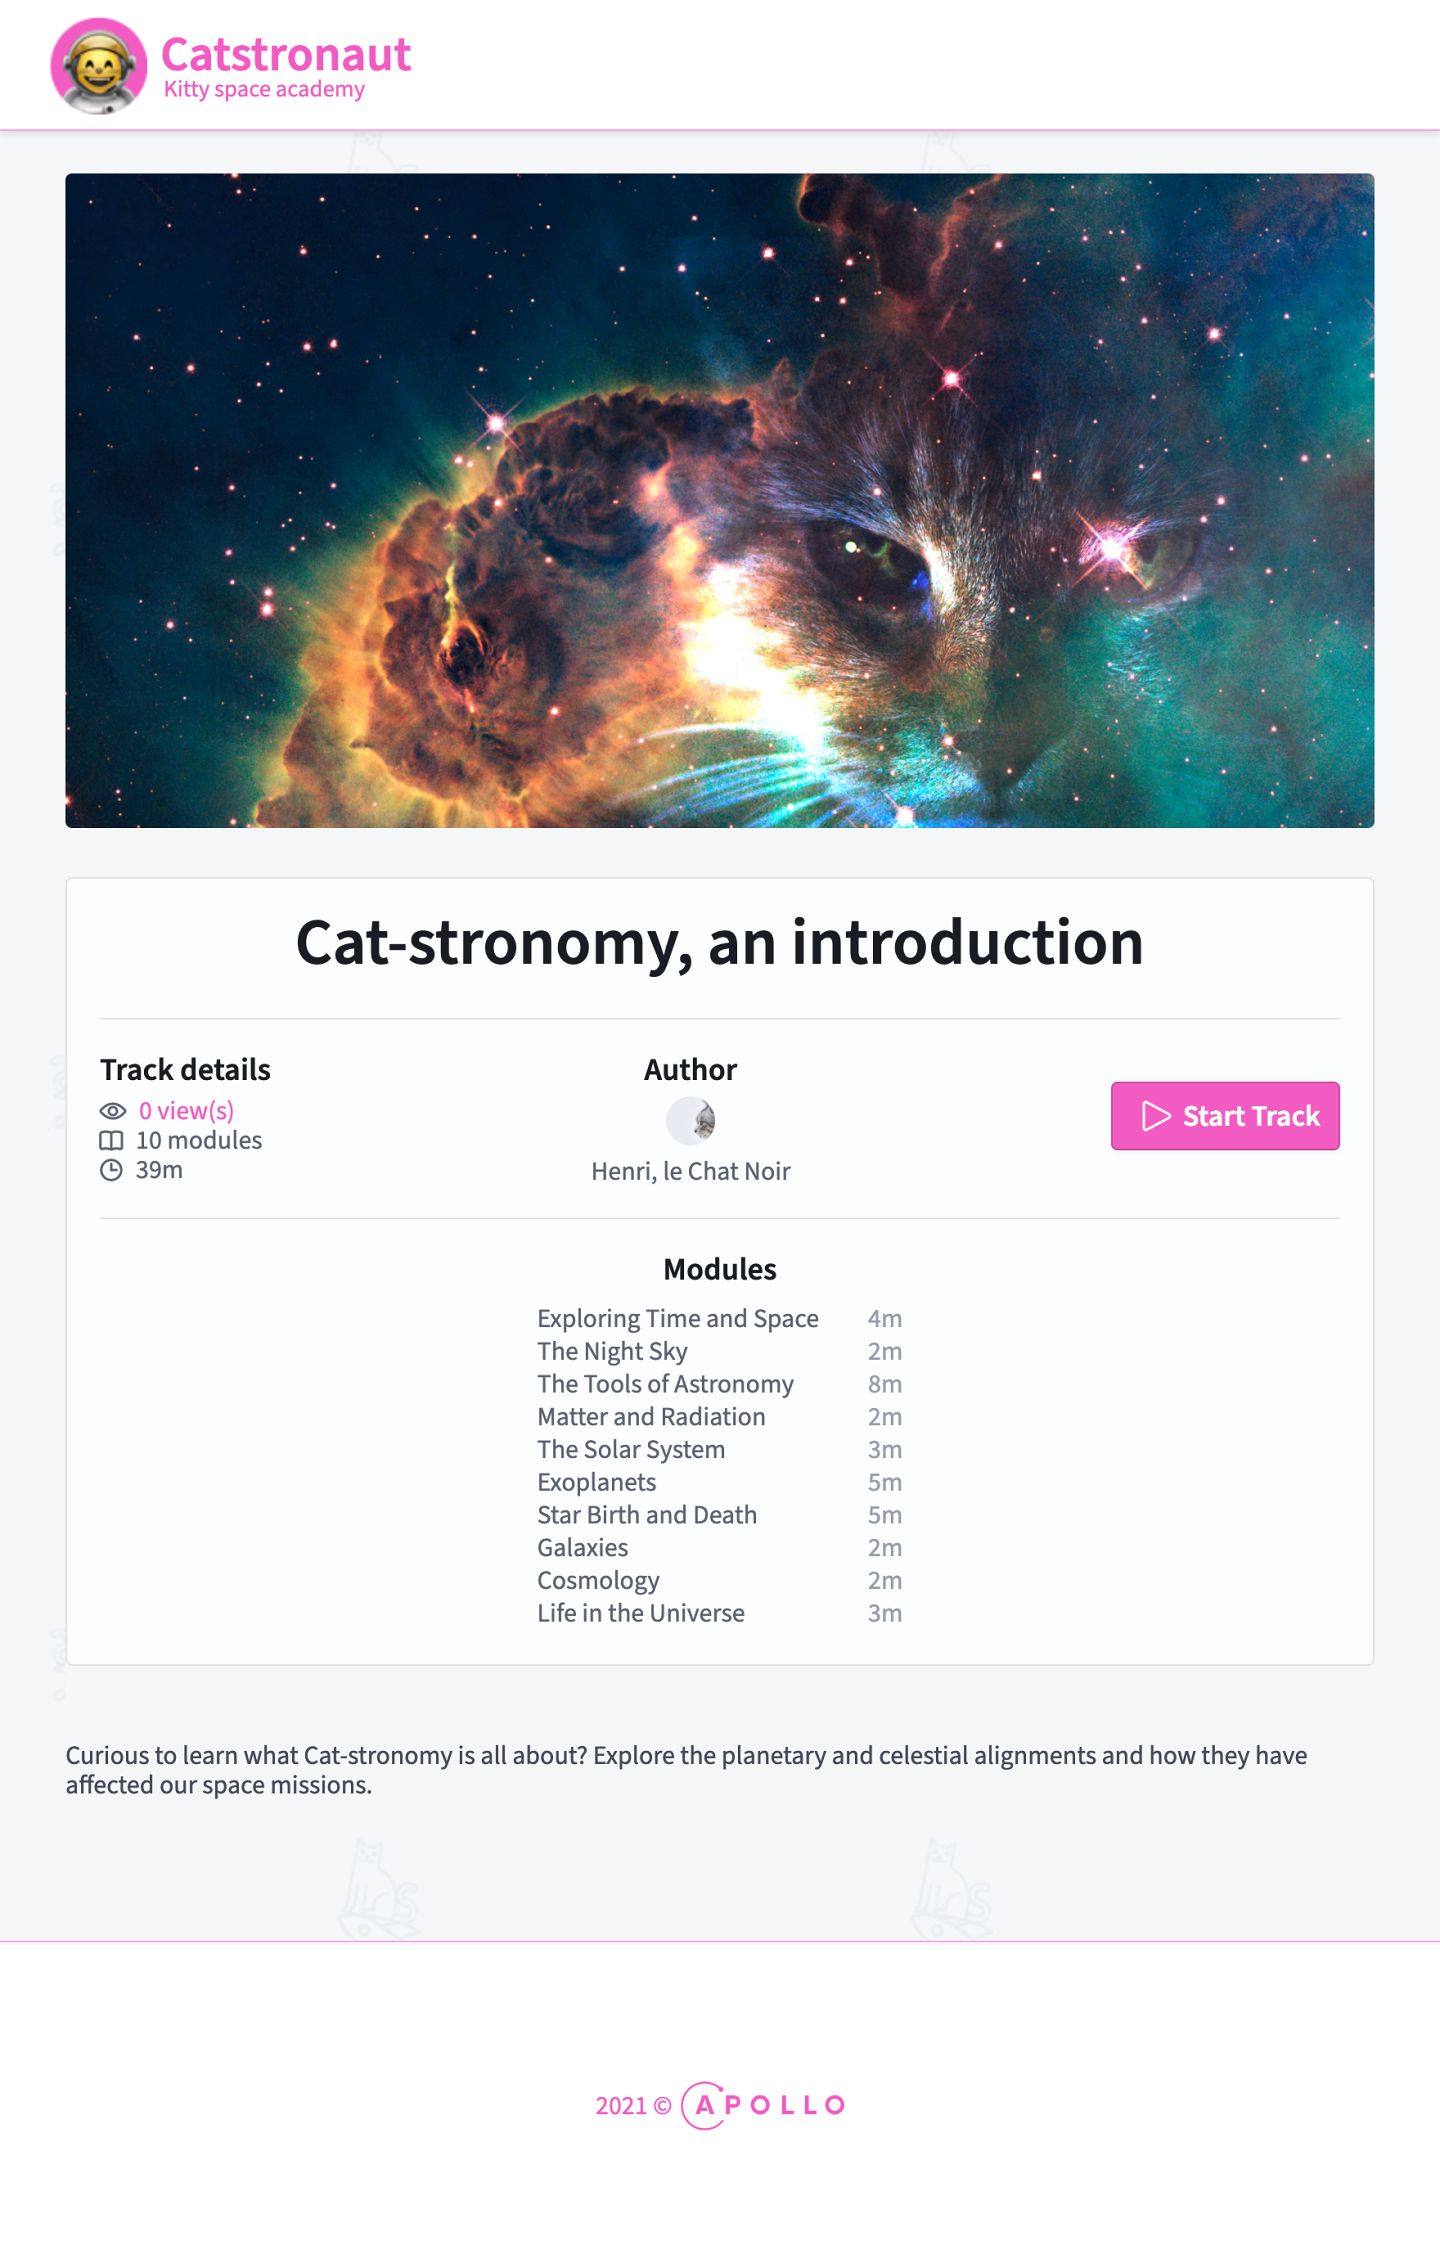
If we navigate back to the browser to localhost:3000/track/c_0, we should see the track page with all its details showing up! We see the nice large thumbnail of our space kitties, the title, track details, author, module details, and description below! If we change the URL to show different track IDs, such as c_1 or c_2, the page updates with the correct data.
Great, we're on the right track! 🥁
Only one final detail remains to complete our feature: we need to set the action that will trigger the navigation from the home page to the track page with the correct track ID. We'll get that ready in the next lesson!
Share your questions and comments about this lesson
Your feedback helps us improve! If you're stuck or confused, let us know and we'll help you out. All comments are public and must follow the Apollo Code of Conduct. Note that comments that have been resolved or addressed may be removed.
You'll need a GitHub account to post below. Don't have one? Post in our Odyssey forum instead.