Overview
Awesome, we know how graph variants can be useful in our development flow, so let's put them to use. In this lesson, we will:
- Create a
staginggraph variant - Learn how to push a subgraph schema to a graph variant
- Access and explore variants in GraphOS
Creating a staging variant
Right now, both the staging and production versions of the GraphOS Router are using the production version of the supergraph schema. This means that when we publish changes to our staging subgraphs, the schema used by our live production router also changes. And that's not great, because if our changes accidentally break something, things will be broken in both our staging and production routers. We need a staging graph variant for our staging version of the router to use.
Let's take a look at how to create a staging variant. We'll start by setting up the staging variant with our production graph's current state, so that we have a baseline to work from before we make our feature additions.
To create a new variant, we'll use the Rover CLI again. In fact, you're probably already familiar with the command we'll use: rover subgraph publish.
You might recall that the first argument of this command is the graph ref. The graph ref is the name of the graph, followed by @ and the name of the variant.
airlock-managed-fed@current
In Voyage I, we used the default current variant, but we can also specify a different variant. In this case, we'll use the name staging. If this variant doesn't already exist, GraphOS will create it for us.
Here's how we'd publish the accounts subgraph schema to the staging variant of our graph:
rover subgraph publish airlock-managed-fed@staging \--schema "accounts.graphql" \--name accounts \--routing-url "https://staging-airlock-accounts.com"
Note that the routing-url value points to the subgraph's staging environment, not the production environment.
After running the rover subgraph publish command above, we'll see this in the terminal:
Publishing SDL to airlock-managed-fed@staging (subgraph: accounts)using credentials from the default profile.A new subgraph called 'accounts' for the 'airlock-managed-fed@staging' graph was created.The supergraph schema for the 'airlock-managed-fed@staging' graph was updated,composed from the updated 'accounts' subgraph.
After the schema is published to the staging variant, Studio will reflect this new addition. Under the graph's name on the homepage, we can see a new variant has been added with the name staging.
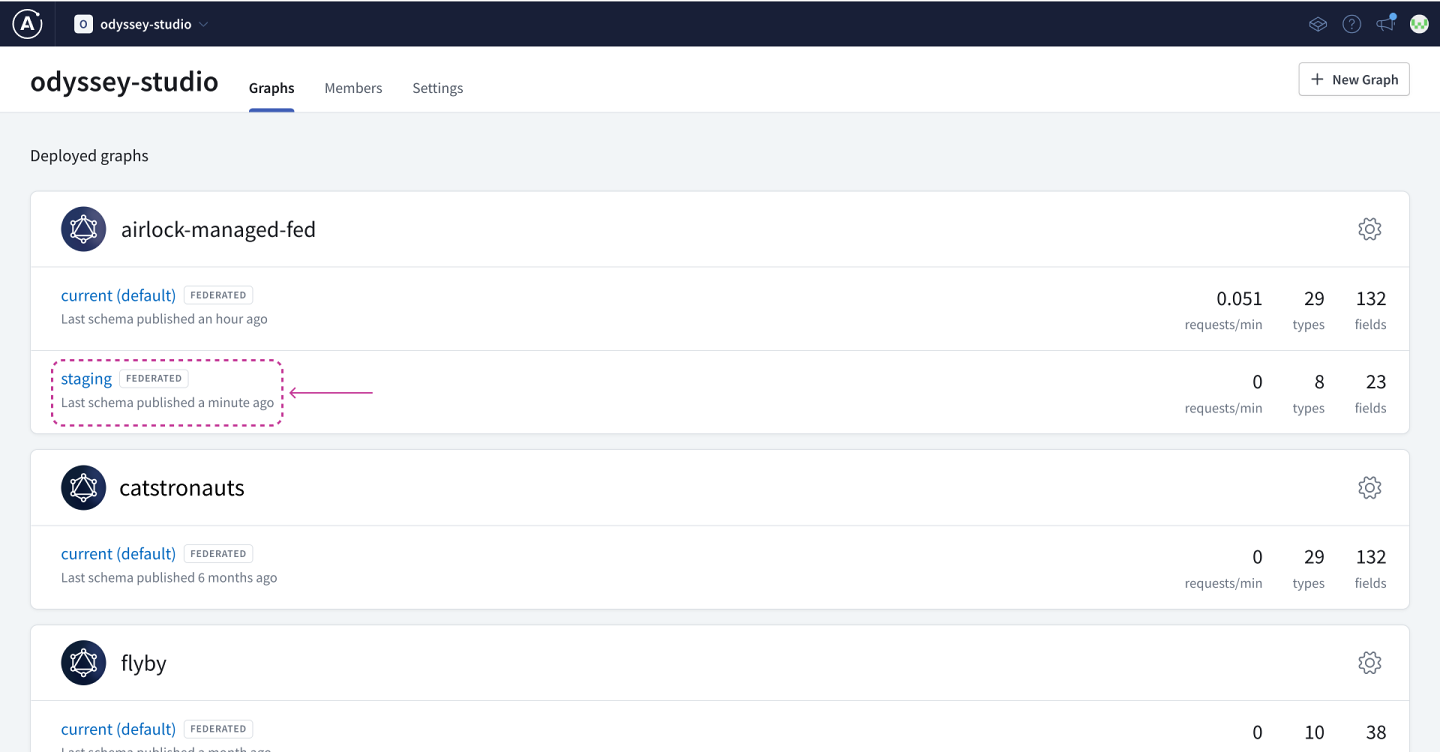
We can click on the new staging variant to see the current schema for this graph. So far, it only consists of the accounts subgraph that we just registered.

We'll also need to register all the other subgraphs to the new staging variant: listings, bookings, reviews, and payments. The values for the schema, name, and routing-url options will differ for each, but the graph name and the variant will stay the same!
After publishing all the other subgraphs, we can see them in our staging variant schema:

Awesome, the staging graph variant is now set up with all of the subgraphs for Airlock! Right now, the staging variant schema is in the exact same state as the current variant schema. We've got our baseline ready before we start making feature additions or schema changes.
The last thing we need to do is make sure the staging graph variant is connected to the endpoint for the staging router.
We can do this in the variant's homepage by clicking on Connection Settings, and setting the endpoint for the staging router URL.

All right, we're ready to proceed with our changes for Project Galactic Coordinates.
Practice
Key takeaways
- We can publish a schema to a specific variant by using the Rover command
rover subgraph publishand specifying the graph variant name after the@symbol in the graph ref.
Up next
The Listings Team has been hard at work, and they're now ready to share their schema updates so that other teams can also start contributing to Project Galactic Coordinates.
In the next lesson, we'll see how they can use schema checks to confidently push their schema changes to the registry.
Share your questions and comments about this lesson
Your feedback helps us improve! If you're stuck or confused, let us know and we'll help you out. All comments are public and must follow the Apollo Code of Conduct. Note that comments that have been resolved or addressed may be removed.
You'll need a GitHub account to post below. Don't have one? Post in our Odyssey forum instead.