Overview
Our MCP server needs at least one operation to get up and running.
In this lesson, we will:
- Create our first tool
- Run the MCP Inspector to test our connection
Creating an operation
To create a tool, we first need a GraphQL operation. But when we ran rover dev in the last lesson, both our API and server failed to launch.
Let's try running that command again, this time removing the --mcp flag. This will launch the local router process without starting up the MCP server at the same time. Doing so will give us a chance to test out our API independently and design our first operation.
rover dev --supergraph-config ./supergraph.yaml
Now we should see happy output only. Our API is up and running on http://localhost:4000, so let's go there now.
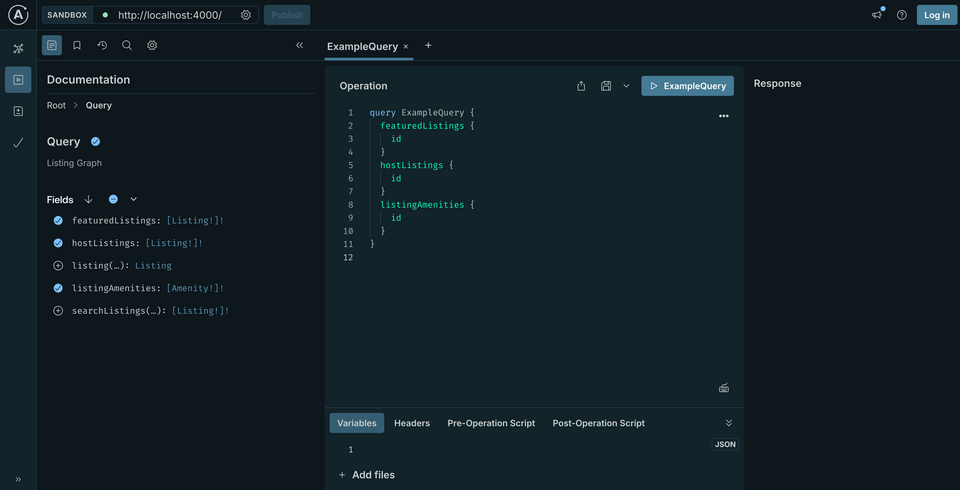
Before building our operation, let's consider the question we asked Claude earlier in the course: "What are the featured listings today?"
Right here in Sandbox we can build the optimal query to help our AI assistant answer that question. Under the left-hand Documentation panel, we'll find the Query type has an entrypoint called featuredListings. Let's click the plus button (+) beside that field to add it to our Operation panel. For each Listing returned, let's include the following fields: id, description, costPerNight, locationType, and numOfBeds.
Finally, let's rename the operation to GetFeaturedListings so it's a bit more explicit.
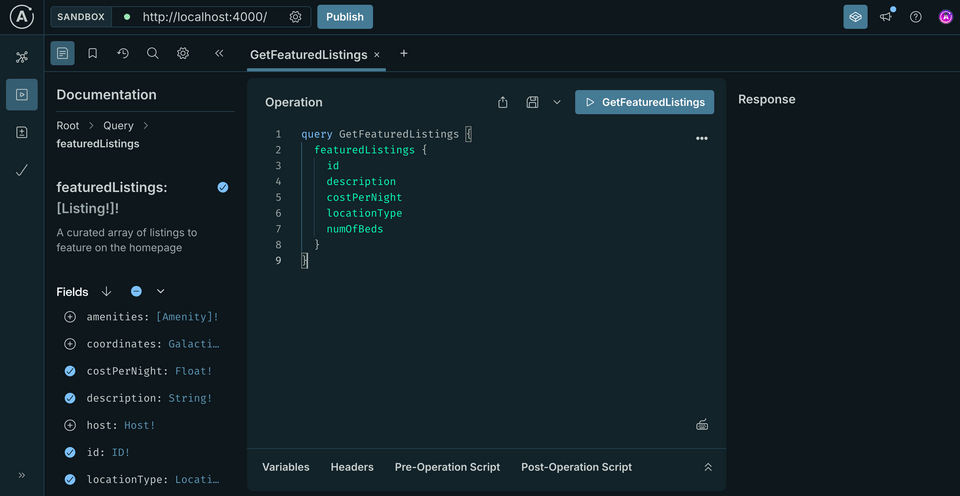
Here's what our finished query operation looks like.
query GetFeaturedListings {featuredListings {iddescriptioncostPerNightlocationTypenumOfBeds}}
Running this query gives us a nice big object in the Response panel.
This is a good first operation we can equip as a tool in our MCP server. Copy the operation, and let's return to our code.
Adding an operation as a tool
Navigating now to our project directory, let's create a new file called featuredListings.graphql.
📂 odyssey-apollo-mcp┣ 📂 operations+ ┃ ┗ 📄 featuredListings.graphql┗ 📄 supergraph.yaml
Inside, we'll paste the contents of our operation in its entirety.
query GetFeaturedListings {featuredListings {iddescriptioncostPerNightlocationTypenumOfBeds}}
That's our first operation done!
It's time to let our MCP server know about this operation, so that it can expose it as a tool for our AI assistant to use. To do this, we'll use a configuration file.
First, let's create a file called mcp-config.yaml in the root of our project directory.
📂 odyssey-apollo-mcp┣ 📂 operations┃ ┗ 📄 featuredListings.graphql+ ┣ 📄 mcp-config.yaml┗ 📄 supergraph.yaml
Inside, we'll add the following configuration:
operations:source: localpaths:- ./operations/featuredListings.graphql
We're telling the MCP server that our operations will be sourced from the local filesystem, and defining a list of file paths to the operations (these paths are relative to the location where we're running the MCP server).
With that, let's restart the rover dev process in our terminal—only this time, we'll add the path to our configuration file.
rover dev --supergraph-config ./supergraph.yaml \--mcp ./mcp-config.yaml
Note: We've included the backslash character (\) on line 1 to break up our terminal command for readability.
This time when we run the command, we should see everything boot up successfully.
==> Your supergraph is running! head to http://localhost:4000 to query your supergraphINFO Starting MCP server in Streamable HTTP mode port=8000 address=127.0.0.1
Note: Make sure that your output references the Streamable HTTP mode. If not, you might be running an older version of Rover. To upgrade your version, check out the Getting Started page in the documentation.
But wait... all we've added here is a GraphQL operation. Exactly how does that become a tool that an AI assistant can actually use? Let's see what this looks like in detail—using the MCP Inspector.
The MCP Inspector
To test out our MCP server and ensure everything is working as expected, we can run a special tool provided by the creators of MCP: the MCP Inspector.
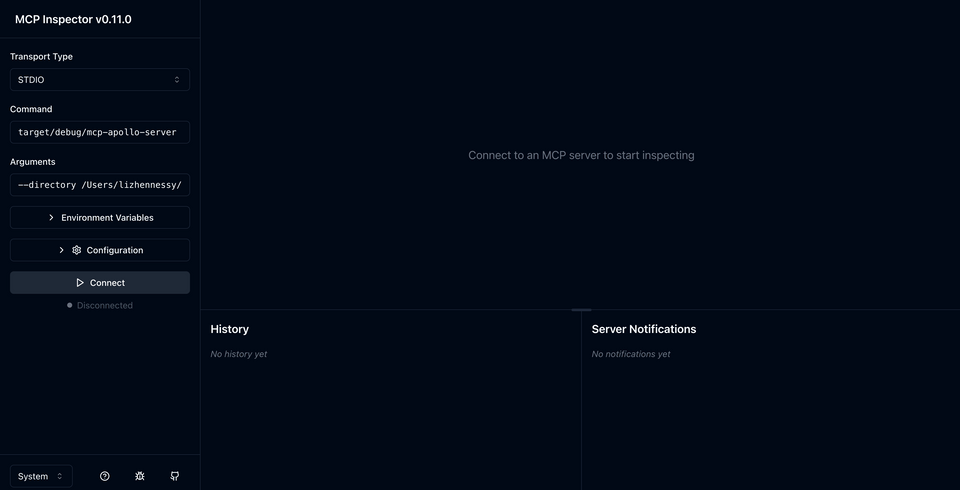
Before we even connect our MCP server to an AI assistant like Claude, the MCP Inspector gives us a chance to make sure our tools are showing up the way that we expect, and that there aren't any problems with our connection. We can start up a new MCP Inspector process using a single npx command.
Open up a new terminal window in the root of your project directory, and run the following command.
npx @modelcontextprotocol/inspector http://127.0.0.1:8000/mcp --transport http
If this is the first time installing the MCP Inspector, you'll need to confirm the following message by pressing the "Y" key on your keyboard.
Need to install the following packages:@modelcontextprotocol/inspector@<VERSION>Ok to proceed? (y)
After running the command, we should see the following output. Note that the terminal will show a unique session token has been generated for you, along with a link that will take you to the Inspector with authentication details pre-filled.
Starting MCP inspector...⚙️ Proxy server listening on port 6277🔑 Session token: ...Open inspector with token pre-filled:http://localhost:6274/?MCP_PROXY_AUTH_TOKEN=...
Click the link with the MCP_PROXY_AUTH_TOKEN, or copy and paste into a new browser window, and let's see what's there.
On the left, we'll find some different options. The first lets us specify the Transport Type, which contains a few different options in a dropdown. You can check out what these do specifically on your own, but for now we'll set it to Streamable HTTP.
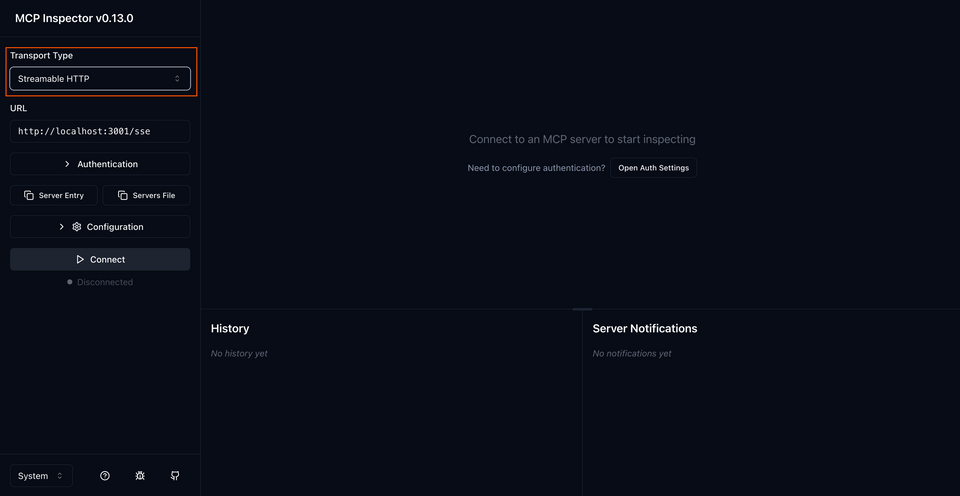
Just below the Transport Type, we'll see an input for our URL. This URL should correspond with where our MCP server is running; because we booted it up with rover dev, this automatically mounts our server at http://127.0.0.1:5000.
In fact, we can see these details in our server output. If you return to the terminal window running rover dev, you should see a line like the following at the bottom of the output:
==> Your supergraph is running! head to http://localhost:4000 to query your supergraphINFO Starting MCP server in Streamable HTTP mode port=8000 address=127.0.0.1
Our MCP server is running in Streamable HTTP mode on port 8000, while our API is running on 4000.
Back in the MCP Inspector, let's use these details to fill in our URL. We'll need to add /mcp to the end of our address, to specify the route where the Streamable HTTP mode can receive connections.
http://127.0.0.1:8000/mcp
Then, click the Connect button. We should see the interface update, and a few more options appear in the dashboard.
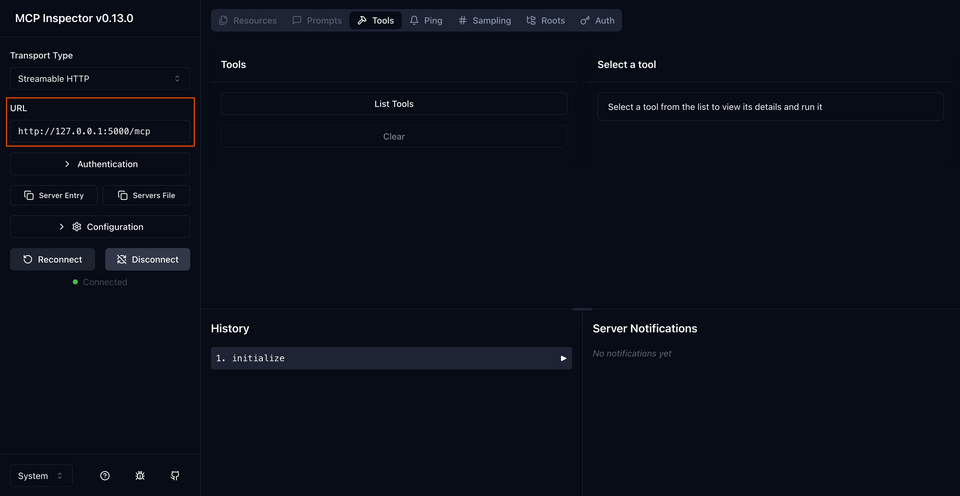
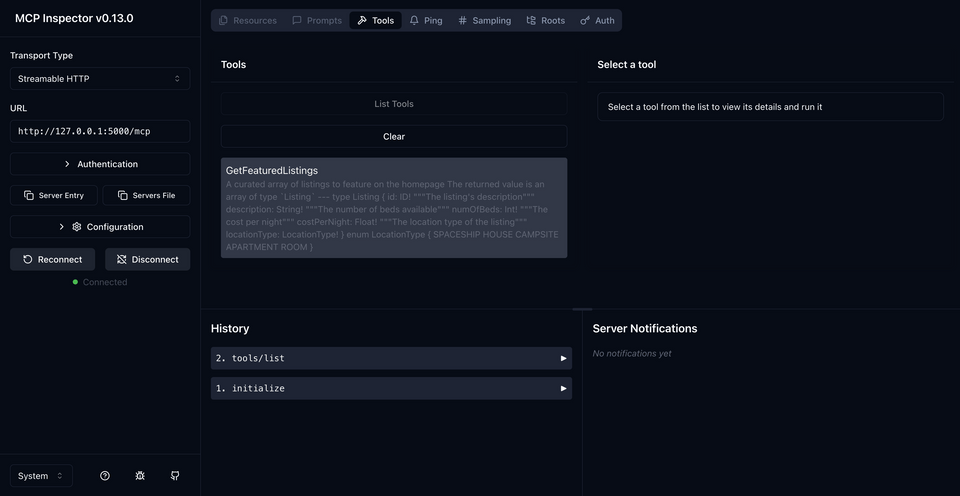
In the center of the screen, we'll find a Tools header and, just beneath, a button called List Tools. Let's click that next and see the tools we're working with.
When we click it... we see a summary of GetFeaturedListings! In addition, there's a description that we didn't write ourselves.
If we look toward the bottom of the page, we'll see a section entitled History. There should be an item in the list labeled tools/list. When we expand this, we'll see the request that was issued for the MCP server's available tools, along with the response.
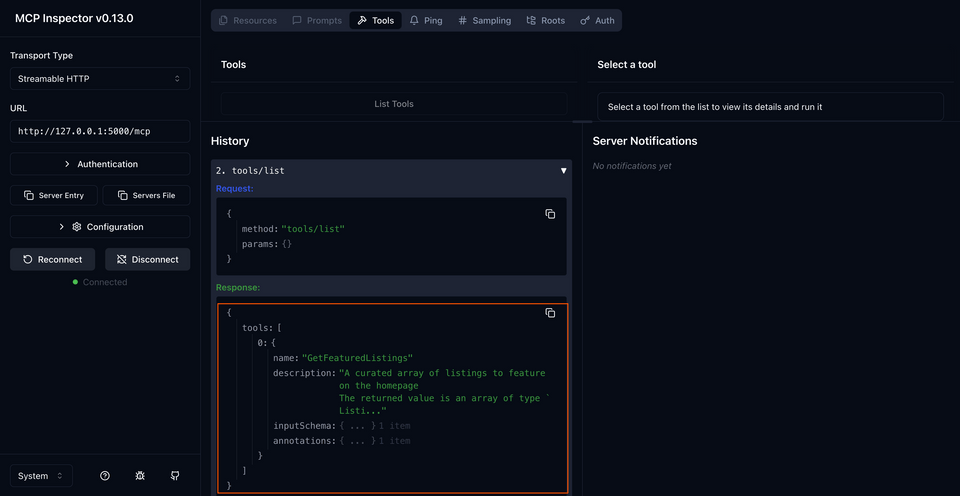
There should be one object in the tools array; it has all three properties we mentioned earlier in this course, name, description, and inputSchema. But we didn't have to define any of these ourselves; they were all generated automatically by the Apollo MCP server, using only our provided operation as input.
We should see something like this:
{"method": "tools/list","params": {}}
{"tools": [{"name": "GetFeaturedListings","description": "A curated array of listings to feature on the homepage\nThe returned value is an array of type `Listing`\n---\ntype Listing {\n id: ID!\n \"\"\"The listing's description\"\"\"\n description: String!\n \"\"\"The number of beds available\"\"\"\n numOfBeds: Int!\n \"\"\"The cost per night\"\"\"\n costPerNight: Float!\n \"\"\"The location type of the listing\"\"\"\n locationType: LocationType!\n}\n\nenum LocationType {\n SPACESHIP\n HOUSE\n CAMPSITE\n APARTMENT\n ROOM\n}\n","inputSchema": {"type": "object"},"annotations": {"readOnlyHint": true}}]}
This works seamlessly because of GraphQL's inherent type safety: the schema we've provided to our MCP server is already self-documenting, so all the information about the types of data each field returns has already been provided. It also gives you another good reason to document your schema's types and fields with helpful comments.
No need to type out our tools' JSON properties by hand—we just provide a query operation, and the server takes care of the rest.
Test run!
We can even test our tool right here within the MCP Inspector. On the right-hand side of the page, just below the description of the GetFeaturedListings tool, click the Run tool button.
We'll see a lot of output along with a Success status: it's the data for our featured listings query!
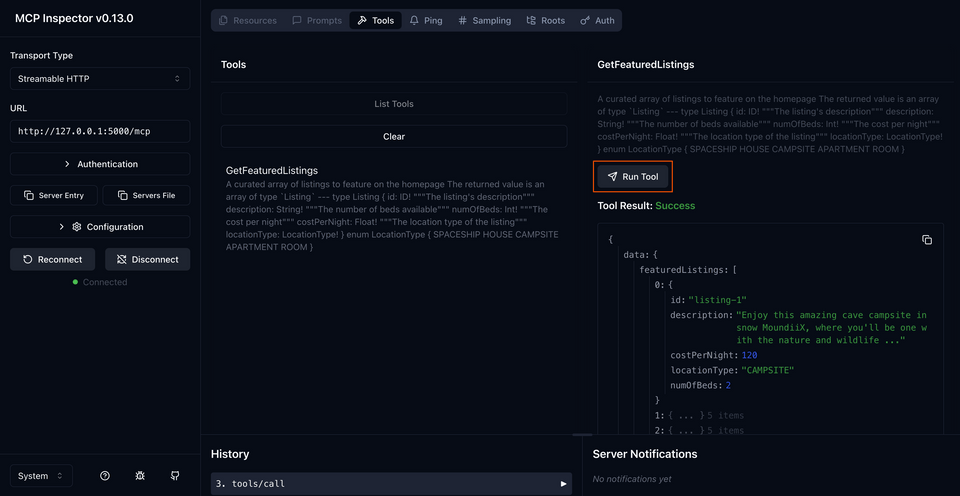
Best of all, we're ready for Claude to connect to the server and make use of this tool. Let's finish up this last step of configuration.
Practice
name, description, and Drag items from this box to the blanks above
development tool
command line interface
tools
inputTypeinspect and debug
AI assistant tool
inputSchemadeploy and monitor
Key takeaways
- We can use the MCP Inspector to test out the functionality in our MCP server.
- We can define individual GraphQL query files that we pass into the MCP server as
--mcp-operationsarguments. - The MCP server reads in these operations and creates objects with all the required tool properties:
name,description, andinputSchema. - The self-documenting nature of GraphQL types and fields provides all the information up front about what parameters each query requires, as well as the types of data it returns.
Up next
One critical piece of the puzzle hasn't yet entered the conversation: our AI assistant Claude! Let's get that application communicating with our MCP server in the next lesson.
Share your questions and comments about this lesson
This course is currently in
You'll need a GitHub account to post below. Don't have one? Post in our Odyssey forum instead.