👋 Welcome to GraphQL Federation with TypeScript!
We're so excited you've joined us for this course in our GraphQL and TypeScript series.
We're ready to build upon GraphQL foundations and dive into a scalable federated architecture. In this course, we'll learn about the components of what's called a supergraph, also known as a federated GraphQL architecture. And we have lots of hands-on opportunities ahead of us, building new features on top of an existing GraphQL API. We'll use some of the primary GraphOS components to ship these changes safely: schema checks, launches, and rover dev.
Let's jump in!
Starting from a GraphQL API
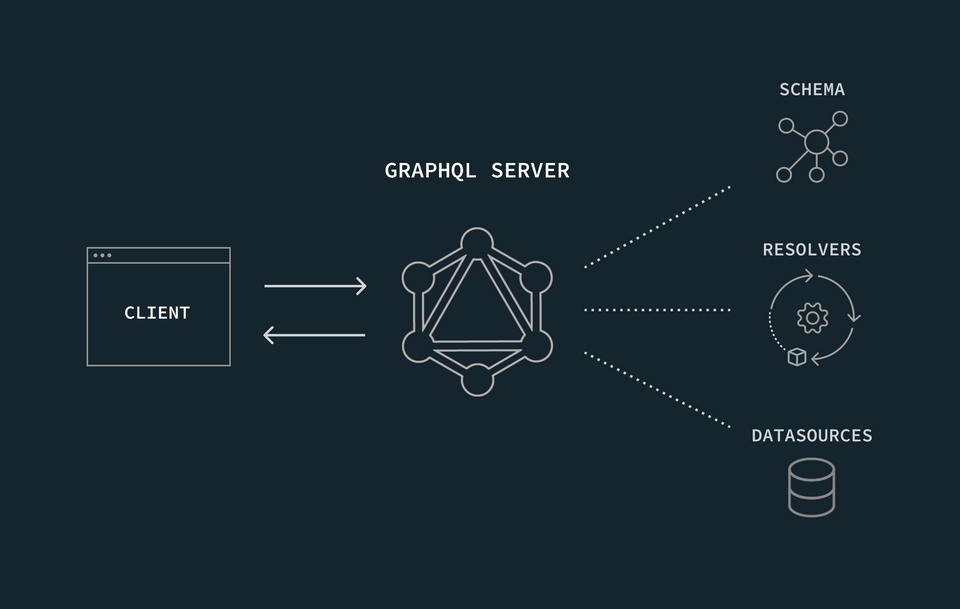
First, let's take a look at how a single GraphQL API works.

When a client needs some data, it sends a GraphQL operation to the GraphQL server. The server uses its schema, resolvers, and data sources to retrieve and resolve that data, then sends it back to the client. It's a pretty great experience!
This setup works well for smaller projects or teams, but what happens as our API grows? As more teams start adding types, fields, and features to our schema, our API becomes harder to manage, scale, and deploy. This is a common bottleneck problem with monolithic backend services.
Introducing federation
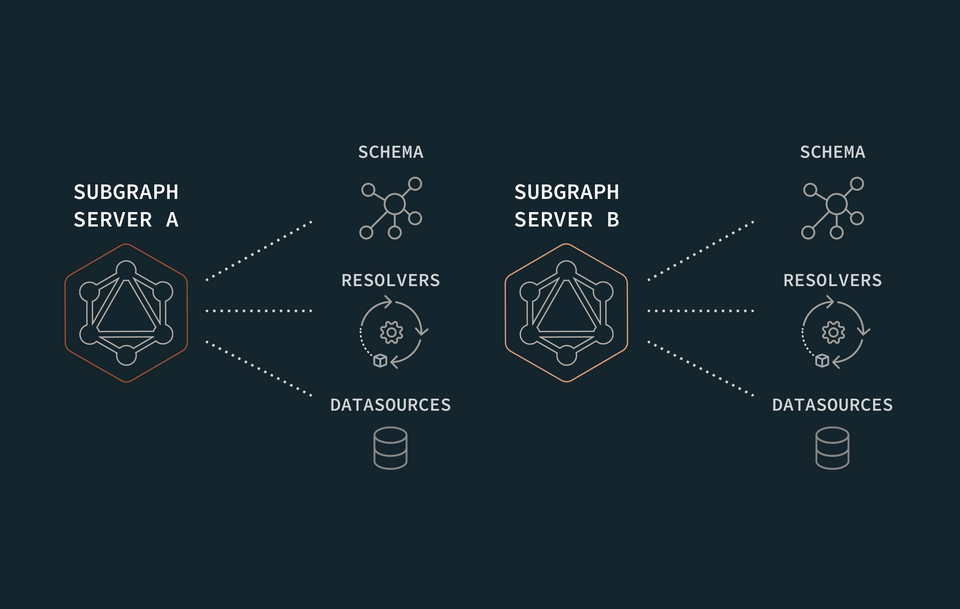
To solve this problem, we can divide our API's capabilities across multiple GraphQL-powered microservices, with each one taking responsibility for a different part of our API's schema. When we adopt this federated architecture, each of our microservices is called a subgraph, and together, they form the foundation of our supergraph.

As our supergraph grows, it can include one, two, or even two hundred subgraphs! It all depends on how we want to divide our features and capabilities to help our teams build and collaborate.
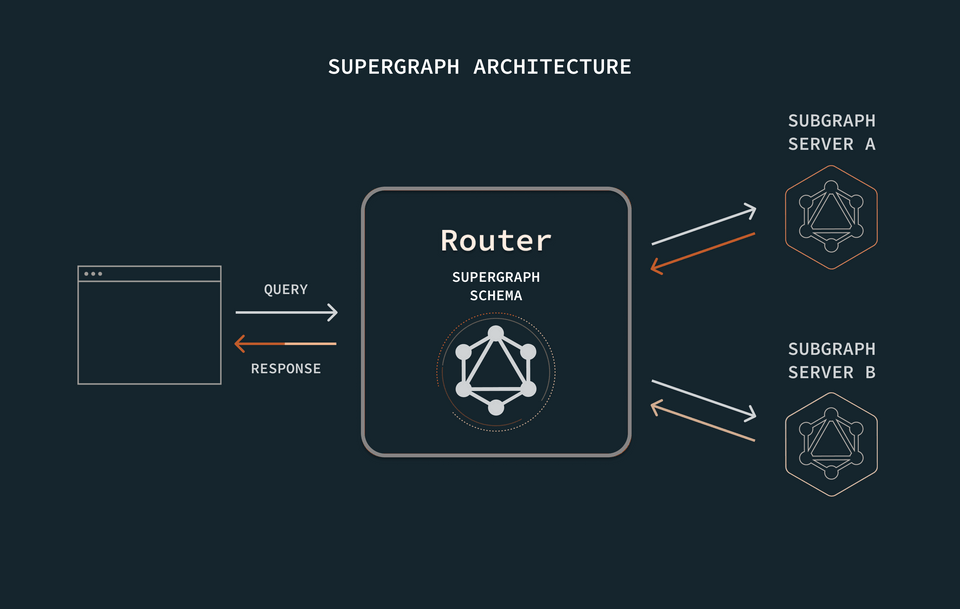
If we split our API's capabilities between lots of different microservices, how do clients query across all of them? For that, we need the other piece of our supergraph: the router.
The router knows about all of our subgraphs, and it also knows which subgraph is responsible for each field in our API's schema. Clients send queries to the router, and the router intelligently divides them up across the appropriate subgraphs.

The router acts as the single access point for our API, kind of like an API gateway. Because the router manages how requests are routed and resolved, clients don't need to worry about communicating with our individual subgraphs!
Following this approach, we can grow our API to include numerous data sources and services: with all of its capabilities unified behind a single, intelligent router.
Why use federation?
With a supergraph architecture, nothing changes from the client perspective. They still communicate with a single GraphQL endpoint (the router), and they don't need to know a thing about how the graph is built under the hood.
On the backend API-side, we have a clear separation of concerns. By splitting up our schema into subgraphs, backend teams can work on their own subgraphs independently, without impacting developers working on other subgraphs. And since each subgraph is a separate server, teams have the flexibility to choose the language, infrastructure, and policies that work best for them.
What we're building
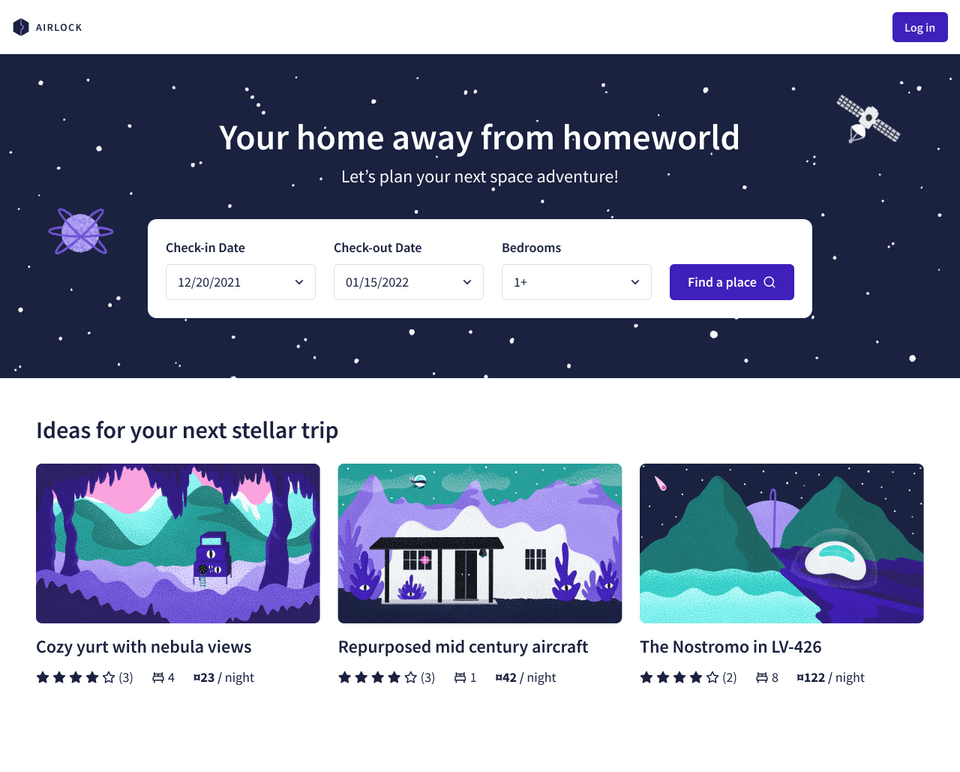
As we learn and practice these federation concepts, we'll be building our course project: Airlock.

Airlock is an intergalactic trip booking app: a resource we can use to find a cool place to stay in the wide open universe! We already built the starting point of the listings server in the Intro to GraphQL with TypeScript course. In this course, we're boosting our listings with some new and vital data: reviews. Check out what other travelers thought before booking your trip—after all, word-of-mouth is the best form of marketing.
Project setup
To follow along with the course, you will need the following:
Prerequisite knowledge
We assume that you are familiar with GraphQL concepts like types, queries, and mutations. Check out our Intro to GraphQL with TypeScript course if you need a refresher.
You should also be familiar with TypeScript programming concepts.
Note: We also offer this course in Java with DGS and C# with Hot Chocolate.
Code editor or IDE
We're using VS Code.
Many popular IDEs offer plugins that enable GraphQL syntax highlighting. For VS Code, we recommend the GraphQL: Syntax Highlighting extension.
Clone the repository
Let's get our code set up.
Open up a terminal to a new directory and running the following command:
git clone https://github.com/apollographql-education/odyssey-federation-typescript.git
Here's the project structure: the listings directory provides all of our listings data. The router directory, for now, contains a single file called router-config.yaml. We'll discuss the role of this directory in a later lesson.
📦 odyssey-federation-typescript┣ 📂 router┃ ┗ 📄 router-config.yaml┗ 📂 listings
Running the app
Finally, let's get our listings server up and running.
Navigate to the listings directory in your terminal, and run the following commands.
First, to install packages:
npm install
Next, to boot up the server:
npm run dev
Shortly after, we should see in the terminal that our app is running!
🚀 Server is running📭 Query at http://localhost:4000/
Checkpoint
Sign up for an Apollo GraphOS account
Don't have an account yet? Create one now and you're all set with the Free plan! Jump to the next step.
If you already have an existing account in an organization on a different plan, you must have Graph Admin or Org Admin role to create graphs and follow along with the course.
Rover setup
Rover is Apollo's command line interface (CLI) tool that helps developers work with graphs and interact with GraphOS. It's a handy and versatile tool that can be used for both local development and CI/CD.
In upcoming lessons, we'll use Rover to validate our local changes before we publish them.
Installing Rover
Rover is Apollo's command line interface (CLI) tool that helps developers work with graphs and interact with GraphOS.
Practice
Key takeaways
- Federation is an architecture for creating modular graphs, also known as a supergraph architecture.
- A supergraph is composed of one or more subgraphs and the router.
- A subgraph is a GraphQL microservice responsible for its own domain.
- The router is the single endpoint that manages how requests are routed and executed, kind of like an API gateway.
Up next
Our listings are hungry for the opinions of their guests! In the next lesson, we'll take our first steps toward growing our API and learn about the components of a supergraph.
Share your questions and comments about this lesson
Your feedback helps us improve! If you're stuck or confused, let us know and we'll help you out. All comments are public and must follow the Apollo Code of Conduct. Note that comments that have been resolved or addressed may be removed.
You'll need a GitHub account to post below. Don't have one? Post in our Odyssey forum instead.
