Overview
Let's get these schema checks and publishes integrated into our automated tools, so that we don't have to remember when and how to run them every single time we want to make a change.
In this lesson, we will:
- Create a CI/CD pipeline for schema checks and publishes using Rover and GitHub Actions
The complete schema delivery process
Before we dig into the specifics of how to set up our CI/CD pipeline, let's take a step back and look at the complete process, with schema checks and launches, and where they fit in our development cycle.
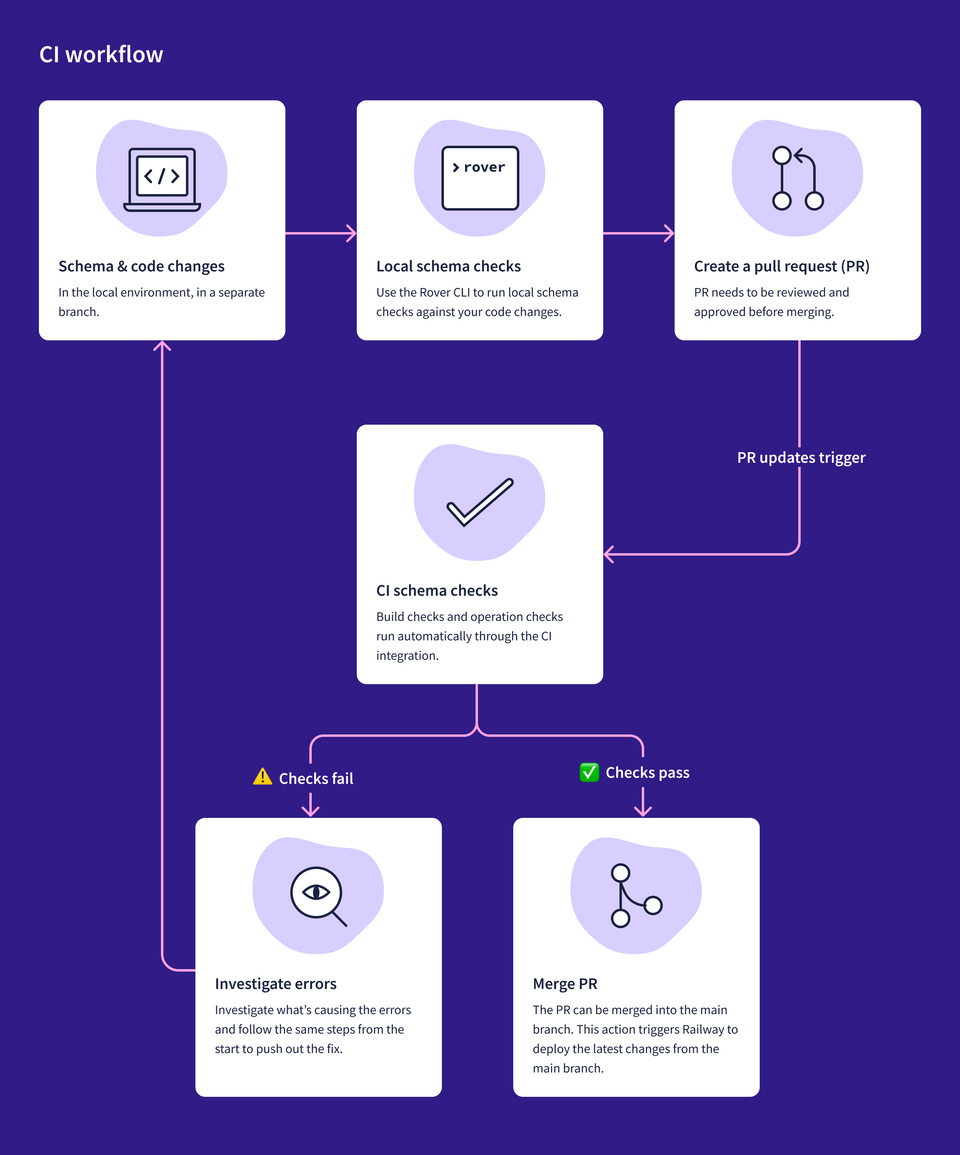
We want to set up schema checks to run automatically against the code changes in a pull request. This way, every PR will check that the schema still works and checks are passing before it can be successfully merged. We can merge with confidence, knowing that our schema changes won't break our supergraph or existing client queries.
First, we'll make our schema and code changes, and run a schema check locally. If all is good, we'll create a pull request that triggers a GitHub workflow to run schema checks (we'll be creating this workflow!).
If the checks fail, we'll see the errors in the GitHub PR, which will also link to Studio for more details. We'll need to investigate the error, fix it in our local environment and follow the process again from the start.
If the checks pass, great! We can merge the changes to the main branch. Railway will be automatically notified of these changes and deploy the latest version. (Alternatively, if you're not using Railway, you might add a different GitHub workflow to deploy the main branch to the platform of your choice!)
Next, we'll need to set up another GitHub workflow to automate publishing the schema. We'll manually trigger this workflow once we've confirmed that our deployment was successful. We'll follow the launch process in Studio until we see green checks everywhere!
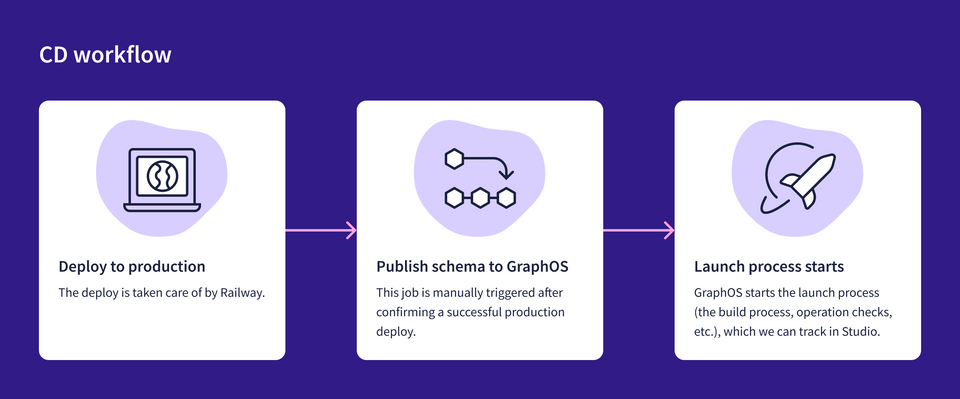
Whew, exciting stuff! This may seem like a lot to set up and do, especially if you're just one developer going through a tutorial trying things out. But when you're ready to level up and ensure that you've got the foundations ready for safe and confident supergraph evolution, we hope these workflows will help!
Note: GitHub Actions is what we're using to automate our CI/CD workflows. These workflows can be triggered by events such as creating or closing pull requests, new commits on a branch, or even manually with a push of a button.
Exploring the GitHub Actions
When Railway cloned the repository for you, it also brought over the workflows from the original repository. You won't need to code the workflows yourself!
You can find them under the Actions tab of your repo.
Schema checks workflow
Select the "Schema checks" workflow from the list on the left sidebar, then click on the file name (check-schema.yaml) to check out the contents of the file.
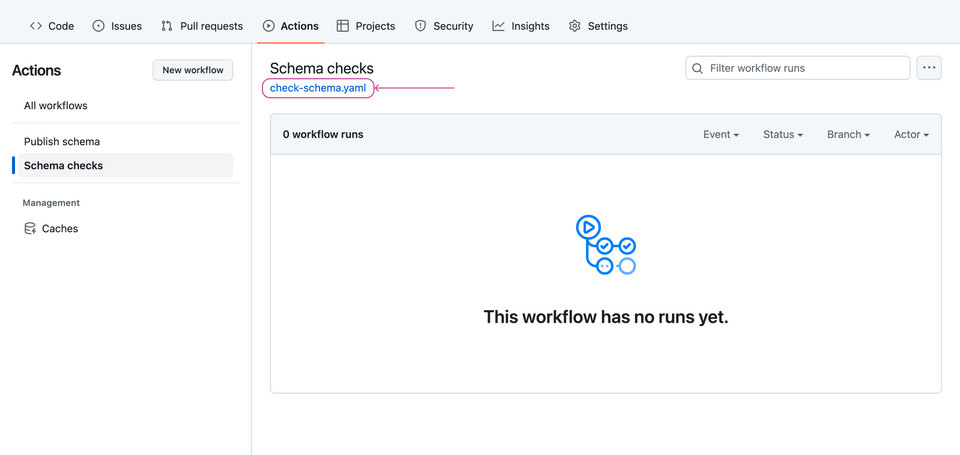
Don't worry too much about the specific syntax for these workflows. We've left comments in the file to help you make sense of what's happening but the goal of this course is more about getting a big-picture sense of how all the pieces of deployment fit together. Pay attention to the steps: section, which outlines what commands to run for this job.
We've defined that this workflow should run on every PR opened, updated and edited.
At the very end, it runs the rover subgraph check command we're familiar with. We'll need to give it the variables it's expecting: APOLLO_GRAPH_REF and APOLLO_SUBGRAPH_NAME. We'll set those up in the next section.
Note: Ideally, you'll want to prevent merging to main if the schema check workflow fails. You can learn more about required status checks and branch protection rules in the GitHub documentation.
Publish schema
Back to the Actions tab, select the "Publish schema" workflow from the list on the left sidebar, then click on the file name (publish-schema.yaml) to check out the contents of the file.
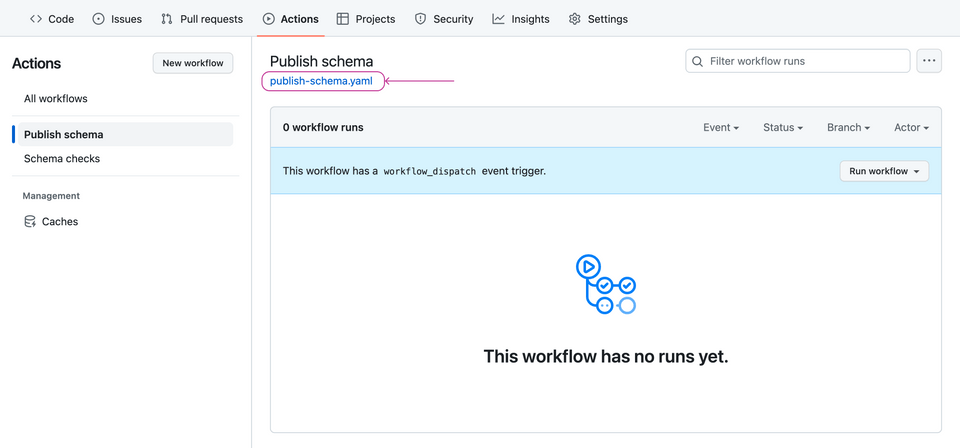
We've defined that this workflow should be run manually.
At the very end, it runs the rover subgraph publish command. Like the previous workflow, we'll need to give it the variables it's expecting. Let's set those up.
Setting the variables
In GitHub, navigate to the Settings tab.
Click Secrets and variables, then Actions. This is where all the secrets and variables our workflows need will live. Secrets are used for sensitive data, whereas variables are used for non-sensitive data.
https://github.com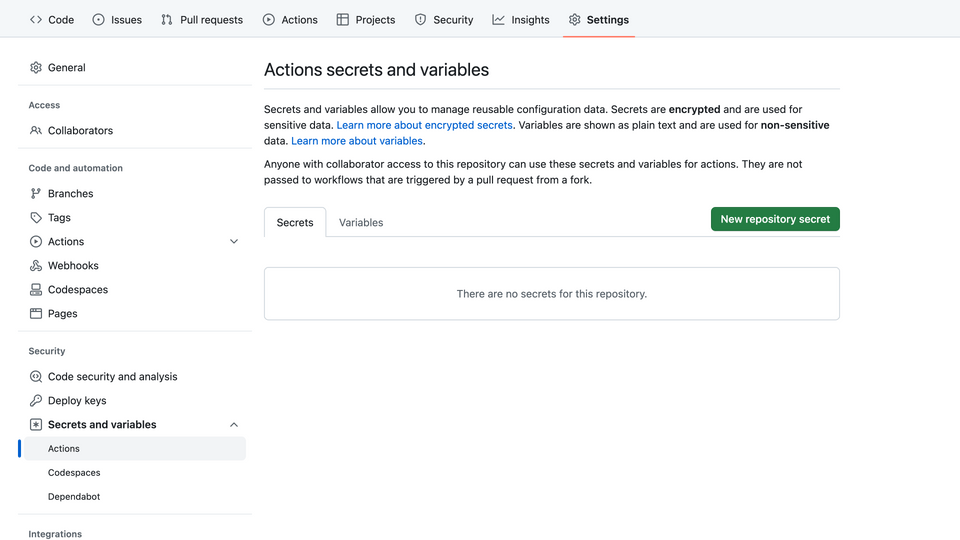
First, let's tackle the variables. The workflows need two things: the graph ref (APOLLO_GRAPH_REF) and the subgraph name (APOLLO_SUBGRAPH_NAME).
Note: We've prefixed the variable names with APOLLO_ to make it easier to differentiate against other variables you may have for your application.
Click the Variables tab, then click New repository variable.
https://github.com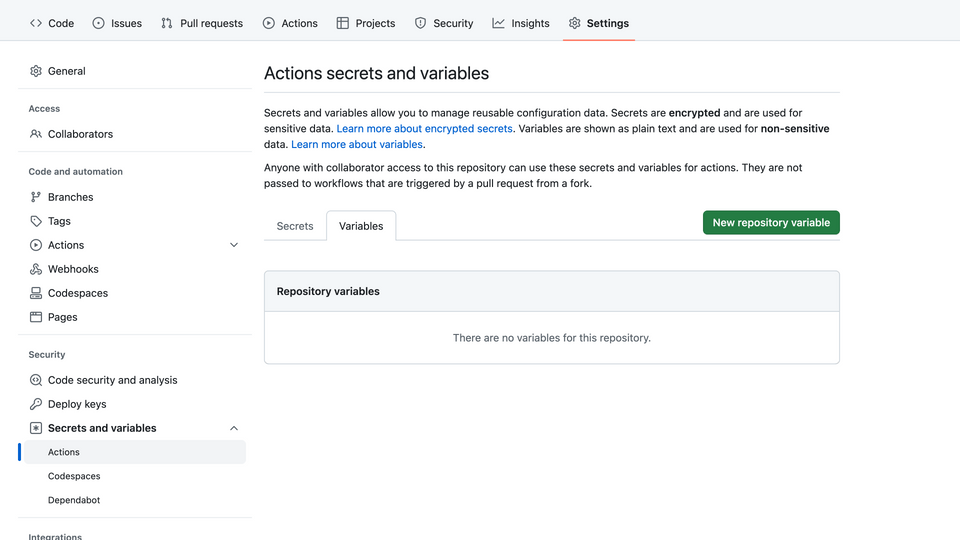
Add
APOLLO_GRAPH_REFin the Name input.In the Value input, paste in your graph ref. Remember, we can find this value in Studio, at the top of the graph's README page.
Hit Add variable.
Add another variable for
APOLLO_SUBGRAPH_NAME, setting it torecipes, the name of our subgraph.https://github.com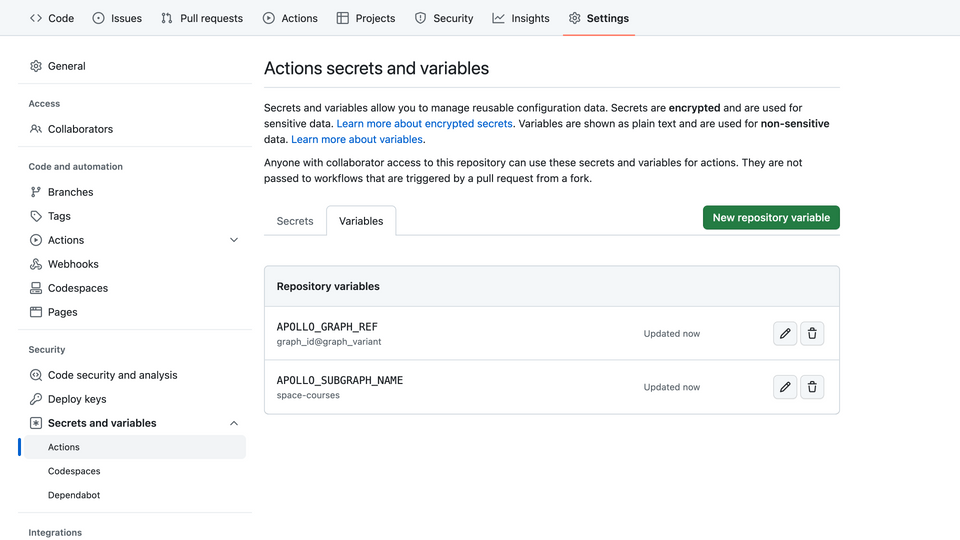
Perfect! Variables good to go—next up: the APOLLO_KEY secret.
Setting the APOLLO_KEY secret
This will be the API key that tells GraphOS we're allowed to make changes to this particular supergraph. It's an important key that should be kept secret. It's sensitive data we don't want anyone else to have because they'd be able to make changes to our supergraph!
Click the Secrets tab, then click New repository secret.
https://github.com
Set the Name to be
APOLLO_KEY.
If you remember way back at the beginning of the course when we were setting up Rover, we used rover config auth and gave it our personal API key. Personal API keys are appropriate to use for local development, like running commands in our terminal locally.
For CI/CD purposes, we need to use a graph API key. We want to create a unique graph API key for each non-development system that communicates with GraphOS. By doing this, we can better control (and revoke) what has access to our supergraph.
Let's take a detour and grab our graph API key.
In Studio, open your supergraph's Settings page, and from the This Graph tab select the API Keys option.
Click Create New Key. Give your key a name, like "GitHub PRs".
https://github.com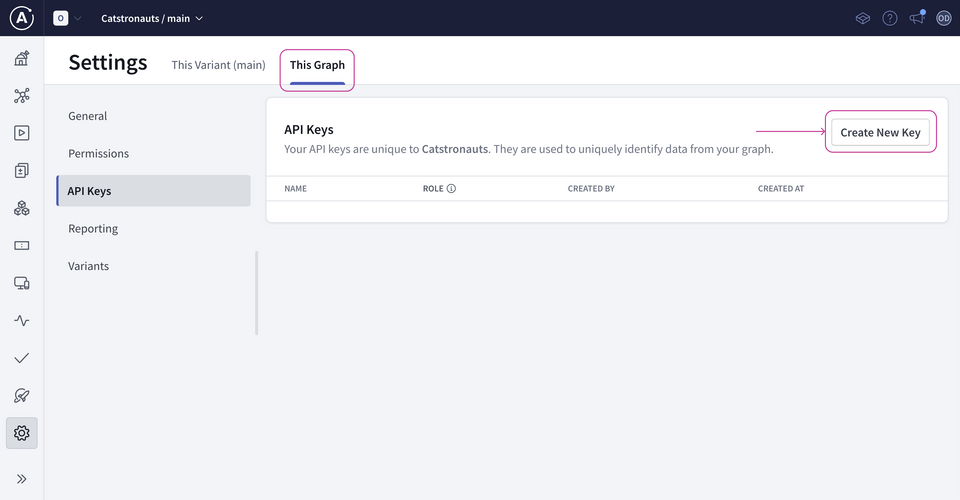
Copy the key (you won't be able to see it again!).
Paste it into the GitHub secret value.
Click Add secret to save your changes.
https://github.com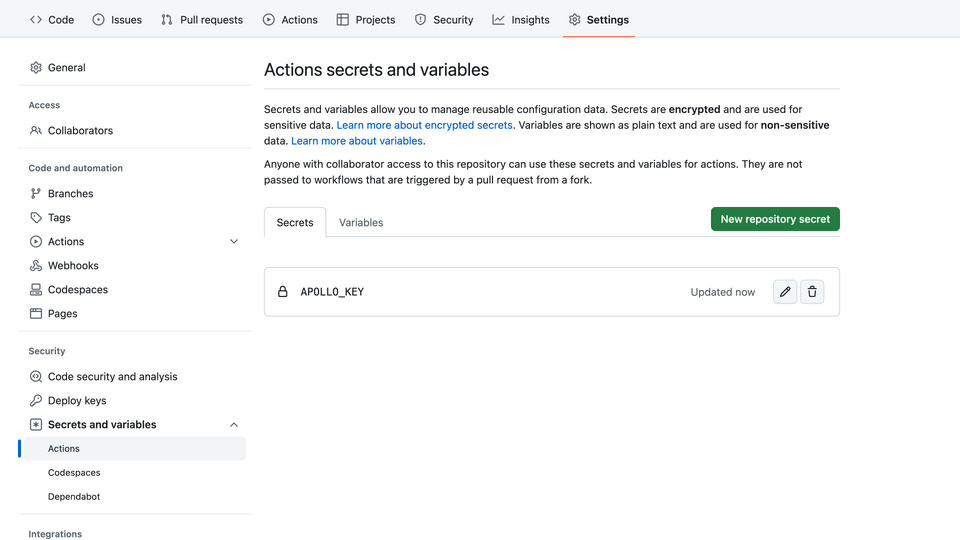
And we're all done! 🥳 We've set up two workflows to help us automate our schema delivery process:
- A schema check workflow that runs on every pull request creation, update and edit.
- A publish schema workflow that we'll manually trigger once our server deployment is successful.
Great job! Are you itching to see these workflows in action? Then let's keep moving.
Practice
Key takeaways
- We can easily integrate schema checks and publishes to our CI/CD pipeline to feel even more confident when we make changes to our supergraph.
- Use graph API keys for CI/CD purposes. You should create a unique graph API key for each non-development system that communicates with GraphOS to better control (and revoke) what has access to your supergraph. These keys should be kept secret.
Up next
We're not done deprecating our text field completely yet! Remember, we were waiting to make sure that usage of that field went down to zero so that we can safely remove it. In the next lesson, we'll find out how to use GraphOS field insights to do exactly that then see these workflows in action!
Share your questions and comments about this lesson
Your feedback helps us improve! If you're stuck or confused, let us know and we'll help you out. All comments are public and must follow the Apollo Code of Conduct. Note that comments that have been resolved or addressed may be removed.
You'll need a GitHub account to post below. Don't have one? Post in our Odyssey forum instead.