Overview
So far, FlyBy's subgraphs are running and their schemas have been published, but we still need one piece to tie everything together: the router.
In this lesson, we will:
- Set up the GraphOS Router locally
- Connect the router to GraphOS
- Send our first query to our supergraph
✏️ Downloading the router
The GraphOS Router is a high-performance graph router available as an executable binary that you can add to your project in a few steps:
Open a terminal window and navigate to the
routerdirectory in the FlyBy project.cd routerSo far, we only have the
.envfile in here with our environment variables.📦 router┣ 📄 .envWe'll download the Router by running the install command in the terminal, for Linux, OSX and WSL environments.
routercurl -sSL https://router.apollo.dev/download/nix/v1.46.0 | shVisit the official documentation to explore alternate methods of downloading the Router for other environments.
Now when we check the contents of our
routerdirectory, we'll see that we have a new file also calledrouter!📦 router┣ 📄 .env┗ 📄 router
✏️ Running the router
Back in the same terminal window, run the command below that suits your development environment. You'll need to replace the
<APOLLO_KEY>and<APOLLO_GRAPH_REF>placeholder values with your supergraph's corresponding values from therouter/.envfile. This command starts up the router locally and tells the router which supergraph to connect to.MacOS / Linux / WSLAPOLLO_KEY=<APOLLO_KEY> APOLLO_GRAPH_REF=<APOLLO_GRAPH_REF> ./routerWindows powershell$env:APOLLO_KEY="<APOLLO_KEY>"$env:APOLLO_GRAPH_REF="<APOLLO_GRAPH_REF>"./routerNote: For Windows users, we recommend running the subgraph servers and the router in the same environment (all on powershell, or all on WSL).
We'll see a few lines of router output, and finally a message that our router is running on port 4000, ready to receive queries!
Let's copy this address, we'll need it to set our connection settings in Studio. This tells outside consumers of our API what endpoint they can use to query our schema.
GraphQL endpoint exposed at http://127.0.0.1:4000/ 🚀Note: Because our router is currently running at http://127.0.0.1:4000, it's not actually accessible to the outside world. But we can still add it to our configuration settings, which will let us query the router from our own machines.
✏️ Connecting the router to GraphOS
Let's flip back over to Studio.
Click on the README tab in the sidebar.
Next, tap the Connection Settings link at the top of the page.
studio.apollographql.com/graph/flyby/variant/current/home
We'll paste the router address we copied (
http://127.0.0.1:4000) as the endpoint, then save.studio.apollographql.com/graph/flyby/variant/current/home
Let's get to querying our supergraph!
✏️ Testing our schema
Select the Explorer tab from the sidebar.
Let's put together a query that retrieves data from both of our subgraphs. We'll call our query
GetLocationsAndLatestReviews.Now let's fire in some fields. We'll start with
locations. Click the plus button (⊕) next to Fields to add all the location fields to our query.Next let's go back and add
latestReviews, and all the reviews subfields.Our query should look like this:
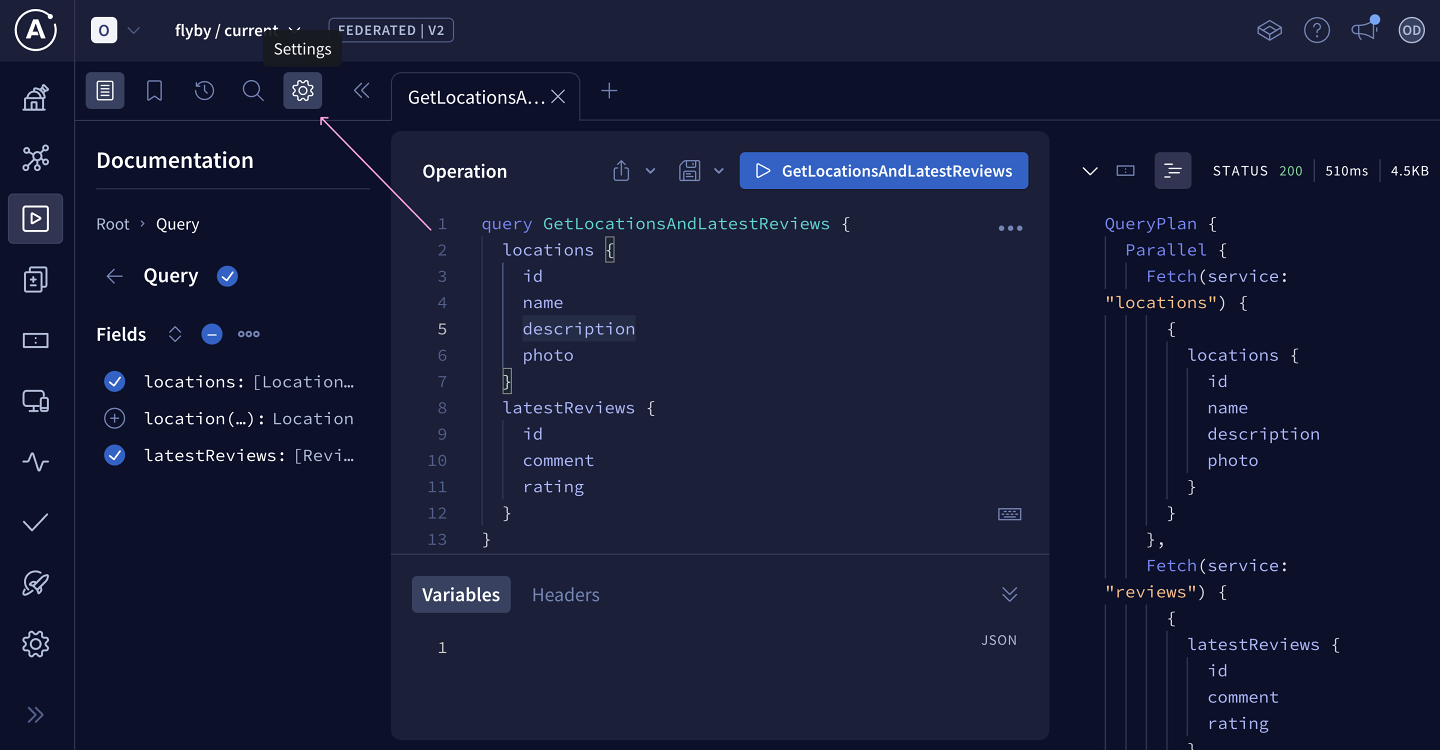
query GetLocationsAndLatestReviews {locations {idnamedescriptionphoto}latestReviews {idcommentrating}}Before we run the query, let's change the Response dropdown on the right to Query Plan Preview. This shows us a diagram for the query plan the router will use to resolve our current operation.
studio.apollographql.com/graph/flyby/explorer?variant=current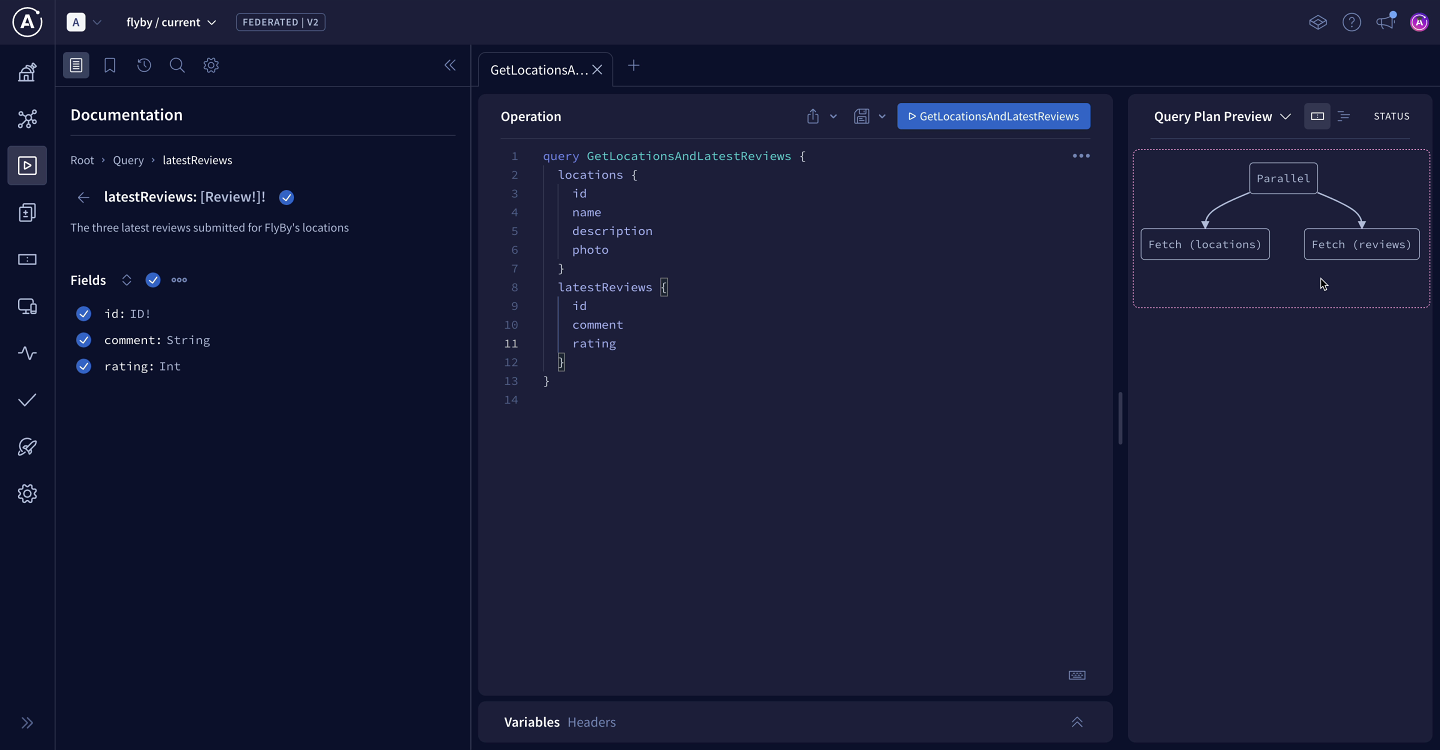
By choosing the icon to Show plan as text, we'll see a more detailed breakdown of the query plan. We won't worry about all the syntax here, but we can get a general idea of how the router plans to handle this query: the
locationssubgraph will resolve thelocationsfields, and thereviewssubgraph will handlelatestReviewsand its subfields.studio.apollographql.com/graph/flyby/explorer?variant=current


Now let's run this query.
studio.apollographql.com/graph/flyby/explorer?variant=current
Fantastic! We can see that the data object in our response contains both locations and reviews.
This is huge. We've just unlocked one of the powers of our supergraph: we can write one query to our router and hit both subgraphs at once!

Practice
Key takeaways
- The GraphOS Router is an executable binary file that can be downloaded and run locally.
- The Query Plan Preview inspects the GraphQL operation in the Explorer and outputs the query plan the router will execute to resolve the operation.
Up next
Congratulations, we now have a working supergraph! Our frontend team can get back all the data they need from a single GraphQL operation, and we've improved our development experience by modularizing the backend!
But there's still one problem we need to solve.
Remember those three fields we still haven't added to our schema? You remember! Here's that schema agreement again, to jog your memory:

Even though our router can query each subgraph separately, we can't associate data between the two subgraphs yet.
Well, next up we'll learn about the feature that will make coordination between our subgraphs possible: entities.
Share your questions and comments about this lesson
Your feedback helps us improve! If you're stuck or confused, let us know and we'll help you out. All comments are public and must follow the Apollo Code of Conduct. Note that comments that have been resolved or addressed may be removed.
You'll need a GitHub account to post below. Don't have one? Post in our Odyssey forum instead.