Overview
Let's get our local development environment ready to work with connectors.
In this lesson, we will:
- Verify our Apollo account
- Install the Rover CLI
- Set up our local environment
- Create a graph in GraphOS Studio
- Run
rover dev
What we're building
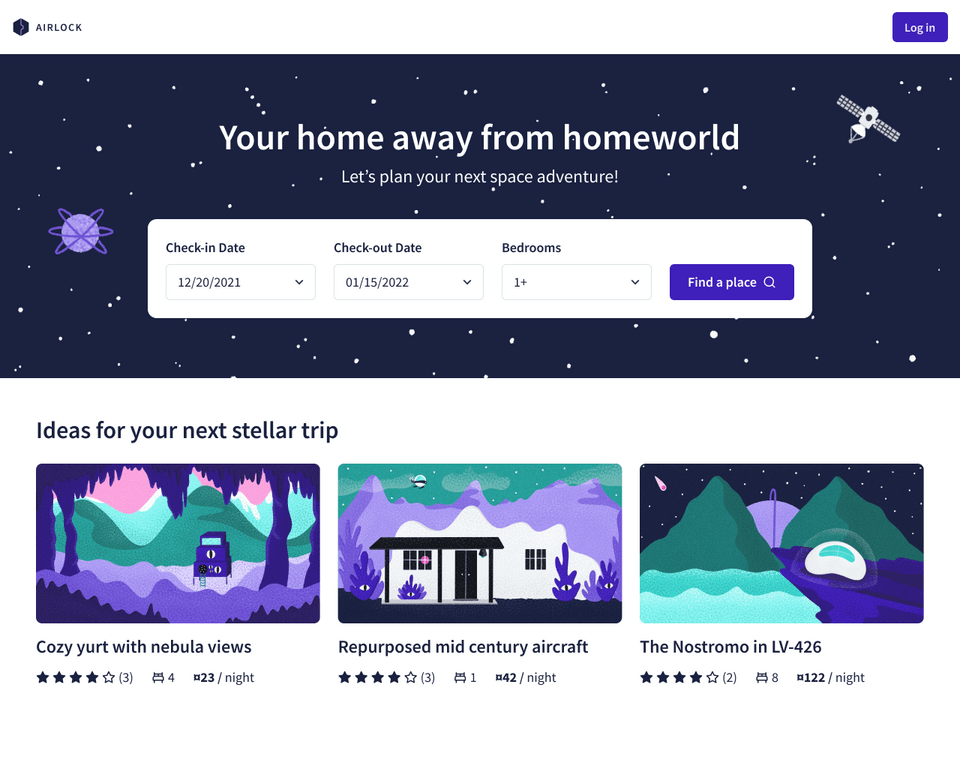
Airlock is an intergalactic travel booking app: a resource we can use to find a cool place to stay in the wide open universe!
Eventually, Airlock will be a full-fledged supergraph with many different subgraphs. For now, we'll start with the listings
subgraph, powered by the Listings REST API.
1) Verify your Apollo account
To get started with connectors, you'll need an Apollo account with one of the following plans: GraphOS Trial or Enterprise.
Don't have an account yet? Create one now. You'll automatically be enrolled in a GraphOS Trial plan with the correct role. You can move on to the next step to install the Rover CLI.
If you already have an account, check your organization's current plan in GraphOS Studio. From your organization's page, go to the Settings tab and scroll down to the Plan and Billing section. You will need to have a GraphOS Trial or Enterprise plan. Additionally, you will also need to have the Graph Admin role in that organization to be able to create graphs.
2) Install the Rover CLI
Rover is Apollo's command line interface (CLI) tool that helps developers work with graphs and interact with GraphOS. We'll use it to spin up a local supergraph we can work with locally.
We'll be using a specific version of Rover (that's currently in preview) that works with the Apollo VS Code extension (which we'll install at a later step).
Open up a terminal and run the install command that suits your computer's environment:
For Linux / Mac OS:
curl -sSL https://rover.apollo.dev/nix/v0.27.0-preview.0 | shFor Windows PowerShell installer
iwr 'https://rover.apollo.dev/win/v0.27.0-preview.0' | iexNote: You can find other installation methods in the Apollo documentation. You'll need to download this version:
v0.27.0-preview.0
.If you've already installed Rover before, you'll get a message asking if you'd like to overwrite the existing installation. Type
y
and hit enter to continue.Verify that the installation completed successfully:
rover --versionYou should see the following output:
Rover 0.27.0-preview.0
3) Set up your local environment
3a) Clone the project repo
In a terminal window, run the following:
git clone https://github.com/apollographql-education/odyssey-connectors-rest-intro
Don't have git
installed? Check out the instructions to install it. Alternatively, you can download the ZIP file locally by clicking "Code" and selecting "Download ZIP".
Your project directory will look something like this:
📂 summit24-connectors┣ 📂 .vscode┣ 📄 .gitignore┣ 📄 apollo.config.yaml┣ 📄 listings.graphql┣ 📄 router-config.yaml┣ 📄 rover-dev.md┗ 📄 supergraph.yaml
In listings.graphql
, we're starting off with a small GraphQL schema.
extend schema@link(url: "https://specs.apollo.dev/federation/v2.10", import: ["@key"])type Query {"A curated array of listings to feature on the homepage"featuredListings: [Listing!]!}"A particular intergalactic location available for booking"type Listing {id: ID!"The listing's title"title: String!}
We'll build onto this throughout the course!
3b) Install the Apollo VS Code Extension
We strongly recommend using VS Code to make use of our Apollo VS Code extension. It brings many helpful features for working on a GraphQL project, such as intelligent autocomplete, schema information, syntax highlighting and much more!
Note: If you don't use VS Code, you can still follow along with the course with any code editor, you just won't see tips and in-development errors while you code.
4) Create a new connectors supergraph in GraphOS Studio
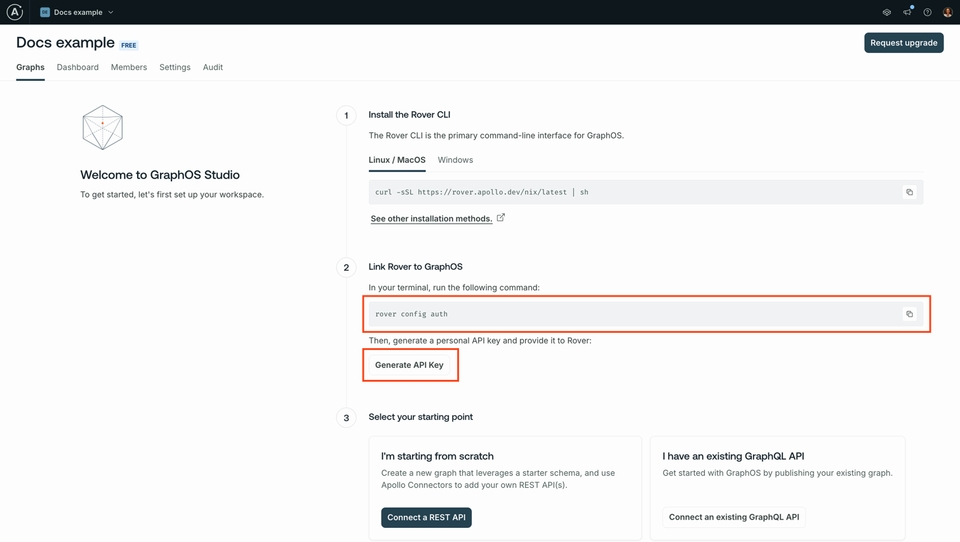
In Studio, if you have a brand new organization, you'll see two choices to start. Select "Connect a REST API".
studio.apollographql.comIf you already have existing graphs, click the arrow beside "+ Create New Graph", then select Create a new connectors supergraph.
studio.apollographql.comGive your graph a name.
studio.apollographql.comKeep the example subgraph as
users
and graph as visible to others. Then hit "Create graph".The next step in the process outlines how to set up our local development environment using an example
users
subgraph. It's great for getting started quickly, but we've already got our Airlock API to work on, so we won't do all the steps in this process!studio.apollographql.comWe've already got step 1 completed with our special Rover installation. We're also starting with a
supergraph.yaml
file in our project repo, and a schema, so that's steps 2 and 3 done!Scrolling down to step 4, let's copy and paste over the values for
APOLLO_KEY
andAPOLLO_GRAPH_REF
into ourrover-dev.md
file.studio.apollographql.com
# shAPOLLO_KEY="..." \APOLLO_GRAPH_REF="..." \APOLLO_ROVER_DEV_ROUTER_VERSION=2.0.0-preview.0 \rover dev --supergraph-config supergraph.yaml --router-config router-config.yaml# Powershell$env:APOLLO_KEY="..."$env:APOLLO_GRAPH_REF="..."$env:APOLLO_ROVER_DEV_ROUTER_VERSION="2.0.0-preview.0"rover dev --supergraph-config supergraph.yaml --router-config router-config.yaml
5) Run rover dev
rover dev
spins up a supergraph in your local environment.
In a new terminal window, run the command in the rover-dev.md
file that suits your local environment. Don't forget, we substituted over our own values for APOLLO_KEY
and APOLLO_GRAPH_REF
in the previous step!
APOLLO_KEY="..." \APOLLO_GRAPH_REF="..." \APOLLO_ROVER_DEV_ROUTER_VERSION=2.0.0-preview.0 \rover dev --supergraph-config supergraph.yaml --router-config router-config.yaml
$env:APOLLO_KEY="..."$env:APOLLO_GRAPH_REF="..."$env:APOLLO_ROVER_DEV_ROUTER_VERSION="2.0.0-preview.0"rover dev --supergraph-config supergraph.yaml --router-config router-config.yaml
Note: You can take a peek at the config files we've passed into rover dev
if you're curious!
You should see output messages in the terminal that the router has started up at port 4000.
supergraph config loaded successfullywatching router-config.yaml for changesDo not run this command in production! It is intended for local development.starting a session with the 'listings' subgraphcomposing supergraph with Federation v2.10.0-alpha.2your supergraph is running! head to http://localhost:4000 to query your supergraphwatching listings.graphql for changes
We're ready!
Open up http://localhost:4000 in the browser to see a Sandbox Explorer running, ready to create and run operations.
Key takeaways
- To get started with Apollo Connectors, you need an Apollo account with a GraphOS Trial or Enterprise plan.
- To run a local supergraph, you'll need
rover dev
and your graph identifiers.
Up next
If we try to run queries against our schema now, we'll get errors! Let's jump into the schema and link to our REST API with @source
!
Share your questions and comments about this lesson
This course is currently in
You'll need a GitHub account to post below. Don't have one? Post in our Odyssey forum instead.