Overview
In the planning phase, we identified a list of entities in the monolith schema. It's time to put the plan into action!
In this lesson, we will:
- Define entities
- Publish the updated schema
Define entities
Here's the list of entities again:
- Host- Guest- Listing- Booking- Review
For each of these types, we'll use the @key field to mark it as an entity with a primary key field. Fortunately, each type uses the same field name to hold the data that makes each instance uniquely identifiable: id!
Open up
monolith/schema.graphql.Find each type and add the following directive:
@key(fields: "id").type Host implements User @key(fields: "id") {# fields}type Guest implements User @key(fields: "id") {# fields}type Listing @key(fields: "id") {# fields}type Booking @key(fields: "id") {# fields}type Review @key(fields: "id") {# fields}Let's check out these changes we've made locally with our subgraph in Sandbox at http://locahost:4001.
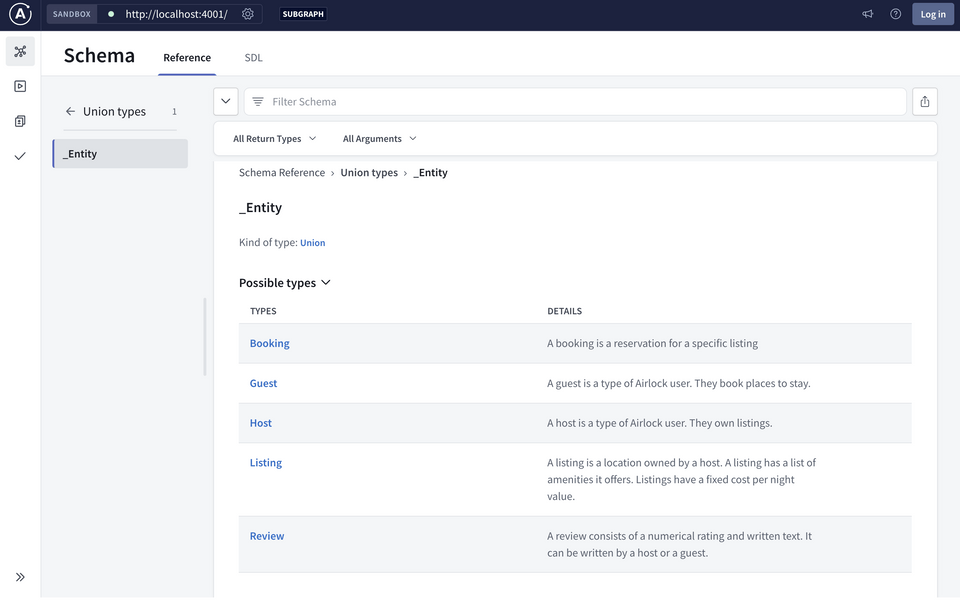
Head over to the Schema page. We'll see a new field in the
Querytype called_entitieswith the return type as a list of_Entity. Click on that type to find out more information.In this detailed view, we can see a list of possible entities: the same list we defined earlier. Perfect, it's all working!
studio.apollographql.com
Publish schema
We made changes to the schema, and it's time to publish them to the graph. You know the drill!
Open up a new terminal and run the rover subgraph publish command.
rover subgraph publish <APOLLO_GRAPH_REF> \--schema ./monolith/schema.graphql \--name monolith
Note: We're in tutorial land so we're working with localhost, which means that every time you publish your subgraph schema, you'll need to confirm that it's okay to publish with a localhost routing URL. In Voyage III, you'll learn what this process looks like in a production environment, complete with schema checks, launches and CI/CD workflows.
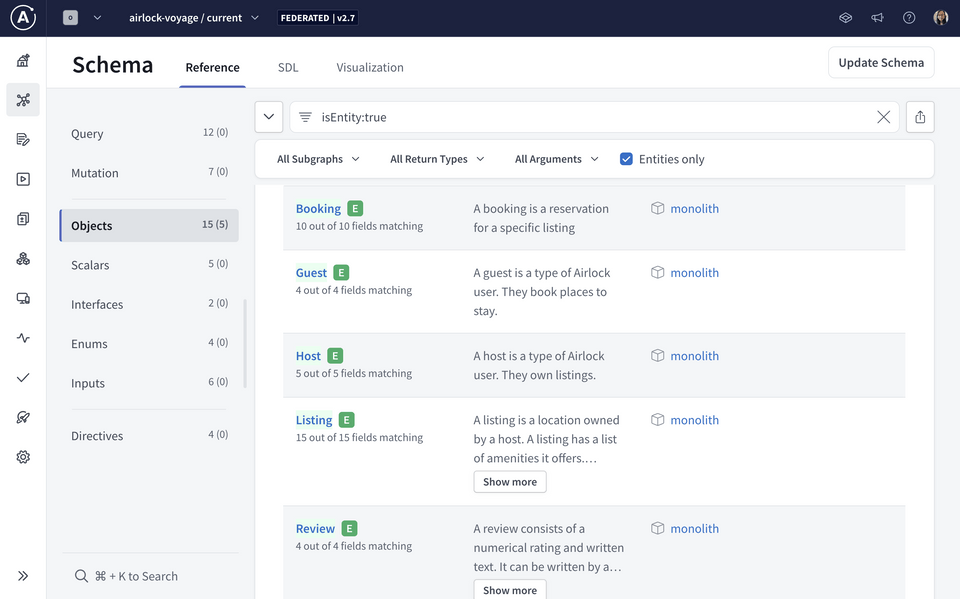
With a successful publish, we can head over to Studio and see the results mirrored in our supergraph.
In the Schema page, select Objects and check off the Entities only filter.

We've made our local changes available in the supergraph, which means other teams can see them too. This makes it easier for others to discover entities and even contribute their own fields to those entities in their own subgraphs!
Key takeaways
- Defining entities is an important step in migrating to a federated architecture. It enables everyone to explore the schema and contribute to it.
Up next
We'll continue on with our implementation plan, splitting off a stub of our accounts subgraph to start.
Share your questions and comments about this lesson
Your feedback helps us improve! If you're stuck or confused, let us know and we'll help you out. All comments are public and must follow the Apollo Code of Conduct. Note that comments that have been resolved or addressed may be removed.
You'll need a GitHub account to post below. Don't have one? Post in our Odyssey forum instead.