Exercise: Creating a supergraph
🎯 Goal: Create a supergraph on GraphOS using your API endpoint (where it's running on Railway!). This will be the start of your Poetic Plates GraphQL API.
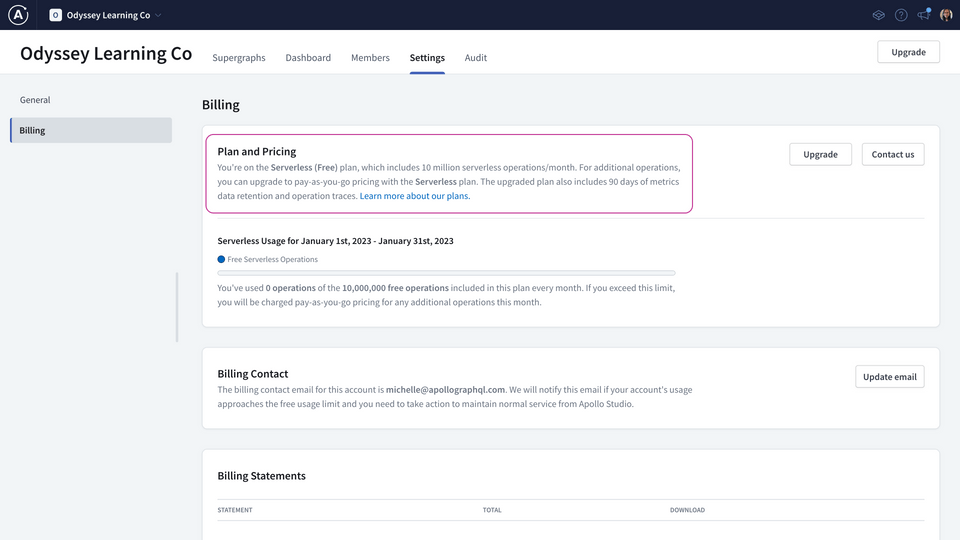
You'll need a Studio account with the Serverless plan.
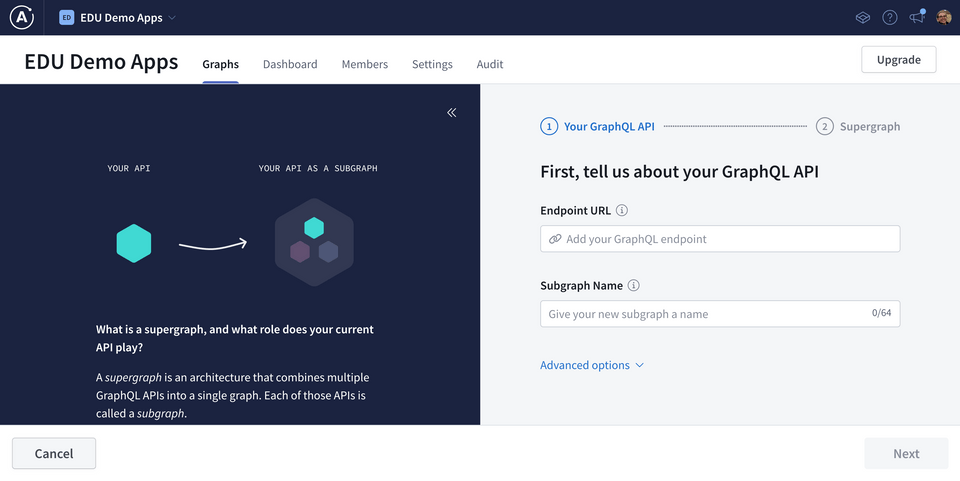
If you already have a GraphOS account with existing graphs, click the Create New Graph button. Then, walk through the steps to create a supergraph.
If you see the flow below, you're in the right place! Go ahead and walk through the steps to create your supergraph.

If you don't see that screen, then follow the "Before you start: Check your plan" section above.
Questions to think about
What's a good name for this first subgraph? Think: what business domain is it focused on? Here's the subgraph name we used:
Subgraph namerecipesWhat's the difference between the supergraph ID and the supergraph name? When/where would the ID or the name be used in: the developer workflow? GraphOS?
AnswerThe supergraph ID will be used to reference your supergraph from various tools later on.It CANNOT be changed.The supergraph name can be changed at any time.It's displayed throughout Studio.It's usually how you refer to your supergraph with your teammates.
Configuring CORS
Currently, our supergraph is ready to be queried—but only through Studio. This is because the cloud router we've set up for our supergraph needs to be specifically configured to allow other origins to access it.
We can update these settings right in Studio.
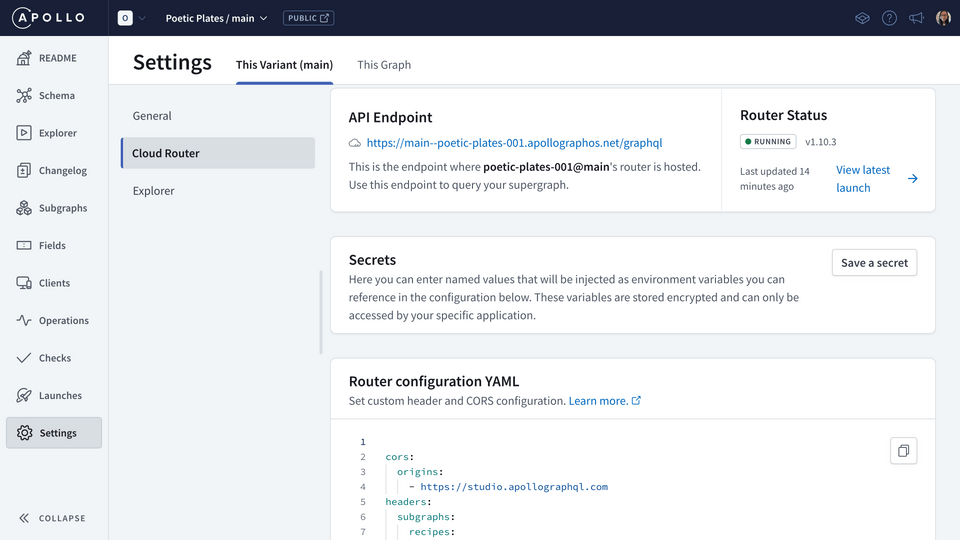
Navigate to our newly-created supergraph's Settings page, under the This variant tab.
Click into the Cloud Router option, and scroll down to the section titled Router configuration YAML.
https://studio.apollographql.com Router Configuration YAMLcors:origins:- https://studio.apollographql.comheaders:subgraphs:recipes:request:- propagate:matching: ".*"
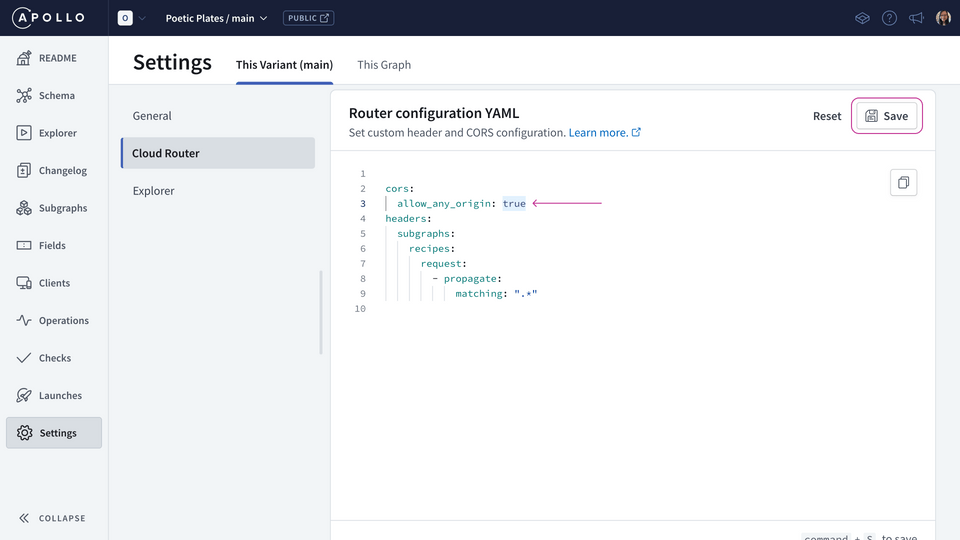
Remove the
originslist. Below (still nested within thecorsproperty), we're going to add a new property calledallow_any_originand set it totrue.Router Configuration YAMLcors:allow_any_origin: trueThen, hit Save.
https://studio.apollographql.com
If we didn't set this option, client app developers would see an error in their browser, noting that their localhost or production URL has been blocked by CORS policy.
Share your questions and comments about this lesson
Your feedback helps us improve! If you're stuck or confused, let us know and we'll help you out. All comments are public and must follow the Apollo Code of Conduct. Note that comments that have been resolved or addressed may be removed.
You'll need a GitHub account to post below. Don't have one? Post in our Odyssey forum instead.
