Full-stack React + GraphQL Tutorial

Jonas Helfer
This tutorial uses an old version of Apollo Client, and we’re working on updating it soon. For a more up to date introduction to the new constructor API, check out this getting started guide. Most of this tutorial will be identical and can be completed with the new API.

GraphQL is a new API-definition and query language that has the potential to become the new REST. It makes it easy for UI components to declaratively fetch data without having to worry about backend implementation details. Because it’s such a powerful abstraction, GraphQL can speed up app development and make code much easier to maintain.
However, despite the great advantages of using GraphQL, the first step can be a bit daunting. That’s why I’ve started writing a series of tutorials that take you step by step through building a full-stack React app with GraphQL and Apollo Client. The series will guide you through the entire process of building an instant messaging app which uses GraphQL throughout:
- Part 1 (this part): Setting up a simple client
- Part 2: Setting up a simple server
- Part 3: Writing mutations and keeping the client in sync
- Part 4: Optimistic UI and client side store updates
- Part 5: Input types and custom cache resolvers
- Part 6: Subscriptions on the server
- Part 7: GraphQL Subscriptions on the client
- Part 8: Pagination
This tutorial — the first in the series — is about getting started with GraphQL on the frontend. It only takes about 20–30 minutes, and by the end of it you’ll have a very simple React UI that loads its data with GraphQL and looks something like this:
Let’s get started!
1. Getting set up
Note: To do this tutorial you will need to have node, npm and git installed on your machine, and know a little bit about React.
We’re going to use <a href="https://github.com/facebookincubator/create-react-app" target="_blank" rel="noreferrer noopener">create-react-app</a> in this tutorial, so go ahead and install that:
> npm install -g create-react-app
We’ll also clone the tutorial repository from GitHub, which has some CSS and images in it that we’ll use later.
> git clone https://github.com/apollographql/graphql-tutorial.git
> cd graphql-tutorial
Next, we create our react app with create-react-app .
> create-react-app client
> cd client
To make sure it’s working, let’s start our server:
> npm start
If it all worked, you should now see the following in your browser:

2. Writing the first component
Since we’re building an app with Apollo here, let’s change the logo and CSS by copying over logo.svg and App.css from ../resources
> cd src
> cp ../../resources/* .
To keep this initial tutorial short, we’ll only build a simple list view today. Let’s change a few things in App.js:
- Change “Welcome to React” to “Welcome to Apollo”. Apollo is the name of the GraphQL client we’re going to use throughout this tutorial series.
- Remove the “To get started ..” paragraph and replace it with a pure React component that renders an unordered list
<ul>with two list items<li>, “Channel 1” and “Channel 2” (yes, you guessed it, we’re going to build a messaging app!). Let’s name our list componentChannelsList.
Now your App.js should look like this:
import React, { Component } from 'react';
 import logo from './logo.svg';
 import './App.css';const ChannelsList = () =>
     (<ul>
       <li>Channel 1</li>
       <li>Channel 2</li>
     </ul>);class App extends Component {
   render() {
     return (
       <div className="App">
         <div className="App-header">
           <img src={logo} className="App-logo" alt="logo" />
           <h2>Welcome to Apollo</h2>
         </div>
         <ChannelsList />
       </div>
     );
   }
 }export default App;
create-react-app sets up hot reloading for you, so as soon as you save the file, the browser window with your app should update to reflect the changes:

3. Writing your GraphQL schema
Now that we have a simple app running, it’s time to write GraphQL type definitions for it. The schema will specify what object types exist in our app, and what fields they have. In addition, it also specifies the allowed entry points into our API. We’ll do that in a file called schema.js
export const typeDefs = `type Channel {
   id: ID!                # "!" denotes a required field
   name: String
}# This type specifies the entry points into our API. In this case
# there is only one - "channels" - which returns a list of channels.
type Query {
   channels: [Channel]    # "[]" means this is a list of channels
}
`;
With this schema we’ll be able to write a simple query to fetch the data for our ChannelList component in the next section. This is what our query will look like:
query ChannelsListQuery {
  channels {
    id
    name
  }
}
4. Wiring your component together with the GraphQL query
Alright, now that we have our schema and query, we just need to hook up our component with Apollo Client! Let’s install Apollo Client and some helper packages that we’ll need to get GraphQL into our app:
> npm i -S react-apollo
react-apollo is a neat integration of Apollo Client with React that lets you decorate your components with a higher order component called graphql to get your GraphQL data into the component with zero effort. React Apollo also comes with ApolloClient, which is the core of Apollo that handles all the data fetching, caching and optimistic updates (we’ll get to those in another tutorial).
Now with that, let’s add a few imports at the top of our App.js and create an instance of Apollo Client:
import {
  ApolloClient,
  gql,
  graphql,
  ApolloProvider,
} from 'react-apollo';const client = new ApolloClient();
Next, we decorate the original ChannelsList with a GraphQL higher-order component that takes the query and passes the data to our component:
const channelsListQuery = gql`
   query ChannelsListQuery {
     channels {
       id
       name
     }
   }
 `;const ChannelsListWithData = graphql(channelsListQuery)(ChannelsList);
When wrapped with the graphql HOC, our ChannelsList component will receive a prop called data, which will contain channels when it’s available, or error when there is an error. In addition data also contains a loading property, which is true when Apollo Client is still waiting for data to be fetched.
We’ll modify our ChannelsList component to make sure the user knows if the component is loading, or if there has been an error:
const ChannelsList = ({ data: {loading, error, channels }}) => {
   if (loading) {
     return <p>Loading ...</p>;
   }
   if (error) {
     return <p>{error.message}</p>;
   }   return <ul>
     { channels.map( ch => <li key={ch.id}>{ch.name}</li> ) }
   </ul>;
 };
Finally, we have to replace the ChannelsList inside our App’s render function with ChannelsListWithData. In order to make an instance of Apollo Client available to the component we just created, we also wrap our top-level app component with ApolloProvider, which puts an instance of the client on the UI.
Your App component should now look like this:
class App extends Component {
   render() {
     return (
       <ApolloProvider client={client}>
         <div className="App">
           <div className="App-header">
             <img src={logo} className="App-logo" alt="logo" />
             <h2>Welcome to Apollo</h2>
           </div>
           <ChannelsListWithData />
         </div>
       </ApolloProvider>
     );
   }
 }
Okay, we’re almost done! If you try to run this now, you should see the following error:

What’s going on? Well, we wired up all our components correctly, but we haven’t written a server yet, so of course there is no data to fetch or display! If you don’t specify a URL for your GraphQL endpoint, Apollo Client will assume that it’s running on the same origin under /graphql. To change that, we need to create a network interface with a custom URL.
However, because this tutorial isn’t about writing a server, we’ll use the fact that GraphQL is self-documenting to create mocks automatically from the type definitions we wrote earlier. To do that, we just need to stop the server, install a few additional packages, and restart it:
npm i -S graphql-tools apollo-test-utils graphql
We’ll use these packages to create a mock network interface for Apollo Client based on the schema we wrote earlier. Add the following imports and definitions towards the top of App.js:
import {
  makeExecutableSchema,
  addMockFunctionsToSchema
} from 'graphql-tools';
 import { mockNetworkInterfaceWithSchema } from 'apollo-test-utils';
 import { typeDefs } from './schema';const schema = makeExecutableSchema({ typeDefs });
addMockFunctionsToSchema({ schema });const mockNetworkInterface = mockNetworkInterfaceWithSchema({ schema });
Now all you have to do is pass the mockNetworkInterface to the constructor of Apollo Client …
const client = new ApolloClient({
networkInterface: mockNetworkInterface,
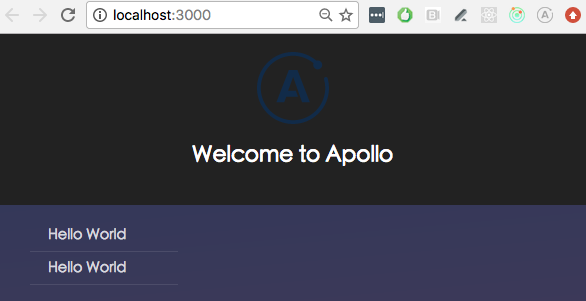
});That’s it, you’re done! Your screen should now look like this:

Note: “Hello World” is just the default mock text used for strings. If you want to customize your mocks to be super-fancy, check out this post I wrote a while ago.
If something isn’t working, and you can’t figure out why, you can compare it to this file to see what you did differently. Alternatively, you can check out the t1-end Git branch to inspect some working code.
Congratulations, you’ve officially finished the first part of the tutorial! It may not feel like much, but you’ve actually done a lot: You’ve written a GraphQL schema, generated mock data from it, and connected that to your React component with a GraphQL query. You know have the foundation on which we’re going to build a real messaging app throughout the remainder of this tutorial series. In part 2, we’ll write a simple server and hook it up to our app!
If you liked this tutorial and want to keep learning about Apollo and GraphQL, make sure to click the “Follow” button below, and follow us on Twitter at @apollographql and @helferjs.