Using Rover in CI/CD
Integrate Rover into continuous integration and deployment workflows
You can use Rover in any CI/CD environment that uses a Rover-supported operating system (Linux, MacOS, or Windows). Most commonly, this is to run schema checks with rover graph check or rover subgraph check.
Rover's installation is similar to many other CLI tools, but the recommended method varies depending on which provider you're using. We've included instructions for some of the most common CI/CD providers:
If you're using Rover with a CI/CD provider not listed here, we'd love for you to share the steps by opening an issue or pull request.
CircleCI
Linux jobs using the curl installer
Normally when installing, Rover adds the path of its executable to your $PATH. However, CircleCI doesn't use the $PATH variable between run steps. This means that if you install Rover and try to run it in the next step, you get a command not found: rover error.
To fix this, you can modify the $PATH and append it to $BASH_ENV. $BASH_ENV is executed at the beginning of each step, enabling any changes to be maintained across steps. You can add Rover to your $PATH using $BASH_ENV like this:
echo 'export PATH=$HOME/.rover/bin:$PATH' >> $BASH_ENV
After you install Rover and modify the $BASH_ENV as shown, Rover should work like normal.
ⓘ NOTE
Because the rover config auth command is interactive, you need to authenticate using an environment variable in your project settings.
Full example
# Use the latest 2.1 version of CircleCI pipeline process engine. See: https://circleci.com/docs/2.0/configuration-referenceversion: 2.1jobs:build:docker:- image: cimg/node:15.11.0steps:- run:name: Installcommand: |# download and install Rovercurl -sSL https://rover.apollo.dev/nix/v0.25.0 | sh# This allows the PATH changes to persist to the next `run` stepecho 'export PATH=$HOME/.rover/bin:$PATH' >> $BASH_ENV- checkout# after rover is installed, you can run it just like you would locally!# only run this command with the `--background` flag if you have the Apollo Studio GitHub integration enabled on your repository- run: rover graph check my-graph@prod --schema ./schema.graphql --background
GitHub Actions
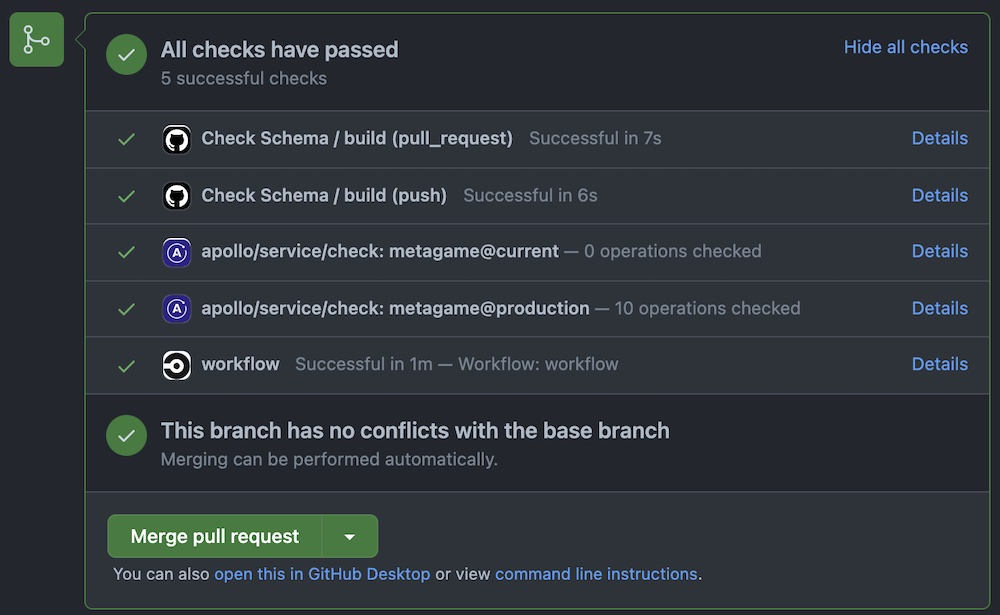
Displaying schema check results on GitHub pull requests
If you use GitHub Actions to automatically run schema checks on every pull request (as shown below), you can install the Apollo Studio GitHub app to provide links to the results of those checks alongside your other pull request checks:
To display schema check results on pull requests correctly, you need to make sure Rover associates the schema check execution with the pull request's HEAD commit, as opposed to the merge commit that GitHub adds. To guarantee this, set the APOLLO_VCS_COMMIT environment variable in your action's configuration, like so:
env:APOLLO_VCS_COMMIT: ${{ github.event.pull_request.head.sha }}
Linux/MacOS jobs using the curl installer
Normally when installing, Rover adds the path of its executable to your $PATH. However, GitHub Actions doesn't use the $PATH variable between run steps. This means that if you install Rover and try to run it in the next step, you get a command not found: rover error.
To fix this, you can append Rover's location to the $GITHUB_PATH variable. $GITHUB_PATH is similar to your system's $PATH variable, and additions to $GITHUB_PATH can be used across multiple steps. You can modify it like this:
echo "$HOME/.rover/bin" >> $GITHUB_PATH
ⓘ NOTE
Because the rover config auth command is interactive, you need to authenticate using an environment variable in your project settings.
GitHub actions uses project environments to set up secret environment variables. In your action, you choose a build.environment by name and set build.env variables using the saved secrets.
The following is a full example script, showing how to choose an apollo environment and set an APOLLO_KEY variable:
Full example
# .github/workflows/check.ymlname: Check Schema# Controls when the action will run. Triggers the workflow on push or pull request eventson: [push, pull_request]# A workflow run is made up of one or more jobs that can run sequentially or in paralleljobs:# This workflow contains a single job called "build"build:# The type of runner that the job will run onruns-on: ubuntu-latest# https://docs.github.com/en/actions/reference/environmentsenvironment: apollo# https://docs.github.com/en/actions/reference/encrypted-secrets# https://docs.github.com/en/actions/reference/workflow-syntax-for-github-actions#jobsjob_idstepsenvenv:APOLLO_KEY: ${{ secrets.APOLLO_KEY }}APOLLO_VCS_COMMIT: ${{ github.event.pull_request.head.sha }}# Steps represent a sequence of tasks that will be executed as part of the jobsteps:# Checks-out your repository under $GITHUB_WORKSPACE, so your job can access it- uses: actions/checkout@v2- name: Install Roverrun: |curl -sSL https://rover.apollo.dev/nix/v0.25.0 | sh# Add Rover to the $GITHUB_PATH so it can be used in another step# https://docs.github.com/en/actions/reference/workflow-commands-for-github-actions#adding-a-system-pathecho "$HOME/.rover/bin" >> $GITHUB_PATH# only run this command with the `--background` flag if you have the Apollo Studio GitHub integration enabled on your repository- name: Run check against prodrun: |rover graph check my-graph@prod --schema ./test.graphql --background
Bitbucket Pipelines
The following is a full example configuration for Bitbucket Pipelines. It shows how to:
- Run
rover subgraph checkfor each commit on all branches - Run
rover subgraph publishto keep the schema definition of yourmainbranch in-sync with a base variant (@localin this case)
The example uses the following Pipeline Repository Variables to make the pipeline configuration portable across different repositories:
APOLLO_KEYAPOLLO_SUBGRAPH_NAME, which represents the name of the subgraph you're running schema checks forAPOLLO_LOCAL_PORT, which represents the port number of the base variant
Full example
# ./bitbucket-pipelines.ymlimage: nodedefinitions:steps:- step: &rover-subgraph-checkname: "[Rover] Subgraph Check"caches:- nodescript:- 'echo "Subgraph name: $APOLLO_SUBGRAPH_NAME"'- npx -p @apollo/rover@latestrover subgraph check my-graph@prod--name $APOLLO_SUBGRAPH_NAME--schema ./schema.graphql- step: &local-publishname: "[Rover] @local publish (sync with main/master)"caches:- nodescript:- 'echo "Subgraph name: $APOLLO_SUBGRAPH_NAME"'- 'echo "Local variant port: $APOLLO_LOCAL_PORT"'- npx -p @apollo/rover@latestrover subgraph publish my-graph@local--name $APOLLO_SUBGRAPH_NAME--schema ./schema.graphql--routing-url http://localhost:$APOLLO_LOCAL_PORT/graphqlpipelines:default:- step: *rover-subgraph-checkbranches:'{main,master}':- step: *rover-subgraph-check- step: *local-publish
Jenkins
To set up Rover for use with Jenkins, first consider which type of Jenkins agent you'll use in your pipelines. The samples below demonstrate a golang pipeline that uses Docker, but you can modify them to meet your specific needs.
Distributed builds via the node agent
If you're running a distributed build system using the node agent type, make sure that Rover is installed on all machines either as part of a baseline image or via a setup script. Also make sure it's available globally via the PATH environment variable.
Pipelines using Docker
If you're using Rover with a Docker-enabled pipeline, note the following additional considerations:
$PATH issues
Normally when installing, Rover adds the path of its executable to your $PATH. However, Jenkins doesn't persist the $PATH variable between runs of sh steps, because each sh block runs as its own process. This means that if you install Rover and try to run it in the next step, you get a command not found: rover error. This is functionally similar to the CircleCI note, but the resolution is different.
To avoid this issue, do one of the following:
Use the script, but reference
roverby its full path ($HOME/.rover/bin/rover)Download the latest release via cURL and extract the binary like so (this downloads Rover
0.23.0for Linux x86 architectures):curl -L https://github.com/apollographql/rover/releases/download/v0.25.0/rover-v0.25.0-x86_64-unknown-linux-gnu.tar.gz | tar --strip-components=1 -zxv
Permission issues
If you run into permissions issues within Docker, you can resolve many of them by creating a user to run the install and build processes. The example Dockerfile below shows how to accomplish this with a specific Docker image for your Jenkins build pipeline:
FROM golang:1.18RUN useradd -m rover && echo "rover:rover" | chpasswdUSER roverRUN curl -sSL https://rover.apollo.dev/nix/latest | sh
Jenkinsfile Configuration
After you've installed Rover appropriately, you can execute the rover command within a sh step, as shown in the example configuration below. Because rover outputs logs via stderr and emits proper status codes, it generates build errors if the rover subgraph check command fails.
We recommend passing arguments to rover commands via environment variables. This enables you to reuse large portions of your pipeline, making it faster to onboard new subgraphs without rewriting code.
Additionally, we strongly recommend passing in the APOLLO_KEY by using a Jenkins credential and referencing it using credentials(key_name) within your jenkinsfile. An example of this is below.
pipeline {agent {dockerfile {filename './build_artifacts/Dockerfile'}}stages {stage('Rover Check') {steps {sh '''echo "Subgraph: $APOLLO_SUBGRAPH_NAME$HOME/.rover/bin/rover subgraph check $APOLLO_GRAPH_REF --name $APOLLO_SUBGRAPH_NAME --schema $SCHEMA_PATH'''}}stage('Build') {steps {sh 'go build .'}}stage('Go Test') {steps {sh 'go test ./... -v'}}stage('Schema Publish to Dev') {when {expression { env.BRANCH_NAME == 'main' }}steps {sh '$HOME/.rover/bin/rover subgraph publish $APOLLO_GRAPH_REF --name $APOLLO_SUBGRAPH_NAME --schema $SCHEMA_PATH'}}}environment {APOLLO_KEY = credentials('apollo_key')APOLLO_SUBGRAPH_NAME = 'products'APOLLO_CONFIG_HOME = '~/.config/rover'SCHEMA_PATH = './graph/schema.graphqls'APOLLO_GRAPH_REF = 'AolloJenkins@dev'}}
Gitlab
Since there isn't any official Docker image for Rover, we can use the debian:stable-slim as a base image. All you need to do is fetch the source via cURL, add the executable to the PATH variable, then publish your subgraphs.
push_subgraphs:stages:- publish_subgraphspublish_subgraphs:stage: publish_subgraphsimage: debian:stable-slimretry: 1 # to retry if any connection issue or such happensbefore_script:- apt-get update && apt-get install curl -yscript:- curl -sSL https://rover.apollo.dev/nix/latest | sh # Install the latest version of Rover- export PATH="$HOME/.rover/bin:$PATH" # Manually add it to the ruuner PATH- export APOLLO_KEY=$APOLLO_FEDERATION_KEY- rover subgraph publish $APOLLO_GRAPH_REF --name $APOLLO_SUBGRAPH_NAME --schema $SCHEMA_PATH
Using With npm/npx
If you're running in a Node.js workflow, it might be easier to use the NPM distribution of Rover. This way, you don't need to adjust the PATH at all to run Rover, and it might fit better into your existing workflow.
You can use Rover by adding it to your package.json dependencies using these instructions and then execute it using npm scripts, similar to other workflows you might already have. If you don't want to install Rover as a dependency, you can run it with npx by using the -p flag:
ⓘ NOTE
Only run this command with the --background flag if you have the Apollo Studio GitHub integration enabled on your repository.
npx -p @apollo/rover rover graph check my-graph@prod --schema=./schema.graphql --background
Since most commands require you be authenticated, see the above sections for instructions on how to add environment variables for your CI/CD provider.